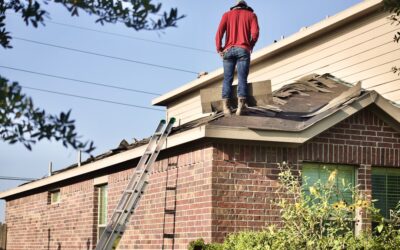
Steel roofs are sold as a 50 year solution but the fasteners, sealants, and flashings rarely make it past year 15 without attention. Steel roof repair separates into three buckets — fastener and sealant maintenance, panel damage from impact or corrosion, and flashing failures at penetrations. Each demands different tools, different products, and a different decision about whether to DIY or call a roofer.
Part of our Roofing guide — explore the full guide →
This guide walks through the common failure points, the products that actually hold up, and a step-by-step on the two most common repairs: leaking screw heads and a damaged panel.
Common Steel Roof Failure Points
Exposed-fastener panels — corrugated and 5V-crimp profiles screwed through the face — fail at the screw heads first. The neoprene washer under each screw dries out, cracks, and lets water past the fastener. On a 1,500 square foot roof there are 800 to 1,200 screws, and any one of them can drip.
Standing seam panels fail at the flashings — chimney pans, valley intersections, ridge caps, and pipe boots. The panels themselves rarely leak unless physically damaged. Look for daylight through the underside of the deck if you have an unfinished attic; that tells you whether the leak is at a fastener, a flashing, or a panel.
Tools You Need Before Climbing Up
Pull together a Milwaukee M18 1/4 inch hex impact driver, an assortment of nut driver bits in 1/4 and 5/16 inch (matching your roof’s screw heads), a Husky 100 piece socket set, tin snips from Wiss (right-cut and left-cut), and a Sherwin Williams brush kit for touch-up paint. A DeWalt DCN890 cordless concrete nailer is not useful here — keep tools roof-specific.
For safety, never set foot on a steel roof without a proper harness anchored to a structural member, soft-soled boots with non-marking soles, and a partner on the ground. A Werner 24 foot extension ladder rated for 300 pounds is the minimum for most single-story homes.
Fixing Leaking Screw Heads
Pull each leaking or suspect screw and inspect the washer. Replace the washer or, more commonly, replace the entire screw with a slightly oversized woodgrip — a #14 if the original was a #12 — using a fresh EPDM-bonded washer. Brands like Atlas Bolt & Screw and ST Fastening Systems sell color-matched replacement screws by the 250 count box for $25 to $45.
If the hole is wallowed out from movement, drill it out to the next size, plug with a 1/4 inch wood dowel set in two-part epoxy, let cure 24 hours, then drive the new screw through the plug. This rescues the panel without a full replacement. Avoid the temptation to slather on roof sealant as a fix — it lasts 2 to 3 years tops and traps water against the panel.
Sealants That Actually Hold
For sealant work — bedding flashings, sealing penetrations, touching up end laps — use a butyl-based or polyurether like Geocel Pro Flex RV and Marine or NovaFlex 850 Metal Roof Sealant. Skip silicone unless you never want to repaint the surrounding metal, because nothing else sticks to cured silicone.
Apply sealants at 60°F to 90°F surface temperature. Below 50°F, the sealant skins over before flowing into the joint and fails within months. Above 100°F it sags. Plan repair days for spring or fall mornings.
Replacing a Damaged Panel
A panel dented by a falling branch or punctured by impact needs replacement, not patching. Patches over significant damage trap moisture and accelerate corrosion. The good news is most standing seam and screw-down panel systems are designed for panel replacement.
For exposed-fastener panels: back out every screw on the damaged panel and the two adjacent panels. Slide the damaged panel down and out from under the ridge cap, install a new color-matched panel from the manufacturer (or a close match from McElroy Metal or ABC Metal Roofing), reseat the adjacent panels, and drive new screws into fresh wood. Expect 2 to 4 hours for a single panel replacement on a single-story roof.
For standing seam, the panel locks into adjacent panels at the seams. Cutting it out without damaging the neighbors usually requires a roofer with a seam crimper and the experience to work the panel free. Budget $400 to $900 for a pro replacement of a single panel.
Touching Up Paint and Preventing Corrosion
Any scratch through the Galvalume coating to bare steel needs touch-up paint within a few weeks or rust starts spreading. Most major panel manufacturers — Fabral, MBCI, Metal Sales — sell matching touch-up paint in 8 ounce bottles for $15 to $25. Clean the scratch with a wire brush, wipe with denatured alcohol, and apply two thin coats with the included brush.
For larger rust spots, sand to bright metal with a Mirka Abranet 80 grit pad, treat with Ospho or similar phosphoric acid converter, prime with Rust-Oleum Rusty Metal Primer, and topcoat with the matching color. This buys 5 to 8 more years on an aging panel.
Flashing and Penetration Repairs
Pipe boots — the rubber collars around plumbing vents — dry out and crack at year 10 to 15. Replacement boots from Oatey and Lifetime Tool slip over the pipe and screw down with butyl tape underneath. Plan 20 minutes per boot.
Chimney pan flashings on steel roofs are unforgiving. If the pan is leaking at the back where it tucks under the panels, you typically need a roofer with a brake to fold a new pan and reseat the panels around it. DIY attempts at this almost always result in worse leaks within a season.
When to Call a Roofer
Multiple leaks across a roof point to systemic failure — bad sealant batch, undersized fasteners, or a deck that has lost too much screw retention. Get a pro inspection and a quote for re-fastening or re-roofing. Same call if you see widespread corrosion, sagging panels, or any sign that the underlying deck has rotted.
For one or two screw leaks, a damaged panel from a tree branch, or a single failed pipe boot, DIY with the right products is reasonable. Time and dollar invested in steel roof repair done right adds a decade to the roof’s life and prevents the cascading damage that water intrusion causes inside the home.