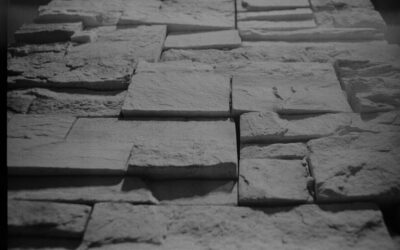
Hand-laid stone veneer is a skilled masonry job: scratch coat, mortar, individual stones fitted one by one, and grouted joints. It looks great, and it takes time. Stone veneer panels package that look into larger interlocking sections that fasten or adhere to the wall without a mortar setting bed, so a homeowner or a general contractor can cover an accent wall, a foundation skirt or a full elevation in a fraction of the time.
The short version: panelized systems come in three main types (natural thin stone bonded into stacked panels, manufactured concrete panels, and lightweight molded faux panels). Most mortarless exterior systems install over sheathing and a weather-resistive barrier, starting from a level starter strip and working up with staggered joints and matching corner pieces. Expect material costs from the high single digits to the mid twenties per square foot, with installed prices typically lower than hand-laid veneer because the labor is faster.
Panels are not a perfect substitute for every job, though. Weight, water management and the look up close all depend on which system you pick.
Types of Stone Veneer Panels
Natural stacked stone panels
These are real stone strips (slate, quartzite, sandstone, limestone) cut thin and bonded to each other or to a backing in an interlocking Z or rectangular shape. They are the most authentic option and are popular as stacked stone panels on fireplaces and feature walls. They are also the heaviest panel type and usually go on with a polymer or cement-based adhesive rather than screws, so they still need a prepared substrate.
Manufactured concrete panels
Cast from lightweight concrete and pigmented to look like fieldstone, ledgestone or brick, these panels often have a fastening flange or hidden clip system. Many are true mortarless designs: screw the panel to the wall, interlock the next one, and no grout is needed. They give a convincing stone texture with less weight than full masonry.
Faux molded panels
Made from high-density polyurethane or similar resins, these are very light and quick to install with screws and adhesive. They work well for interior walls, wainscots and covered exterior areas. Up close they read as less authentic, and some can be dented by impact, but they are the lowest-effort option and easy to cut with standard woodworking tools.
Shoppers looking for stone siding panels or stone facade panels for a whole house usually end up choosing between manufactured concrete systems and higher-grade natural panels, since faux resin panels vary widely in weather durability.
Where Stone Veneer Panels Fit vs Hand-Laid Veneer
Panels make the most sense when speed and consistency matter more than one-of-a-kind character. Good fits include:
- Accent walls, fireplace surrounds and kitchen islands
- Foundation and skirt wraps on homes with exposed concrete
- Exterior columns, porch knee walls and entry features
- Full elevations where budget rules out hand-laid stone
Hand-laid veneer still wins for curved walls, irregular shapes, very large natural stones and historic homes where the pattern needs to look random. Panel systems repeat patterns, so on a long wall you may notice the same shapes recurring unless you mix panels from several boxes and rotate them.
Corners are the other telltale. Every quality system offers L-shaped corner pieces with a long and short leg that alternate up the wall. Without them, panel edges show and the illusion of solid stone disappears.
Tools and Materials
- Panels, corner pieces and any trim or sill pieces for the system
- Weather-resistive barrier (house wrap or building paper) and flashing tape
- Starter strip or track from the panel maker
- Corrosion-resistant screws or nails long enough to reach studs, per the system instructions
- Construction adhesive or polymer mortar specified by the maker
- Color-matched touch-up kit or grout for any filled joints
- Circular saw or angle grinder with a diamond blade (wet cutting for stone or concrete), level, chalk line, drill
- Safety glasses, gloves, hearing protection and an N95 or P100 respirator
Installing Mortarless Panels Over Sheathing
Always follow the specific system’s instructions; panel profiles and fastening schedules differ. The general sequence for exterior veneer panels looks like this.
- Check the wall. Sheathing must be solid, flat and dry. Any rotten or soft areas get replaced. Find and mark the studs, because fasteners usually need to hit framing, not just sheathing.
- Install the weather-resistive barrier. Lap house wrap or building paper shingle-style, upper layers over lower, and flash around windows, doors and penetrations. Some systems call for a drainage mat or rainscreen layer behind the panels; this is a smart upgrade in wet climates.
- Set the starter strip. Snap a level line several inches clear of grade (and further from paved surfaces, where splash-back is heavy) and fasten the starter strip along it. Every later course depends on this line, so check it twice.
- Install the corners first. Place a corner piece at each outside corner, alternating long and short legs on each course.
- Run the first course of panels. Seat each panel on the starter strip, interlock it with the corner piece, and fasten through the flange into studs as specified. Apply adhesive to the back if the system calls for it.
- Stagger the joints. Offset vertical seams from course to course and mix panels from several boxes to avoid visible repeats.
- Cut and trim openings. Use trim pieces or sill pieces around windows, doors and outlets. Wet-cut stone and concrete panels, and keep cut edges facing into corners or trim where possible.
- Finish the top edge. Cap the final course with a ledge or trim piece that sheds water outward, and flash it under the siding or soffit overhead.
- Touch up. Fill visible fastener heads or cut edges with the maker’s color kit.
Structural, Moisture and Safety Notes
Panels add real weight to a wall. Faux resin panels weigh very little, but natural stacked stone and concrete panels can weigh several pounds or more per square foot. Make sure the framing and sheathing can carry the load and that fasteners anchor into studs, not just into thin sheathing. For heavy natural stone panels on tall walls, or for any system on a wall with questionable framing, have a contractor or engineer confirm the substrate.
Water management is the most common failure point on any adhered or panelized stone siding. Leave the specified clearance to soil and paving, use weep or drainage details where the system calls for them, and never bury the bottom of the panels in mulch or soil. Flashing at windows, doors, deck ledgers and roof intersections must lap correctly so water drains out, not in. If you are installing panels on a wall that supports a deck ledger, the ledger must be properly flashed and fastened to framing; panels are never part of the ledger attachment.
If the project includes new footings for a stone-wrapped column or a low wall, call 811 before digging so underground utilities are marked. Exterior siding changes may need a permit and usually need HOA approval if your neighborhood has one, so check before ordering material.
Cutting natural stone and concrete releases crystalline silica dust. Cut with water whenever possible, wear an N95 or P100 respirator, and clean up with a HEPA vacuum rather than dry sweeping. For older homes, test any paint you plan to sand or scrape for lead before disturbing it.
Stone Veneer Panels Cost per Square Foot
General ranges vary by region and system, but here is a realistic picture:
- Faux resin panels: roughly $8 to $20 per square foot for material.
- Manufactured concrete panel systems: roughly $10 to $20 per square foot for material.
- Natural stacked stone panels: roughly $10 to $25 per square foot for material, higher for premium stone.
- Installed cost: commonly around $20 to $40 per square foot, depending on wall height, corners and openings.
Hand-laid stone veneer usually runs higher installed because of the extra labor for scratch coats and setting stones individually. Corners cost more per linear foot than flat panels, so a column with four corners costs proportionally more than a flat wall of the same area.
Troubleshooting Common Problems
Panels pulling away from the wall
Fasteners missed the studs or the adhesive was not suited to the substrate. Refasten into framing and follow the system’s adhesive specification.
Staining or efflorescence
White deposits mean water is moving through concrete or mortar. Check flashing, clearance to grade and downspout discharge before cleaning.
Visible repeating pattern
Remove and reshuffle panels from multiple boxes while the wall is still accessible, and rotate pieces where the system allows.
When to Call a Pro
Hire a siding or masonry contractor for full-house exteriors, walls over one story, walls with complex flashing at roofs and decks, or any project with signs of rot or water damage in the sheathing. A pro can also confirm whether stone veneer panels or traditional hand-laid stone suits the house better. For footings, structural repairs or engineered attachments, use a licensed contractor and obtain permits where required.
Frequently Asked Questions
Can stone veneer panels go directly over sheathing?
Most exterior systems install over sheathing covered with a weather-resistive barrier, with fasteners into studs. Never install panels on bare sheathing without water protection.
Are stone veneer panels cheaper than hand-laid stone?
Usually yes on installed cost, because panels go up faster and need no mortar setting bed. Material costs can overlap, especially with natural stone panels.
Do stacked stone panels need grout?
Most stacked stone panels are designed as dry-stack looks with no grout joints. Some manufactured systems use touch-up mortar only at corners or cut edges.
How long do exterior stone panels last?
Natural and concrete panels can last decades when flashed and drained properly. Resin panels vary more, so check the weather and impact ratings.
Can I install stone siding panels myself?
A handy homeowner can install panels on single-story walls and accent features. Leave tall walls, complex flashing and any structural concerns to a contractor.