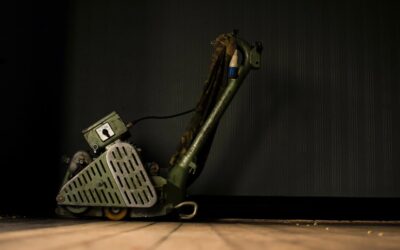
Anyone who has tried to remove old tile with a hammer and chisel knows it is brutal, back-breaking work. A tile scraper machine transforms that miserable job into a manageable one, using power and leverage to pop tile and scrape stubborn adhesive off floors in a fraction of the time. Whether you are a homeowner tackling one renovation or a contractor doing regular demolition, this guide covers the types available, what to look for, and how to choose the right machine.
Part of our Tile & Grout guide — explore the full guide →
- What a Tile Scraper Machine Does
- Main Types of Tile Scrapers
- How to Match the Machine to Your Job
- What to Look For When Buying or Renting
- Rent or Buy?
- Typical Costs
- Safety and Usage Tips
- Blades and Attachments That Make the Difference
- Preparing the Room and Protecting Your Home
- Final Thoughts on Choosing a Tile Scraper Machine
What a Tile Scraper Machine Does
A tile scraper machine, sometimes called a floor scraper or tile stripper, uses a sharp, powered or leveraged blade to get under tile, vinyl, or adhesive and separate it from the subfloor. Instead of chipping away tile by tile, the machine drives a blade beneath the material and lifts it in larger sections, then scrapes off the thinset, mastic, or glue left behind. The result is far faster removal, dramatically less physical strain, and a cleaner subfloor ready for new flooring.
Main Types of Tile Scrapers
Machines range from simple hand tools to ride-on demolition equipment. Understanding the categories helps you match the tool to the job:
- Manual long-handle floor scrapers: a sharp blade on a long handle; cheap, no power, best for small areas and light adhesive.
- Powered handheld scrapers: electric or air-powered chipping tools with a scraper blade; great for tile and thinset in bathrooms and kitchens.
- Walk-behind floor scrapers: heavier machines you push, with a vibrating or oscillating blade for large floor areas.
- Ride-on floor scrapers: powerful self-propelled machines for large commercial jobs and thousands of square feet.
Most homeowners are best served by a powered handheld scraper or a walk-behind unit, while contractors handling big floors lean toward walk-behind or ride-on machines.
How to Match the Machine to Your Job
The right choice depends on scale and material. For a single small bathroom, a powered handheld chipping scraper or even a quality manual scraper may suffice. For a whole kitchen or living area of tile set in hard thinset, a walk-behind scraper saves hours and spares your body. For very large areas or daily professional use, a ride-on machine pays for itself in speed. Also consider the flooring being removed; ceramic tile in thinset is tougher than sheet vinyl in mastic, and harder materials call for more power and a more aggressive blade.
What to Look For When Buying or Renting
A few features separate an effective machine from a frustrating one:
- Power source: corded electric is common and steady; some handhelds are pneumatic and need a compressor.
- Blade quality and angle: sharp, replaceable, hardened blades cut faster and stay effective; adjustable blade angles help attack different materials.
- Weight and maneuverability: more weight aids cutting on walk-behind units but is harder to transport; handhelds should be light enough to control.
- Vibration control: anti-vibration handles reduce fatigue on long jobs.
- Ease of blade changes: quick-change blades keep you cutting instead of fiddling with tools.
Rent or Buy?
This is the key financial decision for most people. Renting a walk-behind or ride-on tile scraper typically costs $50 to $150 per day, which makes excellent sense for a one-time renovation; you get professional power without the storage or ownership cost. Buying makes sense if you are a contractor or serious DIYer who will use it repeatedly. Powered handheld scrapers are affordable enough to own, often $80 to $300, while walk-behind machines run $1,000 to $4,000 and ride-on units far more. For a single project, rent; for ongoing work, buy.
Typical Costs
Here is a rough cost picture across the categories. Manual long-handle scrapers cost $20 to $60. Powered handheld chipping scrapers with tile blades run $80 to $300. Walk-behind floor scrapers to buy typically land between $1,000 and $4,000, and ride-on machines start around $8,000 and climb steeply. Rental remains the value play for occasional use, with daily rates that let you finish a big floor for a modest fraction of purchase price. Factor in replacement blades, which wear down and need swapping during large jobs.
Safety and Usage Tips
Tile removal throws sharp shards and fine dust, so protect yourself and work smart. Always wear eye protection, heavy gloves, hearing protection, and a proper dust mask or respirator, since old thinset and some adhesives can contain hazardous dust. Keep the blade sharp; a dull blade forces you to work harder and less safely. Work in sections, keep the blade at a low angle to slide under the tile, and clear debris frequently so you have solid footing. For handheld chipping scrapers, let the tool’s weight and power do the work rather than forcing it.
Blades and Attachments That Make the Difference
The blade is the working heart of any tile scraper, and choosing the right one dramatically affects speed and results. Different materials call for different blade shapes and widths:
- Wide flat blades: best for scraping large, open floor areas of vinyl and adhesive quickly.
- Narrow chisel blades: concentrate force to pop stubborn ceramic tile set in hard thinset.
- Angled scraper blades: help get under material and lift it in sections.
- Self-scoring or carbide blades: stay sharp longer on abrasive thinset.
Keep spare blades on hand for big jobs, because a dull blade is the single biggest cause of slow, exhausting removal. Many handheld demolition tools also accept chisel and scraper attachments, letting one tool switch between breaking tile and scraping adhesive, which adds real versatility for a renovation.
Preparing the Room and Protecting Your Home
Before firing up any tile scraper, a little preparation makes the job cleaner and safer. Tile removal is dusty and noisy, so seal off doorways with plastic sheeting to keep dust from migrating through the house, and turn off the HVAC or cover return vents so debris does not circulate. Remove furniture and cover anything that must stay, and lay out a clear path to haul heavy debris outside, since old tile and thinset are surprisingly heavy. Have sturdy contractor bags or a debris bin ready. Good lighting helps you see where the blade is working and spot any subfloor damage as you go. Taking these steps not only protects your home from dust and damage but also lets you work faster and more comfortably, which matters on a job that is physical even with a powered machine. When the removal is done, inspect and clean the subfloor thoroughly so it is flat and sound before new flooring goes down.
Final Thoughts on Choosing a Tile Scraper Machine
Removing old flooring is one of the least glamorous parts of a renovation, but the right tile scraper machine turns days of grueling chisel work into a manageable afternoon. Match the machine to your project scale and flooring type, prioritize a sharp quality blade and good vibration control, and lean toward renting for a one-time job or buying for repeat use. With the right tool and basic safety gear, you will strip that old tile and adhesive quickly and get to a clean subfloor ready for whatever comes next.
Before you commit to buying, be honest about how often you will actually use the machine, because a walk-behind or ride-on scraper is a serious investment that spends most of its life in storage for a homeowner with a single renovation. For the vast majority of one-time projects, renting a powerful machine for a day or two delivers professional results at a fraction of the ownership cost, and the rental yard handles maintenance and blade sharpening for you. Reserve buying for contractors and dedicated DIYers with recurring work. Whichever path you choose, a sharp blade, sound technique, and good dust protection will make the job faster, safer, and far less punishing on your body.
Prefer to explore on your own?
See how new flooring looks in your actual room in seconds — free, no signup.
Try the free Floor Studio →