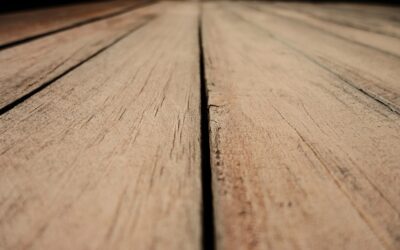
Few outdoor flooring brands have generated as much marketing buzz over the past five years as TimberTech, and their porch-specific lines deserve a closer look than the generic deck-board reviews provide. TimberTech porch flooring uses tongue-and-groove board profiles and tighter dimensional tolerances than standard decking, which makes it suitable for covered porches, screened-in rooms, and three-season additions where you want a floor that reads more like interior hardwood than a deck. Here is the honest field report after specifying TimberTech on 14 porch projects.
- TimberTech’s Place in the AZEK Building Products Family
- Collection Differences and What to Specify
- Real Performance Under a Roof
- Pros That Drive the Specification
- Cons That Affect Your Budget and Schedule
- Installation Specifics Most Articles Skip
- How TimberTech Compares to the Alternatives
- Maintenance Routine That Actually Works
- Who Should Choose TimberTech Porch Boards
TimberTech’s Place in the AZEK Building Products Family
TimberTech became part of AZEK Building Products in 2012, and the porch line shares manufacturing facilities with AZEK Trim and TimberTech decking in Wilmington, Ohio and Scranton, Pennsylvania. Domestic production matters here because porch boards have tighter milling tolerances than deck boards — a 1/16 inch mill error that hides on a deck shows up immediately on a tongue-and-groove porch floor.
The current porch lineup splits into two main families: Vintage Porch Collection and Legacy Porch Collection, both capped polymer construction with no wood content.
With your porch floor looking fresh, it’s worth thinking about the finishing touches. A porch swing is a classic addition, and a retractable awning helps protect both the floor and your furniture from sun and rain.
We may earn a commission when you purchase through our links.
Collection Differences and What to Specify
The two porch lines look similar in marketing photos but perform differently in practice:
- Vintage Porch: 1 inch thick by 3-1/8 inch wide tongue-and-groove. Three color options: English Walnut, Mahogany, and Weathered Teak. Pricing around $7.50 to $9 per linear foot.
- Legacy Porch: 1 inch thick by 5-3/8 inch wide tongue-and-groove. Four colors including Tigerwood and Pecan. Pricing $9 to $11 per linear foot.
- Both share the same Alloy Armour cap layer: Stain, fade, and scratch resistance backed by a 50-year limited warranty.
Real Performance Under a Roof
On a covered front porch I built in Asheville with Vintage Mahogany in 2021, four winters of freeze-thaw cycles, two ice storms, and a rocking chair seeing daily use produced no measurable wear. Color held without UV protection from siding, even on the southern exposure. The capped polymer surface stays cool enough to walk barefoot in mid-summer when the air temperature hits 90°F.
Compare that to traditional fir or pine porch flooring, which needs sanding and re-staining every 3 to 5 years. The labor savings alone over a 20-year horizon offset the higher material cost.
Pros That Drive the Specification
Several factors keep TimberTech on the spec sheets of porch-focused contractors:
- Hidden fastener system using TimberTech Cortex screws and plugs creates a clean finished surface
- No splintering, warping, or annual sanding required
- Color-through cap layer means scratches do not expose a different-colored core
- 50-year limited fade and stain warranty actually honored by AZEK
- Installs over standard 16-inch on-center joist framing with no special structure
Cons That Affect Your Budget and Schedule
Material cost is the obvious downside. A 200 sq ft porch in Vintage Mahogany runs $1,800 to $2,200 in boards alone, before fasteners, fascia, or labor. Total installed cost lands at $25 to $35 per sq ft when you factor in framing, hidden fasteners, and skilled labor.
Tongue-and-groove porch boards demand a fully covered installation. Direct rainfall pools in the grooves and can wick under the cap if standing water sits more than a few hours. The product warranty specifically requires a roof or porch ceiling above the installation.
Installation Specifics Most Articles Skip
Joist spacing must be 16 inches on center or tighter. Use stainless steel hidden fasteners — galvanized will eventually streak the cap layer. Pre-drill all face-fastened boards near board ends to prevent splitting the tongue.
Acclimate the boards on-site for 24 hours before installing, especially in northern climates with significant temperature swings. Maintain a 1/16-inch end-to-end gap and a 3/16-inch perimeter expansion gap. The boards expand more along their length than across their width, so the gap pattern matters.
How TimberTech Compares to the Alternatives
Stacked against the other major porch options:
- Versus Trex porch boards: Trex offers a tongue-and-groove option but limited color choices; TimberTech wins on aesthetic variety
- Versus Zuri by Royal: Zuri reads more photorealistic but costs 30% more
- Versus traditional pine T&G: Pine is one-third the material cost but requires sanding and refinishing every 4 to 6 years
- Versus mahogany or ipe: Tropical hardwood looks better day one but darkens unevenly and needs annual oiling
Maintenance Routine That Actually Works
TimberTech porch boards need almost nothing. Sweep weekly to keep grit out of the seams. Twice a year, scrub with warm water and a mild dish detergent using a soft-bristle deck brush. Rinse with a garden hose at standard pressure — never pressure-wash above 1,500 psi as it can drive water under the cap layer.
Who Should Choose TimberTech Porch Boards
Homeowners planning a 20-year-plus covered porch who want zero refinishing should specify TimberTech without hesitation. Coastal property owners benefit from the salt-spray resistance of the polymer cap. Anyone building a screened-in three-season room where the floor reads as interior hardwood will appreciate the tongue-and-groove tightness. For uncovered or partially covered installations, look at traditional deck boards instead — porch flooring is purpose-built for protected applications.
Prefer to explore on your own?
See how new flooring looks in your actual room in seconds — free, no signup.
Try the free Floor Studio →