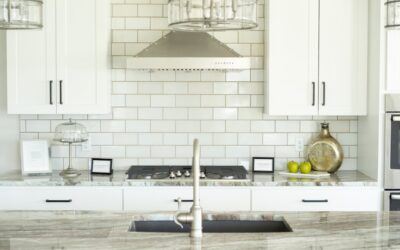
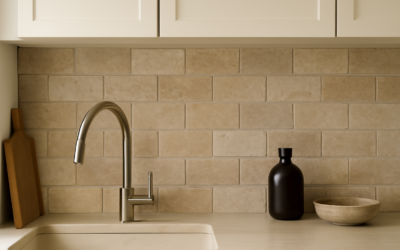
If you want a kitchen that feels warm, grounded, and a little bit old-world, natural stone is hard to beat. A tumbled travertine backsplash delivers exactly that, with soft matte surfaces, gently rounded edges, and earthy tones that range from ivory and cream to walnut and gold. Unlike the slick uniformity of glass or porcelain, every tumbled travertine tile is slightly different, giving the wall a handcrafted, weathered look. This guide covers what tumbled travertine actually is, why sealing is non-negotiable, how to choose grout, and what the project really costs.
Part of our Kitchen Remodeling guide — explore the full guide →
What Is Tumbled Travertine?
Travertine is a form of limestone formed by mineral deposits around hot springs. It’s been used in construction for thousands of years, most famously in the Roman Colosseum. The “tumbled” finish refers to how the tile is processed: pieces are tumbled in a barrel with sand, water, and abrasives to soften the edges and dull the surface. The result is a matte, textured, slightly pitted stone with rounded corners that looks aged and organic, the opposite of a sharp, polished tile.
Those natural pits and voids are part of the charm, but they’re also why travertine needs more care than manufactured tile. The stone is porous, meaning it will absorb liquids and stains if left unprotected.
Why Homeowners Love the Look
Tumbled travertine reads warm in a way few materials can match. Its earth-tone palette pairs naturally with wood cabinets, wrought iron hardware, and Tuscan or Mediterranean kitchens, but it also softens modern and transitional spaces. Because the tones are muted and neutral, a travertine backsplash rarely clashes with countertops, and it hides everyday splatter far better than a glossy white tile. The matte surface also means no glare, which is a relief in a bright, sunny kitchen.
- Warm, natural color range: ivory, beige, gold, walnut, and silver.
- Timeless appeal: a classic look that resists trends.
- Forgiving surface: texture and variation hide minor imperfections and daily mess.
- Versatile formats: available as 4×4 tiles, subway, and mesh-mounted mosaics.
The Non-Negotiable: Sealing
Here’s the part homeowners underestimate. Travertine is porous and reactive, so a tumbled travertine backsplash must be sealed, and not just once. In a kitchen it faces oil, wine, tomato sauce, lemon, and vinegar, all of which can stain or etch unprotected stone. Etching is a dull spot caused by acid eating into the calcium carbonate, and it can’t be sealed away once it happens, so prevention is everything.
Plan your sealing in three stages:
- Pre-seal before grouting. Because tumbled stone is so porous, seal the tiles before you grout so the grout haze doesn’t lodge in the pits and stain the face. This step alone saves hours of scrubbing.
- Seal again after grouting. Once grout has cured, apply a penetrating impregnating sealer to the stone and the grout lines.
- Reseal periodically. Refresh the sealer every one to three years, or whenever water stops beading on the surface. A quick test: drop water on the stone; if it soaks in and darkens, it’s time to reseal.
Use a quality penetrating sealer made for natural stone, such as Miracle Sealants 511 or a comparable impregnator. Expect to pay $25 to $50 for a bottle that covers a typical backsplash several times over.
Choosing the Right Grout
Grout color makes or breaks the finished look. Because tumbled travertine already has soft, blended tones, most installers match the grout to the lightest or mid tone of the stone for a seamless, monolithic effect. A contrasting dark grout will grid out every tile and fight the organic look, which usually isn’t what people want from travertine.
- Matching grout (bone, almond, or a warm beige) keeps the wall reading as continuous stone.
- Non-sanded vs. sanded: tumbled travertine often has tight, irregular joints; many installers use unsanded grout, but confirm based on your joint width, since sanded is needed above 1/8 inch.
- Grout release or pre-seal is essential so the pigment doesn’t stain the porous stone.
Many travertine installations also get a coat of grout across the entire face intentionally, a technique called a “grouted” or filled look, to fill the natural pits for a smoother, more uniform surface. Decide up front whether you want the pits left open for texture or filled for easier cleaning.
Installation Basics
Setting tumbled travertine is similar to other tile, with a few stone-specific steps:
- Start with a flat, clean, dry substrate. Fill and prime as needed.
- Pre-seal the tiles and let them dry.
- Use a white thinset mortar and back-butter each tile for full coverage, since voids on the back are common with natural stone.
- Set with tight, consistent joints; travertine is often laid with minimal grout lines for that seamless stone look.
- Let the mortar cure, grout, clean the haze carefully, and apply the final sealer once everything has cured.
Travertine cuts cleanly with a wet saw fitted with a diamond blade. Snap cutters can chip the soft, pitted edges, so a wet saw is worth the rental.
Pros and Cons
- Pros: warm and timeless natural stone look, no two tiles alike, hides splatter, matte and glare-free, adds real-material value.
- Cons: porous and requires ongoing sealing, can stain and etch from acids, heavier and harder to cut than ceramic, pits collect grime if left open, higher maintenance than porcelain.
What It Costs
Tumbled travertine is a mid-range natural stone. For material, expect $5 to $15 per square foot, with mosaics on the higher end. A typical 30-square-foot backsplash breaks down roughly like this:
- Tile: $150 to $450.
- Sealer, thinset, grout, and supplies: $75 to $150.
- Professional labor: $10 to $20 per square foot, so $300 to $600.
All in, a professionally installed tumbled travertine backsplash usually runs $500 to $1,200 for an average kitchen. DIY brings it closer to $250 to $600 in materials, plus a wet saw rental.
Cleaning and Ongoing Care
Day-to-day cleaning of tumbled travertine is easy as long as you respect the stone. Use a pH-neutral stone cleaner or plain warm water with a soft cloth, and never reach for vinegar, lemon, bleach, or generic bathroom sprays, all of which are acidic or harsh enough to etch and dull the surface. Blot spills quickly rather than letting them sit. For the textured pits, a soft nylon brush lifts trapped grime without scratching. If a stain does set into unsealed or worn stone, a poultice made for natural stone can sometimes draw it out, which is far easier than replacing tile.
The single best maintenance habit is keeping the sealer fresh. A properly sealed travertine backsplash repels most kitchen splatter long enough for you to wipe it away, so the water-bead test every few months is your early warning that it’s time to reseal.
Design Pairings
- Cabinets: travertine’s warmth pairs naturally with wood tones, from honey oak to espresso, and softens white or cream cabinetry.
- Countertops: beige, gold, and brown granite or quartz blend seamlessly; darker counters create a grounding contrast.
- Hardware and fixtures: oil-rubbed bronze, brushed nickel, and wrought iron all complement the old-world feel.
- Style: ideal for Tuscan, Mediterranean, farmhouse, and transitional kitchens.
Is It Right for Your Kitchen?
A tumbled travertine backsplash is an excellent fit if you love natural materials, warm neutral palettes, and a look with genuine age and texture, and if you’re willing to seal and maintain it. If you want a zero-maintenance, spill-proof surface, a porcelain that mimics stone may serve you better. But for homeowners who value authenticity and warmth over convenience, few backsplashes feel as rich and inviting as real tumbled travertine, and with proper sealing it will look beautiful for decades.