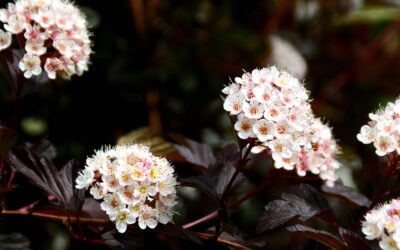
Few cottage garden staples earn their keep like the wallflowers plant, a fragrant Erysimum that blooms from early April through July and tolerates the kind of poor, gravelly soil that kills less hardy perennials. Once dismissed as old-fashioned, modern cultivars like ‘Bowles’s Mauve’ and ‘Apricot Twist’ have brought wallflowers back into serious garden design. Understanding their preferences for lean soil, full sun, and sharp drainage is the difference between a single-season letdown and a four-year clump that perfumes your whole front walk.
- Species and Cultivar Overview
- USDA Hardiness Zones and Climate Needs
- Soil Preparation and Drainage
- Planting Schedule and Spacing
- Watering and Feeding Through the Season
- Pruning to Extend Lifespan
- Companion Plants and Garden Design
- Pests, Diseases, and Common Problems
- Propagation and Long-Term Garden Planning
Species and Cultivar Overview
The genus Erysimum includes about 180 species, but only a handful matter for North American gardens. Erysimum cheiri, the classic English wallflower, is technically a short-lived perennial often grown as a biennial. Erysimum linifolium and its hybrids like ‘Bowles’s Mauve’ last four to six years in zones 6 through 9.
Color choices today range far beyond the historical yellow-orange. ‘Apricot Twist’, ‘Winter Orchid’, and ‘Citrona Yellow’ all reach 18 to 24 inches tall, while compact selections like ‘Sugar Rush Primrose’ stay under 12 inches and work in containers or rock gardens.
USDA Hardiness Zones and Climate Needs
Most perennial wallflowers thrive in USDA zones 6 to 9. In zone 5, they survive winter with mulching and a south-facing site but rarely live past two years. Zones 10 and 11 are usually too hot in summer, causing the plants to stretch, flop, and rot at the crown.
The plant evolved on dry Mediterranean hillsides. It expects cool nights below 60°F, daytime highs under 80°F during bloom, and complete dryness at the root in winter. Coastal California, the Pacific Northwest, and the mid-Atlantic foothills offer near-perfect conditions.
Soil Preparation and Drainage
Wallflowers prefer alkaline soil with a pH of 6.5 to 7.5. They actively dislike rich, amended garden loam. Before planting, work in coarse builder’s sand or fine gravel at a rate of one cubic foot per 10 square feet to raise drainage above what most perennial beds offer.
If your native soil is clay, build a raised berm 6 to 8 inches above grade. Heavy clay holds winter moisture against the crown and causes the fungal collapse that ends most wallflower failures. Spreading a one-inch layer of pea gravel as a mulch reflects heat upward and keeps the lower stems dry.
Planting Schedule and Spacing
Spring planting from quart-size nursery pots is the most reliable method. Set plants out after the last frost when soil reaches 50°F, typically late March in zone 7 or early May in zone 5. Space individual plants 12 to 18 inches apart so air circulates around the woody base.
- Planting depth: crown level with the soil surface, never buried
- Hole size: twice the root ball width, equal depth
- Initial watering: 1 gallon at planting, then weekly for the first month
- Mulch: gravel or crushed oyster shell, not bark or compost
- Bloom onset: 8 to 12 weeks from spring planting
Watering and Feeding Through the Season
Established wallflowers need about one inch of water every 10 to 14 days during active growth. Overwatering is the single most common killer. Stick a finger 2 inches into the soil before reaching for the hose, and water only if it feels dry.
Feed lightly. A single spring application of a low-nitrogen 5-10-10 granular fertilizer at 1 tablespoon per plant is plenty. Excess nitrogen pushes leafy growth at the expense of flowers and shortens lifespan by triggering soft, disease-prone tissue.
Pruning to Extend Lifespan
After the main spring bloom finishes in late June, shear the entire plant back by one third. This single cut prevents seed set, redirects energy to roots, and often triggers a smaller second flush in September. Use clean bypass pruners and avoid cutting into woody stems thicker than a pencil.
Every three years, take 3-inch softwood cuttings in June, dip in IBA rooting hormone, and root in a 50/50 sand and perlite mix. The parent plant will eventually become woody and bloom poorly; cuttings keep the variety going indefinitely.
Companion Plants and Garden Design
Wallflowers shine alongside other dry-loving Mediterraneans. Pair them with lavender ‘Hidcote’, Russian sage ‘Little Spire’, creeping thyme, and bearded iris for a low-water border. The mauve and apricot shades especially complement silver foliage from Stachys byzantina or Artemisia ‘Powis Castle’.
For container plantings, combine ‘Sugar Rush Primrose’ with violas, dwarf sweet alyssum, and trailing nemesia. Use a clay or terracotta pot with at least three drainage holes and a gritty cactus mix amended with extra perlite.
Pests, Diseases, and Common Problems
Wallflowers are members of the Brassicaceae family, so they share pests with cabbage and kale. Flea beetles chew tiny shot holes in spring foliage; spinosad spray at 4 tablespoons per gallon controls them. Cabbage white butterfly caterpillars occasionally appear in June; hand-pick or use BT (Bacillus thuringiensis) at $12 per pint.
Root rot from poor drainage is the leading disease problem. Club root, a soil-borne fungus, can also affect plantings in heavy soil. If you see sudden wilting without an obvious cause, lift the plant, inspect roots, and relocate to a sharper-drained site rather than treating chemically.
Propagation and Long-Term Garden Planning
Propagating from cuttings keeps the variety true to color, while seed-grown plants from biennial types like Erysimum cheiri produce variable colors. For consistent garden design, take 3-inch softwood cuttings in June from non-flowering side shoots, dip in Hormodyne IBA powder ($10), and stick into a 50/50 mix of coarse sand and perlite under bright shade.
Cuttings root in four to six weeks at soil temperatures around 65°F. Move rooted cuttings to 4-inch nursery pots filled with a gritty cactus mix, grow on through summer, and plant out in early September while still warm enough to establish before winter. Stagger fresh plantings every two years to maintain peak flower production across your garden indefinitely.