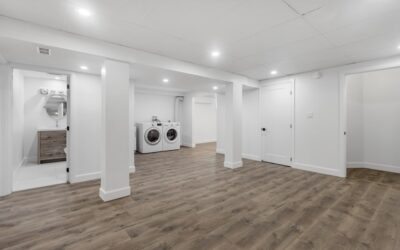
Waterproof vinyl flooring for basement installations has quietly become the smartest choice for finishing below-grade space, and for good reason: it shrugs off the moisture, humidity, and temperature swings that destroy hardwood, laminate, and carpet down there. Rigid-core vinyl gives you a warm, attractive floor that can survive minor leaks and slab moisture without warping or growing mold.
Part of our Roofing guide — explore the full guide →
But “waterproof” gets thrown around loosely, and a basement punishes any shortcut. As a contractor who has ripped out plenty of ruined basement floors, I’ll explain exactly which vinyl products belong below grade, how to test your slab, and how to install it so it lasts.
- Why SPC Rigid-Core Vinyl Suits Below-Grade Basements
- 100% Waterproof Core vs. Water-Resistant
- Testing Your Concrete Slab for Moisture
- Vapor Barriers and Underlayment
- Floating vs. Glue-Down Installation
- Wear Layer: 12 to 20 Mil
- Temperature Stability, Mold, and Mildew
- Cost, Brands, and Install Tips
- Pros and Cons for Basement Use
- Preparing the Basement Before You Start
Why SPC Rigid-Core Vinyl Suits Below-Grade Basements
Basements are uniquely hostile to flooring. The concrete slab sits against damp soil, wicks moisture upward through vapor, and the space swings between humid summers and cold winters. Stone-plastic composite (SPC) rigid-core vinyl handles all of this because its core is a dense mineral-and-PVC blend that does not absorb water or swell.
Unlike wood-based laminate, which uses an HDF core that puffs up the moment it gets wet, SPC stays dimensionally stable across temperature and humidity changes. That stability is the whole game in a basement. A floor that expands and contracts violently will buckle at the seams or gap in winter; SPC barely moves, which is why it has largely replaced other options for below-grade projects.
100% Waterproof Core vs. Water-Resistant
This distinction matters more in a basement than anywhere else in the house. A genuinely waterproof floor has a core that will not degrade even after prolonged water exposure, while “water-resistant” products only tolerate surface spills wiped up quickly.
SPC and WPC (wood-plastic composite) rigid-core planks are the truly waterproof category; their PVC-based cores can sit in standing water and dry out unharmed. Flexible glue-down luxury vinyl is also waterproof at the plank level. Steer clear of anything marketed merely as “water-resistant” or built on a wood or HDF core for a basement. When a water heater fails or a storm pushes water across the slab, only a 100% waterproof core survives without needing replacement.
Testing Your Concrete Slab for Moisture
Even the best waterproof plank can trap moisture against a slab and breed mold underneath if you skip testing. Two simple tests tell you what you are dealing with.
- Calcium chloride test: Measures moisture vapor emission rate (MVER) in pounds per 1,000 sq ft over 24 hours. Most vinyl tolerates up to 5 to 10 lbs; check your product’s spec.
- Relative humidity (RH) probe test: The more accurate method, using an in-slab probe per ASTM F2170. Aim for readings under 75 to 85 percent RH depending on the manufacturer.
A quick DIY check is the plastic-sheet test: tape a 2-by-2-foot square of clear plastic to the slab for 24 to 48 hours. Condensation or a darkened slab underneath signals a moisture problem you must address before flooring goes down.
Vapor Barriers and Underlayment
A concrete slab is never truly dry, so a vapor barrier is often essential below grade. Many SPC products include an attached pad, but for basements I recommend adding a dedicated 6-mil polyethylene vapor barrier or a vinyl-specific underlayment with a built-in moisture film beneath floating installs.
Skip the standard foam underlayment sold for laminate; it lacks a vapor break and can hold moisture. If your slab tested marginal, a self-leveling moisture-mitigation coating applied first buys real insurance. The goal is to keep slab vapor from condensing under the planks where you would never see it until the smell appears.
Floating vs. Glue-Down Installation
Basements support both methods, and each has a place.
Floating (Click-Lock)
Most DIYers choose floating SPC planks that click together and rest over the slab without adhesive. Installation is fast, the floor tolerates minor slab imperfections, and individual planks can be lifted for repairs. Leave a 1/4- to 3/8-inch expansion gap at every wall, since even stable SPC needs room to move.
Glue-Down
For large basements or areas prone to standing water, full-spread glue-down vinyl bonds directly to the slab, eliminating the hollow feel and preventing water from spreading underneath a floating floor. It demands a flatter, cleaner slab and more labor, but it is the more bulletproof choice where flooding is a real risk.
Wear Layer: 12 to 20 Mil
The wear layer is the clear protective top coat, measured in mils, and it determines how well the floor resists scratches and dents. For a basement that doubles as a rec room, home gym, or playroom, do not go below 12 mil.
A 12-mil wear layer suits light residential traffic, 20 mil handles heavy use and furniture, and 22-mil-plus products carry commercial warranties. Do not confuse wear-layer thickness with overall plank thickness; a thick plank with a thin 6-mil wear layer will scuff quickly. In a multi-use basement, 20 mil is the sweet spot for longevity without overpaying.
Temperature Stability, Mold, and Mildew
Basements run cold, and an unheated space can swing 30°F between seasons. SPC’s mineral core barely reacts to that, unlike WPC which expands a bit more, making SPC the better pick for basements without climate control. The inorganic PVC-and-stone core also gives mold nothing to feed on, so the planks themselves will never harbor mildew the way carpet or wood subflooring does.
That said, mold can still grow on dust and debris trapped beneath a floor over a wet slab, which is why moisture testing and a vapor barrier remain non-negotiable. Keep basement humidity under 50 percent with a dehumidifier and the whole system stays healthy.
Cost, Brands, and Install Tips
Quality waterproof vinyl flooring for basement use runs $2 to $5 per square foot for the material, with premium lines reaching $6 to $7. Professional installation adds $1.50 to $4 per square foot, so a 600-square-foot basement typically lands between $2,100 and $6,000 finished. DIY floating installs can cut that nearly in half.
Top Brands to Consider
- COREtec: The original rigid-core line, with WPC and SPC options and attached cork or foam pads.
- LifeProof (Home Depot): Budget-friendly SPC with solid wear layers and easy availability.
- Cali (Cali Bambo): Cali Vinyl Pro offers heavy 20-mil wear layers and strong waterproof warranties.
Install Tips
- Let planks acclimate in the basement 48 hours before installing.
- Flatten the slab to within 3/16 inch over 10 feet; grind or self-level high and low spots.
- Maintain expansion gaps and never trap a floating floor tight against walls or columns.
Done right, a rigid-core vinyl floor turns a cold, damp basement into comfortable, durable living space that can weather the occasional leak and last 20 years or more.
Pros and Cons for Basement Use
Pros
- Truly waterproof core survives leaks and slab moisture without warping.
- Dimensionally stable across the temperature swings of an unheated basement.
- Inorganic core gives mold and mildew nothing to feed on.
- Fast floating install and DIY-friendly click-lock systems.
- Warmer and quieter underfoot than tile, with realistic wood and stone looks.
Cons
- Does not fix an underlying slab moisture problem; testing is still required.
- Cheaper thin planks with 6-mil wear layers scuff quickly under heavy use.
- Floating floors can feel hollow over an uneven slab.
- Trapped moisture under the floor can still cause odor if the slab is wet.
Preparing the Basement Before You Start
Great results start well before the first plank goes down. Address any active water intrusion first, whether that means regrading outside, extending downspouts, or adding a sump pump, because no floor can outrun a chronically wet slab. Once the slab is dry and tested, clean it thoroughly, patch cracks with a cementitious filler, and grind down any high spots.
Check flatness with a straightedge and use a self-leveling underlayment to bring low areas within spec. Sweep and vacuum every trace of dust so the vapor barrier and planks sit clean. This prep work is unglamorous, but it is the difference between a basement floor that clicks together tight and stays flat and one that gaps, lifts, and telegraphs every slab imperfection within a year.
Prefer to explore on your own?
See how new flooring looks in your actual room in seconds — free, no signup.
Try the free Floor Studio →