Waterproofing basement walls from outside is the most thorough way to stop moisture, because it blocks water before it ever reaches the foundation rather than managing it after it enters. It is more involved and costly than interior sealing, requiring excavation, but it delivers the most durable results. This guide explains the process, materials, drainage, and costs.
- Exterior vs. Interior Waterproofing
- When Exterior Waterproofing Is Worth It
- The Excavation Step
- Cleaning and Prepping the Wall
- Applying the Waterproofing Membrane
- Adding a Dimple Drainage Board
- The Footing Drain and Gravel
- Proper Backfilling and Grading
- Cost Expectations
- DIY vs. Professional
- Damp-Proofing vs. True Waterproofing
- Timeline and Disruption to Expect
- Protecting Window Wells and Penetrations
- Combining With Interior Systems
- Soil Type and Its Impact
- Landscaping and Long-Term Maintenance
- Choosing a Qualified Contractor
Exterior vs. Interior Waterproofing
Interior methods, like sealers, drainage channels, and sump pumps, manage water that has already reached or entered the wall. Exterior waterproofing stops water at the source by sealing the outside of the foundation and directing groundwater away. While interior fixes are cheaper and less disruptive, exterior waterproofing is the true solution for persistent leaks and hydrostatic pressure because it keeps the wall itself dry.
When Exterior Waterproofing Is Worth It
Consider exterior waterproofing when:
- You have chronic basement leaks that interior sealing has not solved.
- There is significant hydrostatic pressure pushing water through the walls.
- You are already excavating for another project, such as a foundation repair.
- You want to finish the basement and need a reliably dry space.
Because it addresses the root cause, it is often the best long-term value despite the higher upfront cost.
The Excavation Step
The defining feature of exterior waterproofing is digging down to the base of the foundation, typically 7 to 8 feet, all around the affected walls. This exposes the full wall and the footing. Excavation is the most labor-intensive and expensive part and requires care to avoid damaging utilities, landscaping, and the foundation itself. Contractors call utility locators before digging and slope the trench walls for safety.
Cleaning and Prepping the Wall
Once exposed, the wall is cleaned of soil and debris, and existing cracks are repaired. Poured concrete cracks are filled, and any deteriorated mortar in block walls is repointed. A clean, sound substrate is essential for the waterproofing membrane to bond properly. This is also the ideal time to inspect the footing and address any structural issues while the wall is accessible.
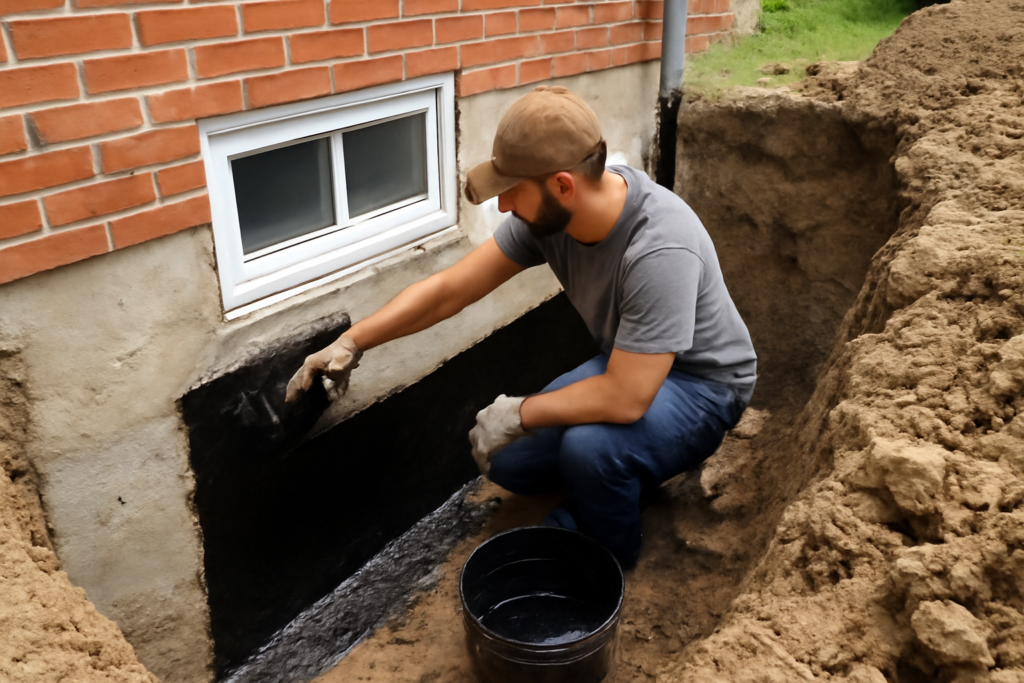
Applying the Waterproofing Membrane
Several membrane systems seal the exterior wall:
- Liquid rubberized asphalt or elastomeric coatings: Sprayed or troweled on to form a seamless, flexible barrier.
- Sheet membranes: Peel-and-stick rubberized sheets applied over the wall.
- Bentonite clay panels: Swell on contact with water to seal the wall.
Liquid elastomeric membranes are popular because they bridge small cracks and form a continuous barrier without seams.
Adding a Dimple Drainage Board
Over the membrane, installers often add a dimpled drainage board (a plastic sheet with raised bumps). This creates an air gap that channels any water down to the footing drain rather than pressing against the wall. It also protects the membrane from being punctured by backfill soil and rocks. The dimple board is a small cost that greatly improves the system’s longevity.
The Footing Drain and Gravel
At the base of the excavation, a perforated pipe (footing drain or French drain) is laid in gravel to collect groundwater and carry it away to daylight or a sump. Proper drainage is essential:
- Lay perforated pipe in a bed of washed gravel along the footing.
- Wrap the gravel and pipe in filter fabric to prevent silt clogging.
- Slope the pipe to drain to a lower outlet or a sump pit.
- Backfill with gravel near the wall, then soil, sloping the surface away.
Proper Backfilling and Grading
How the trench is refilled matters. Gravel or free-draining material near the wall helps water reach the footing drain quickly. The final grade should slope away from the house at least 6 inches over the first 10 feet so surface water runs off rather than pooling. Redirecting downspouts to discharge well away from the foundation completes the exterior water management.
Cost Expectations
Exterior waterproofing is a significant investment because of the excavation:
- Typical cost: $15,000 to $30,000 for a full perimeter, or roughly $80 to $200 per linear foot.
- Partial walls or single problem areas cost less.
- Factors include depth, soil type, access, and landscaping restoration.
By comparison, interior systems run $3,000 to $10,000 but do not keep the wall itself dry.
DIY vs. Professional
Exterior waterproofing is generally not a DIY project. Deep excavation carries collapse and utility-strike risks, and improper backfilling can damage the foundation. Most homeowners hire a licensed foundation or waterproofing contractor with the equipment and experience to dig safely and warranty the work. Small, shallow areas might be tackled by an experienced DIYer, but full-depth walls call for professionals.
Damp-Proofing vs. True Waterproofing
Not all exterior coatings are equal. Damp-proofing, the thin asphalt spray many builders apply, only slows moisture vapor and does not withstand standing water or hydrostatic pressure. True waterproofing uses a thicker elastomeric or rubberized membrane that bridges cracks and forms a continuous barrier against liquid water. If your goal is a reliably dry basement rather than merely reduced dampness, insist on a genuine waterproofing membrane, not a builder-grade damp-proof coating.
Timeline and Disruption to Expect
Exterior waterproofing is a significant project. A full perimeter typically takes one to two weeks depending on soil, weather, and access. Expect heavy equipment in the yard, disruption to landscaping, walkways, and possibly a deck or patio, and open trenches around the house during the work. Planning for landscape restoration afterward is part of the budget. Because of this disruption, many homeowners combine exterior waterproofing with other foundation or drainage work while the walls are exposed.
Protecting Window Wells and Penetrations
Water often enters not through the wall field but around window wells, pipe penetrations, and utility entries. A complete exterior job seals these vulnerable points, installs proper window-well drainage tied to the footing drain, and caulks or hydraulic-cements around penetrations. Overlooking these details is a common reason a wall-only waterproofing job still leaks, so confirm your contractor addresses every opening, not just the flat wall surface.
Combining With Interior Systems
In severe cases, the most reliable result comes from combining exterior and interior methods. Exterior sealing keeps the wall dry, while an interior perimeter drain and sump pump provide a backup path for any water that gets past the membrane or rises through the floor. This belt-and-suspenders approach costs more but offers the highest level of protection for finished basements or homes with a history of chronic flooding.
Soil Type and Its Impact
The soil around your foundation strongly affects both the problem and the solution. Expansive clay soils hold water and swell, exerting heavy pressure on walls, while sandy, free-draining soils shed water quickly. Exterior waterproofing often includes backfilling with granular, free-draining material near the wall to replace poorly draining clay and speed water toward the footing drain. A contractor who understands your local soil can tailor the drainage and backfill to keep water moving away from the foundation.
Landscaping and Long-Term Maintenance
After the trench is backfilled, restore grading and landscaping to keep surface water flowing away from the house. Avoid planting large shrubs or trees close to the foundation, since roots can disturb the membrane and drain over time. Keep gutters clean and downspouts extended so they discharge well beyond the newly waterproofed wall. This ongoing surface-water management protects the substantial investment you made in the below-grade system and keeps it performing for decades.
Choosing a Qualified Contractor
Because exterior waterproofing is expensive and disruptive, vet contractors carefully. Get several detailed written bids that specify the membrane type, drainage plan, and restoration work, not just a lump sum. Verify licensing, insurance, and references from similar deep-excavation jobs, and confirm the crew will call utility locators before digging. Ask about the warranty and what it covers. A reputable foundation contractor explains the full scope, including how they will protect your home and yard during the dig.
To summarize, waterproofing basement walls from outside is the definitive way to keep a basement dry because it stops water before it reaches the foundation. The process involves excavating to the footing, repairing and cleaning the wall, applying a membrane and dimple board, and installing a proper footing drain and grading. Though costly and best left to professionals, exterior waterproofing offers the most permanent protection against chronic leaks and hydrostatic pressure.