A fence gate is the one part of the fence you touch every day, and it is also the part most likely to sag, stick, or fail. Great wood fence gate designs balance curb appeal with the bracing and hardware that keep a gate swinging true for years. This guide walks through the most popular styles, the structural details that prevent drooping, and the build tips that separate a gate you fight with from one that latches with a satisfying click every time.
Part of our Decks & Outdoor guide — explore the full guide →
- What Makes a Gate Work
- Popular Wood Fence Gate Designs
- Choosing the Right Wood
- Building a Frame That Will Not Sag
- Hardware That Holds Up
- Setting the Gate Posts
- Getting Clearance and Swing Right
- Adding Style and Decorative Details
- Finishing and Protecting the Wood
- Maintaining Your Gate Over Time
- Bringing Your Gate Design Together
What Makes a Gate Work
Before choosing a look, understand that a gate is a small structure fighting gravity. Unlike a fence panel supported along its whole length, a gate hangs from one side and must resist the constant pull that wants to drop the far corner. That means design and structure are inseparable: the prettiest gate will disappoint if the framing and diagonal bracing are wrong.
Every durable gate shares three essentials: a rigid frame, a diagonal brace running from the bottom hinge corner up to the opposite top corner, and hardware sized for the gate’s weight. Nail those fundamentals and you can style the surface however you like.
Popular Wood Fence Gate Designs
Style sets the tone for your whole yard. These designs range from simple to statement-making, and most adapt to any privacy or picket fence.
- Flat-top picket: clean horizontal top rail, classic and unobtrusive, easy to build
- Arched top: a gentle curve cut into the pickets for a welcoming, traditional look
- Inverted or dip arch: the reverse curve, dipping in the center, common on cottage-style fences
- Board-on-board privacy: overlapping vertical boards that block sightlines completely
- Horizontal slat modern: boards run sideways for a contemporary, architectural feel
- Lattice-top: a solid lower panel topped with decorative lattice for light and air
Match the gate to the fence rather than making it wildly different, but a subtle upgrade, like an arched top on an otherwise straight fence, marks the entrance in a pleasing way.
Choosing the Right Wood
The species you pick affects both looks and lifespan. Because a gate takes more abuse than a fence panel, invest in rot-resistant material here even if you economize elsewhere.
Western red cedar resists decay naturally, stays light for easier swinging, and weathers to a handsome silver-gray if left unsealed. Pressure-treated pine costs less and holds up well but is heavier, which strains hinges over time. Redwood offers beauty and stability at a premium price. Whatever you choose, seal or stain the gate to slow moisture swings that cause warping and racking.
Building a Frame That Will Not Sag
Sagging is the number one gate complaint, and it almost always traces to a missing or backwards diagonal brace. The brace must run from the bottom of the hinge side up to the top of the latch side, so it works in compression and pushes the far corner up. Install it the other way and it does nothing.
- Build a square frame from 2×4 lumber, checking corners with a framing square
- Confirm square by measuring both diagonals; equal measurements mean true
- Cut the diagonal brace to fit tightly between the bottom-hinge and top-latch corners
- Fasten the brace and frame with exterior screws, not nails, which loosen over time
- Attach the pickets or boards to the completed, squared frame
For wider gates over 4 feet, add an anti-sag turnbuckle cable kit running the same direction as the brace, letting you fine-tune the gate back to square years later with a few turns of a wrench.
Hardware That Holds Up
Cheap hinges are false economy on a gate. Buy hardware rated for the gate’s weight and then size up, because a gate that swings hundreds of times a year punishes undersized parts. Use at least three heavy-duty hinges on a full privacy gate, and choose galvanized or stainless steel to resist rust.
- Strap hinges: long arms distribute load across the frame, ideal for heavy gates
- Self-closing hinges: spring-loaded units that swing the gate shut, required by code around pools
- Gravity latches: drop automatically as the gate closes, simple and reliable
- Lockable latches: add a keyed or padlock option for security
Mount hinges into the solid post and into the frame’s rails, never into thin pickets alone, which will pull out under load.
Setting the Gate Posts
A gate is only as stable as its hinge post. Set gate posts deeper and in more concrete than line posts, because they carry a swinging cantilevered load. Dig the hinge post hole at least a third of the post’s height deep, set the post in concrete, and let it cure fully before hanging the gate.
For heavy or wide gates, use a 4×6 or even a 6×6 hinge post instead of a standard 4×4. The extra mass resists the leverage that would otherwise lean the post toward the gate over time. Plumb the post carefully in both directions, since a post leaning even slightly will make the gate swing open or shut on its own.
Getting Clearance and Swing Right
Leave a consistent gap, about a half inch, between the gate and its posts so the gate does not bind as wood swells in humid weather. Plan the swing direction to match how you use the space, and make sure the ground clearance allows the gate to open over grass, gravel, or a slope without dragging.
On sloped ground, decide early whether the gate bottom follows the slope or stays level. A level gate on a slope needs a taller opening on the downhill side, while a raked gate follows the grade. Test the full swing before final tightening to catch any point where the gate scrapes or catches.
Adding Style and Decorative Details
Once the structure is sound, decorative touches turn a functional gate into a focal point. A simple arched top cut into otherwise straight pickets instantly signals an entrance and softens the fence line. Decorative post caps, whether flat, ball, or solar-lit, finish the posts and protect the end grain from water, which is the first place a post begins to rot.
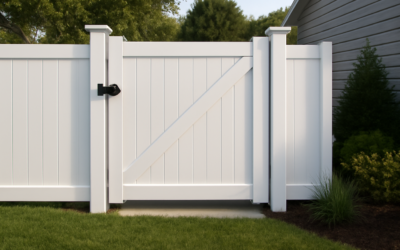
Hardware can be decorative too. Black wrought-iron-style strap hinges and a matching thumb latch lend a classic, handcrafted look while still carrying real load. A speakeasy window or a small piece of lattice worked into a privacy gate breaks up a solid slab and adds character. For a modern look, horizontal slats with a hidden latch and clean stainless hardware create a sleek, architectural statement. The key is choosing details that suit your home’s style rather than piling on features that fight one another.
Finishing and Protecting the Wood
A gate takes the full brunt of weather and handling, so finishing it well pays off in years of service. Bare wood left unsealed cycles through wet and dry, and that constant swelling and shrinking is what warps and racks a gate out of square. A quality exterior stain or water-repellent sealer stabilizes the wood and slows the cycle.
- Semi-transparent stain: shows the grain while adding water and UV protection, popular for cedar
- Solid stain: hides the grain and offers the most protection and color choice
- Clear sealer: preserves the natural look but needs more frequent reapplication
- Paint: durable and bold, though it can peel and requires prep to recoat
Seal all six sides of the boards, including the end grain and the bottom edge, before or right after assembly, and reapply every couple of years. Pay special attention to the bottom rail, which sits closest to splashing ground moisture.
Maintaining Your Gate Over Time
Even a well-built gate needs occasional attention to keep swinging true. Check the hinge screws each season and snug any that have loosened under the constant load. If the gate begins to sag, a turnbuckle brace lets you crank the far corner back up with a few turns rather than rebuilding. Lubricate the hinges and latch annually so they move freely and do not wear prematurely.
Watch the ground clearance as seasons change, since frost heave and settling can shift a post enough to make the gate drag. A gate that starts to scrape usually signals a leaning hinge post, which is easier to correct early than after it has pulled well out of plumb. Catching these small issues promptly keeps a good gate performing for a decade or more.
Bringing Your Gate Design Together
The best wood fence gate designs marry a style you love with the structure that keeps it functioning. Choose rot-resistant wood, build a truly square frame with a correctly oriented diagonal brace, and invest in oversized hinges anchored in a deep, concreted post. Add a turnbuckle for insurance on wide gates, seal the wood against moisture, and leave clearance for seasonal swelling. Get these details right and your gate will greet you with an easy swing and a clean latch for many years, no matter which handsome design you choose for the face.