Caulk smeared into a nail hole or wood filler packed into a corner joint means doing that spot twice. The wood filler caulk decision looks trivial from the outside because both products come in a squeezable container and both fill gaps in painted trim. But they’re opposite materials: one cures hard and sandable, the other stays flexible forever. Use them in each other’s territory and the repair fails in a way you can see from across the room. Here’s a decision guide, with the reasoning, the exceptions, and the products worth keeping on hand.
Part of our Paint & Walls guide — explore the full guide →
The One-Sentence Rule
If the gap can move, caulk it. If the surface needs to be sanded flat and invisible, fill it. Everything else in this article is an elaboration of that sentence.
Wood moves constantly — it swells in humid summers and shrinks in dry heated winters, and joints between two pieces of wood (or wood and drywall) open and close a little every year. A hard filler bridging a moving joint cracks the first season and pops out in chunks by the third. Caulk stretches with that movement. But caulk can never be sanded — it tears, gums, and sheds — so it can never create a flat, invisible surface on the face of a board. Filler can. Two materials, two jobs.


What Each Material Actually Is
Wood filler
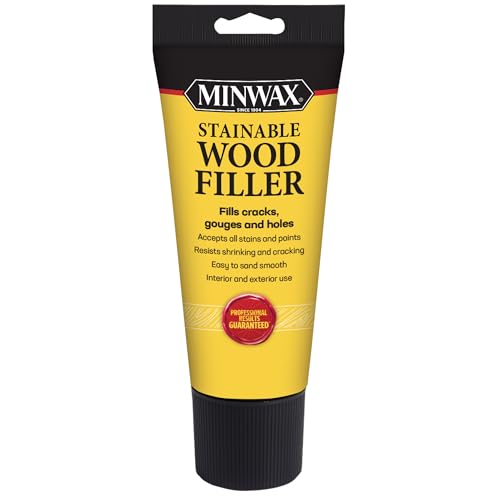
Water-based wood fillers (DAP Plastic Wood-X, Elmer’s, Minwax, $5 to $9 a tub) are wood dust or minerals in an acrylic binder — they dry hard, sand powder-smooth, and take paint perfectly. Two-part epoxy and polyester fillers (Abatron WoodEpox, Bondo Wood Filler, $15 to $40) cure by chemical reaction, harder and faster, and are the only correct choice for exterior structural rebuilds like a rotted sill corner or chewed-up door jamb bottom. Fillers have essentially zero flexibility. That’s a feature on the face of a board and a fatal flaw in a joint.
Caulk
For trim work, this means paintable acrylic latex or siliconized acrylic (Alex Plus, Big Stretch, SherMax, $3 to $9 a tube). It guns into gaps, tools smooth with a wet finger, stays permanently rubbery, and accepts paint. It cannot be sanded, shaped, or feathered flush, and in wide gaps it shrinks as it dries. Silicone caulk has no place anywhere near paintable trim — paint won’t stick to it, ever.
The Job-by-Job Verdicts
| Situation | Use | Why |
|---|---|---|
| Nail holes in trim | Wood filler (or painter’s putty) | Face of board; needs sanding flush; no movement |
| Baseboard-to-wall gap | Caulk | Wood-to-drywall joint moves seasonally |
| Casing miters, corner joints | Caulk (hairline) / filler only on pinned, glued miters | Joints move unless mechanically locked |
| Gouges, dents, chipped edges | Wood filler | Surface repair; must sand flat |
| Crown molding to ceiling | Caulk | Framing moves; ceilings flex |
| Grain and splits on board face (paint-grade) | Wood filler | Needs flat sanded surface |
| Baseboard-to-floor gap | Neither — shoe molding | Caulk to flooring looks bad and tears; trim covers it properly |
| Rotted exterior wood | Epoxy filler after consolidant | Structural rebuild; caulk over rot hides a growing problem |
| Exterior siding/trim vertical joints | Exterior caulk | Movement plus waterproofing |
| Stain-grade repairs | Stainable filler (test first) or wax stick | Caulk never accepts stain |
The Cases People Get Wrong
Nail holes: filler, not caulk
The most common mistake. A dab of caulk pressed into a brad hole looks fine wet. Then it shrinks into a dimple as it cures, and after painting, every hole in the room shows as a tiny crater in raking light. Caulk also can’t be sanded flush, so the little smear around each hole stays as a raised halo. Fill nail holes with wood filler or oil-based painter’s putty, let it dry, sand flush, prime the spots. It’s slower and it’s correct.
Miters: it depends on the joint
A cracked-open casing miter is a moving joint — the two legs of the casing expand at different rates. Caulk the hairline and it stays closed-looking through the seasons. But if the miter is glued and pin-nailed tight, the joint is mechanically locked and behaves like solid wood; then a skim of filler sanded flush makes it disappear completely, which caulk can’t quite do. The honest test: if you can flex the joint at all by pressing on it, it gets caulk.
Wide gaps: neither, at first
A gap over about 3/8 inch — wavy wall behind a straight baseboard, say — swallows caulk. It slumps, shrinks, and wrinkles. Stuff foam backer rod into the gap first, then caulk the last 1/4 inch, or better, scribe the trim to the wall. Filler in a wide moving gap is even worse; it just cracks along its whole length.
Exterior rot: the caulk cover-up
A common problem is a window sill where someone caulked over soft wood and painted it. The caulk skin holds paint beautifully while the rot spreads underneath for years. Rot gets dug out to sound wood, soaked with consolidant, rebuilt with two-part epoxy filler, then sanded and painted — caulk’s only role is sealing the adjacent joints so water stops getting in.
Can You Use Caulk as Filler in a Pinch? And Vice Versa?
Honestly: caulk in a shallow nail hole in low-visibility trim (inside a closet, above eye level in a garage) will survive; it’s just visibly inferior work. The reverse — hard filler in a moving joint — isn’t a judgment call, it’s a guaranteed callback. Rigid material in a flexing joint always cracks; the only variable is which winter. There are also true hybrid situations: flexible “sandable caulks” and lightweight spackling-caulk crossovers exist. They sand worse than filler and flex worse than caulk. The two-product approach wins on every job that matters.
A Working Sequence on a Trim Job
- Install trim; glue and pin miters where possible.
- Fill all nail holes and surface defects with filler. Coffee break while it dries.
- Sand fills flush with 180-grit; vacuum and tack.
- Caulk every wood-to-wall, wood-to-ceiling, and moving wood-to-wood joint with paintable acrylic; tool tight and small.
- Spot-prime the fills, then paint. Caulk skins in 30 to 60 minutes and most acrylics can be painted within 2 hours — filler always gets primed, or it flashes dull through the finish coat.
The order matters: filler first because sanding it after caulking shreds your fresh beads; caulk after sanding so dust doesn’t contaminate the joints.
Cost and Coverage Reality
Neither product will strain a budget, but the consumption math differs. A 5.5-ounce tub of water-based filler handles the nail holes and dings of two or three average rooms of trim — a few hundred holes — for $6 to $9. A single 10-ounce tube of quality paintable caulk covers roughly 50 to 90 linear feet of hairline trim gap at the small bead sizes interior work wants, so figure one tube per average room and two for a room with crown, chair rail, and built-ups. A whole-house interior repaint typically uses a case of caulk and a couple of tubs of filler; the materials together are still under $60 for the entire job. The labor split runs the other way: filling and sanding is slow, deliberate work while caulking moves fast, which is exactly why impatient painters caulk nail holes — they’re stealing time from the slow task and paying for it in the finished look.
What to Keep on Hand
For a homeowner, the whole kit is under $25: one tub of quality water-based wood filler, one tube of paintable acrylic latex caulk with at least a 35-year rating, a $7 caulk gun, and a sanding sponge. Add a stainable filler only when a stain-grade project actually appears — and test it on scrap, because “stainable” is the most optimistic word in the hardware store. With those two products and the one-sentence rule — movement gets caulk, sanded surfaces get filler — you’ll make the right call at every gap in the house, and your paint job will still look right when the seasons have flexed everything twice.