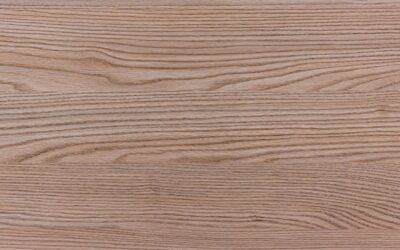
Walk into a modern kitchen or bathroom that looks like it has wide-plank oak floors, then run your hand across the surface and feel cool, hard ceramic. That is wood grain porcelain tile doing its job. It mimics the knots, grain patterns, and color variation of real hardwood while shrugging off water, scratches, and the kind of daily abuse that would leave genuine wood dented and warped. For homeowners who love the warmth of timber but need the toughness of tile, this product has become one of the most requested flooring materials of the past decade.
Part of our Tile & Grout guide — explore the full guide →
Manufacturers use high-definition inkjet printing to reproduce dozens of unique plank faces per collection, so a well-installed floor rarely shows an obvious repeat. Below, you will find everything worth knowing before you buy: how it is made, what it costs, where it works best, and the installation details that separate a professional-looking result from an amateur one.
What Is Wood Grain Porcelain Tile?
Porcelain is a denser, less porous member of the ceramic family, fired at temperatures around 2,200 to 2,500°F. That density gives it a water absorption rate below 0.5 percent, which is why it holds up in wet zones where hardwood cannot go. The “wood grain” part comes from a printed glaze layer that carries a photographic image of real lumber, followed by a protective surface coat.
Most planks are sold in lengths of 24, 36, or 48 inches and widths of 6 to 9 inches, echoing the proportions of true wood boards. Higher-end lines add a subtle surface texture that lines up with the printed grain, so the floor reads as authentic under angled light. Because each tile is a rigid, dimensionally stable body, it will not expand and contract with humidity the way an organic plank does.
Why Homeowners Choose the Wood Look
The appeal starts with performance. You get the design of a hardwood floor in rooms that would destroy the real thing: bathrooms, laundry rooms, mudrooms, basements, and pool surrounds. A spilled glass of water, a leaking dishwasher, or a wet dog is a non-event.
- Waterproof body that suits bathrooms, kitchens, and below-grade spaces
- Scratch and dent resistance that stands up to pet claws and dropped pans
- Radiant heat compatibility, since porcelain conducts warmth efficiently
- No refinishing, sanding, or resealing across the life of the floor
- Fade resistance, so sun-drenched rooms keep their color for decades
Compared with engineered hardwood, which typically lasts 20 to 30 years and can only be refinished a couple of times, quality porcelain can serve 50 years or more with basic care. That longevity often offsets the higher upfront installation labor.
There is a comfort trade-off worth acknowledging. Porcelain is harder and colder underfoot than real wood, which some homeowners solve with area rugs or radiant floor heating. In a bedroom or nursery, that firmness matters more; in a busy kitchen or bathroom, most people never notice it. Sound is another factor, since a tiled floor echoes more than a cushioned wood floor, though rugs and soft furnishings tame that easily.
Cost of Wood Grain Porcelain Tile
Budget planning is easier once you separate material from labor. Tile itself runs a wide range depending on quality and brand.
- Builder-grade planks: $2 to $4 per square foot
- Mid-range collections: $4 to $7 per square foot
- Premium designer lines: $7 to $12 per square foot
- Professional installation: $8 to $15 per square foot
Plank-format tile costs more to install than standard square tile because the long, narrow shape is prone to “lippage,” where one edge sits higher than its neighbor. Expect an all-in figure of $12 to $25 per square foot installed for a typical mid-range job. A 200-square-foot bathroom, for example, often lands between $2,400 and $5,000 depending on your market and the complexity of the layout.
Choosing the Right Tile
Not every wood-look tile is convincing. When you shop, pull several boxes and lay a dozen planks side by side on the showroom floor. Cheap lines repeat the same three or four faces, which your eye will catch once the floor is down.
Face Variation
Look for collections advertising “V3” or “V4” shade variation and at least 12 to 20 unique plank faces. More faces mean a more natural-looking installation with fewer obvious duplicates.
Surface Finish
Matte and textured finishes hide dust and offer better slip resistance, making them the smart pick for bathrooms and entryways. Polished wood-look tile exists but reads less like real timber and can feel slippery when wet.
Rectified Edges
Rectified tiles are mechanically ground to precise dimensions, allowing grout lines as tight as 1/8 inch. That narrow joint is key to selling the illusion of a continuous wood floor. Non-rectified tiles need wider grout lines, which breaks the effect.
Installation and Layout Tips
Getting a flat result takes preparation. The subfloor should be flat to within 1/8 inch over a 10-foot span; anything more and you invite lippage on long planks. Many pros skim-coat with a self-leveling underlayment before setting a single tile.
Offset patterns matter more here than with square tile. A traditional 50 percent brick-lay offset amplifies lippage because the high point of one plank meets the center of the next. Most tile councils now recommend a maximum offset of 33 percent, or roughly a third of the plank length, for boards longer than 15 inches. A random or “staggered” pattern with a one-third step looks natural and installs flat.
- Dry-lay two or three rows to check the pattern and color mix before spreading thinset.
- Use a large-format tile mortar and a 1/2-inch notched trowel for full coverage.
- Back-butter each plank to eliminate voids that cause cracks under load.
- Set leveling clips and wedges every 8 to 12 inches to control lippage.
- Choose a grout color that matches the plank tone for the most seamless look.
Grout selection is the finishing touch. A urethane or high-performance cementitious grout in a tone close to the wood color makes the joints disappear. Contrasting grout, by contrast, turns each plank into a visible tile and defeats the purpose.
Maintenance and Care
Upkeep is refreshingly simple. Sweep or dust-mop to remove grit, then damp-mop with a pH-neutral cleaner. Skip oil soaps and wax products designed for real wood; they leave a film on porcelain that dulls the finish and attracts dirt.
The grout, not the tile, is the part that needs attention. Seal cementitious grout on installation and re-seal every one to two years in wet areas to keep it stain-free. If you chose an epoxy or pre-sealed urethane grout, even that step disappears. Because the tile body itself is waterproof and stain-proof, there is no annual refinishing on the calendar and no worry about standing water.
Where Wood Grain Porcelain Tile Works Best
This flooring shines anywhere hardwood would be a gamble. Bathrooms and laundry rooms top the list, followed by kitchens where spills are constant. Basements benefit from the waterproof body and radiant-heat compatibility, since porcelain warms up quickly and evenly. Open-plan homes use one continuous wood-look tile from the entry through the kitchen and into a sunroom, achieving a seamless flow that mixing real wood with tile could never match.
For a bedroom or formal living room where moisture is not a concern, the choice becomes personal preference. Some owners prefer the softer, warmer feel of actual wood underfoot; others value never having to worry about water rings, pet accidents, or refinishing again. If durability and a maintenance-free life rank high on your list, wood grain porcelain tile delivers the look you want without the compromises that come with the real thing. Order 10 to 15 percent extra to cover cuts and future repairs, and your floor will look showroom-fresh for decades.
Prefer to explore on your own?
See how new flooring looks in your actual room in seconds — free, no signup.
Try the free Floor Studio →