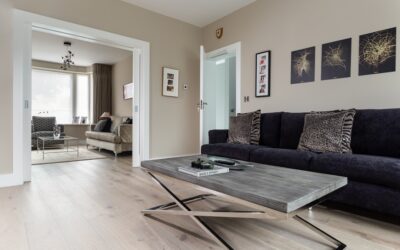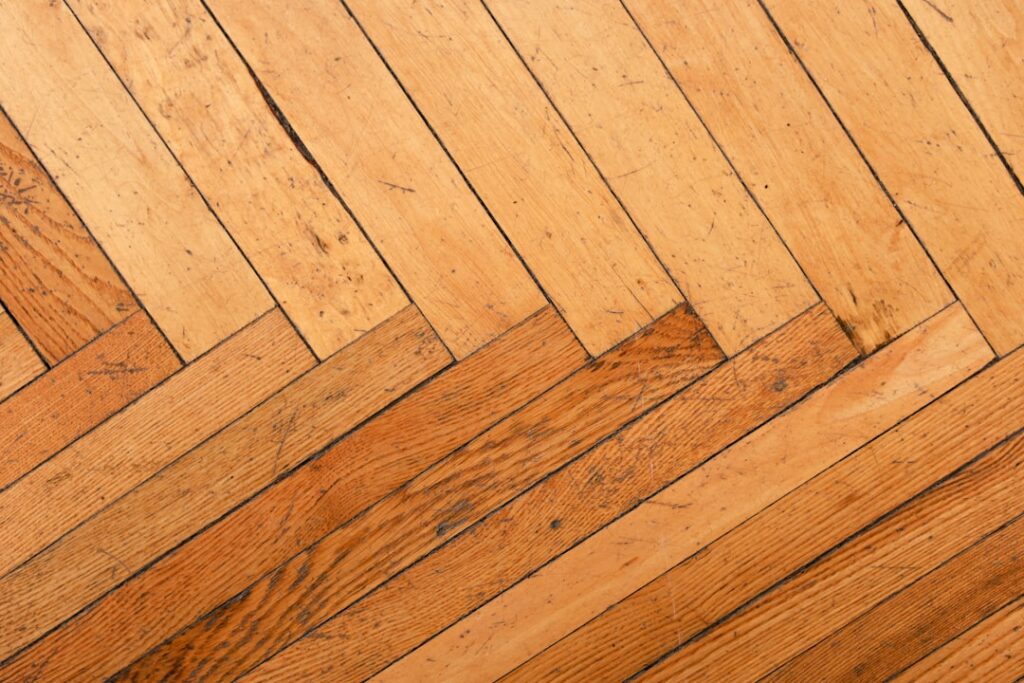
Wooden floor boards have been the foundation of beautiful interiors for centuries. Whether you are building a new home, renovating a period property, or replacing worn flooring, understanding the differences between solid and engineered boards, wood species, plank widths, installation methods, and finishing options will help you make a confident purchase. This guide covers everything you need to know about wooden floor boards, from selection through installation and long-term care.
Solid vs. Engineered Wooden Floor Boards
The first decision when shopping for wooden floor boards is whether to choose solid or engineered construction. Both deliver the beauty of real wood, but they differ in structure, stability, and installation flexibility.
Solid Wood Floor Boards
Solid boards are milled from a single piece of timber, typically 3/4 inch (18-20mm) thick. They are the traditional choice and offer the longest lifespan because they can be sanded and refinished multiple times over decades of use. Solid boards are best installed in above-grade, climate-controlled rooms and should be nailed or stapled to a wooden subfloor.
Engineered Wood Floor Boards
Engineered boards have a real wood veneer (the wear layer) bonded to a cross-laminated plywood or HDF core. This layered construction resists expansion and contraction, making engineered boards more dimensionally stable than solid wood. They can be installed over concrete slabs, with radiant heat, and in below-grade spaces like basements. The trade-off is limited refinishing potential, since the veneer is thinner than a full solid board. For a deep dive, see our engineered wood flooring guide.
Which Should You Choose?
- Choose solid if you want maximum longevity, plan to sand and refinish multiple times, and are installing on a wooden subfloor in a controlled environment.
- Choose engineered if you are installing over concrete, over radiant heat, in a basement, or if you want wider planks that remain stable in varying humidity.
Popular Wood Species for Floor Boards
The species of wood you choose determines the color, grain pattern, hardness, and price of your floor. Here are the most popular options.
Domestic Species
- Red Oak: The most common flooring species in North America. Warm pinkish-brown tones with prominent grain. Janka hardness rating of 1,290. Affordable and widely available. Takes stain well, making it versatile for many looks.
- White Oak: Slightly harder than red oak (Janka 1,360) with a cooler, more neutral tone. Tighter grain pattern and higher tannin content, which gives it excellent water resistance. Very popular for modern, farmhouse, and rustic styles.
- Maple: Hard (Janka 1,450) with a subtle, fine grain and light, creamy color. Contemporary look but can be difficult to stain evenly due to its dense grain.
- Hickory: One of the hardest domestic species (Janka 1,820) with dramatic color variation from pale blonds to dark browns. Extremely durable but can be challenging to install due to its hardness.
- Walnut: A premium domestic species with rich chocolate-brown tones and elegant grain. Softer (Janka 1,010) than oak but highly prized for its natural beauty. Often used without stain.
Exotic Species
- Brazilian Cherry (Jatoba): Deep reddish-brown with exceptional hardness (Janka 2,350). Darkens significantly over time with light exposure.
- Acacia: Distinctive swirling grain with varied blonde to dark brown tones. Hard (Janka 1,750-2,300 depending on variety) and increasingly popular for unique aesthetics.
- Teak: Naturally oily, extremely moisture-resistant, and durable. Used in boats and outdoor settings but also makes stunning interior floors. Premium pricing.
- Bamboo (strand-woven): While technically a grass, strand-woven bamboo achieves Janka ratings over 3,000, making it one of the hardest floor board options available.
Plank Width Options
The width of your floor boards significantly affects the overall look of the room. Trends have shifted toward wider planks in recent years, but each width has its place.
- Narrow strip (2-1/4 inches): The traditional width that dominated American homes for decades. Creates a classic, formal look and works well in smaller rooms where wide planks can look out of proportion.
- Standard plank (3-1/4 to 5 inches): The most common width today. Balances a contemporary feel with broad compatibility across room sizes and design styles.
- Wide plank (5 to 8 inches): Popular in modern, farmhouse, and rustic interiors. Wider boards showcase the natural grain pattern beautifully but are more prone to cupping in solid wood. Engineered construction is recommended for planks wider than 5 inches.
- Extra-wide plank (8 to 12+ inches): A statement choice that creates a dramatic, open feel. Almost always engineered construction to maintain stability at this width.
Tongue-and-Groove vs. Other Joint Systems
Tongue-and-Groove
Tongue-and-groove is the standard joint system for wooden floor boards. One edge has a protruding tongue, and the opposite edge has a matching groove. The tongue slides into the groove, locking adjacent boards together and creating a tight, seamless joint. This system is used for both nail-down and glue-down installations.
Click-Lock
Many engineered boards use a click-lock (or snap-together) system that allows the planks to be installed as a floating floor without nails or glue. The boards interlock with an angled click at the edges and ends. This system is fast, DIY-friendly, and allows the floor to expand and contract as a unit.
Square-Edge
Square-edge boards have no interlocking profile and are installed by face-nailing through the surface. This is typical of reclaimed or antique-style floor boards and gives a historic, character-rich appearance. The nail holes become part of the aesthetic.
Installation Methods for Wooden Floor Boards
Nail-Down Installation
The traditional method for solid wood floors over a wooden subfloor. A pneumatic floor nailer drives cleats or staples through the tongue at an angle, securing each board to the subfloor. This method is fast, secure, and eliminates movement. It requires a minimum 3/4-inch plywood subfloor and is not suitable for concrete slabs.
Glue-Down Installation
Used for both solid and engineered boards installed over concrete or plywood. A flooring adhesive is troweled onto the substrate, and the boards are pressed into the adhesive. This creates a very rigid, quiet floor with minimal movement. It is the preferred method for wide-plank engineered boards over concrete.
Floating Installation
Engineered click-lock boards can be installed as a floating floor over an underlayment pad. The floor is not attached to the subfloor at all and moves as a single unit. This is the easiest DIY method and works over concrete, plywood, and even existing hard-surface flooring. Leave a 1/4-inch to 3/8-inch expansion gap around the perimeter, concealed by baseboards.
Sanding and Finishing Wooden Floor Boards
Unfinished vs. Prefinished Boards
Unfinished boards are sanded and finished on-site after installation. This allows you to choose any stain color and finish type, and the finish fills the joints between boards, creating a seamless, sealed surface. The downside is the dust, fumes, and extended project time (3-5 additional days for sanding and finishing).
Prefinished boards arrive from the factory already sanded, stained, and sealed with multiple coats of finish (often UV-cured aluminum oxide). They are ready to use immediately after installation, with no dust or fumes. The factory finish is typically harder and more durable than a site-applied finish. However, the joints between boards are not sealed, and the micro-bevel edges can collect dirt over time.
Finish Options
- Oil-based polyurethane: Warm, amber tone that deepens over time. Very durable. 2-3 coats recommended.
- Water-based polyurethane: Crystal-clear finish that preserves the natural color of the wood. Faster drying. 3 coats recommended.
- Hardwax oil: Penetrating finish with a matte, natural look. Easy to spot-repair. Requires periodic reapplication.
- Tung oil or Danish oil: Traditional penetrating oils that enhance grain and create a hand-rubbed appearance. Lower protection but beautiful character.
For detailed refinishing guidance, visit our hardwood flooring guide.
Pricing for Wooden Floor Boards
The cost of wooden floor boards varies widely based on species, construction type, width, finish, and grade.
Material Costs (Per Square Foot)
- Solid domestic oak (red or white): $4-$10
- Solid maple or hickory: $5-$12
- Solid walnut: $8-$15
- Solid exotic species: $7-$20+
- Engineered domestic oak: $3-$10
- Engineered wide-plank premium: $6-$14
Installation Costs (Per Square Foot)
- Nail-down: $3-$6
- Glue-down: $4-$7
- Floating: $2-$4 (or DIY)
- Sanding and finishing (unfinished boards): $3-$6
For a 500-square-foot room, expect to pay $3,500-$8,000 for a mid-range solid or engineered floor, professionally installed. DIY floating installation with prefinished engineered boards can bring the total down to $2,000-$4,000 in materials.
Maintenance and Care
- Sweep or vacuum regularly with a soft-bristle attachment to remove dirt and grit that scratches the finish.
- Clean with a damp microfiber mop and a pH-neutral hardwood floor cleaner. Avoid soaking the floor.
- Place felt pads under all furniture legs and replace them every six months.
- Use doormats at every entry to capture dirt, sand, and moisture.
- Maintain indoor humidity between 35% and 55% to minimize expansion and contraction.
- Recoat polyurethane finishes every 5-10 years and refinish when surface wear reaches bare wood.
- For hardwax-oiled floors, reapply oil in high-traffic areas every 1-2 years.
Wooden floor boards remain one of the most enduring and beautiful flooring choices available. Whether you choose solid oak in a traditional strip width or wide-plank engineered walnut, the warmth and character of real wood is hard to beat. For alternatives that replicate the wood look at lower cost, explore our guides on laminate flooring and luxury vinyl plank.
Prefer to explore on your own?
See how new flooring looks in your actual room in seconds — free, no signup.
Try the free Floor Studio →