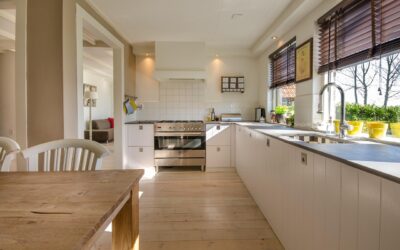
A wooden kitchen island is the hardest-working piece of furniture in most kitchens, delivering prep surface, storage, casual seating, and a warm natural centerpiece all at once. Whether you plan to buy a freestanding cart or build a custom fixed island, the choices you make about wood species, size, and countertop material shape both daily function and long-term durability. This guide breaks down everything you need to plan the right island for your space.
Part of our Kitchen Remodeling guide — explore the full guide →
- Why Choose Wood for a Kitchen Island
- Freestanding Cart vs. Built-In Island
- Choosing the Right Wood Species
- Grain Orientation Matters
- Standard Island Dimensions
- Seating and Overhang Requirements
- Countertop Options for a Wooden Base
- Building Your Own Wooden Island
- Finishing and Sealing the Wood
- Maintenance and Care
- Adding Storage and Function
- Electrical and Plumbing Considerations
- Lighting Above the Island
- Common Mistakes to Avoid
- Reclaimed and Sustainable Wood Choices
- Frequently Asked Questions
- Summary: Planning the Perfect Wooden Kitchen Island
Why Choose Wood for a Kitchen Island
Wood brings warmth that painted MDF and stainless steel cannot match, and it can be sanded and refinished repeatedly over decades. A solid wood or butcher-block island ages gracefully, hides minor dings, and pairs with nearly any cabinet color. Wood is also comparatively forgiving on dropped dishes and knife edges, making it a favorite work surface for serious home cooks who prep directly on the top.
Freestanding Cart vs. Built-In Island
Freestanding wooden islands and rolling carts cost $150 to $1,200, require no installation, and can move or come with you when you relocate. Built-in islands are anchored to the floor, often incorporate plumbing or electrical, and cost $3,000 to $10,000 installed but add lasting resale value. If your kitchen is under about 150 square feet, a compact cart may serve better; larger open kitchens justify a permanent island with seating and storage.
Choosing the Right Wood Species
Hard maple is the classic butcher-block choice: tight-grained, pale, and tough enough for chopping. Oak is affordable and shows bold grain. Walnut delivers rich dark color at a premium price. Cherry warms to a deep red over time. Acacia and teak resist moisture well. Avoid soft pine for the work surface since it dents easily, though pine works fine for a painted base. Expect maple butcher block to run $20 to $40 per square foot.
Grain Orientation Matters
Butcher-block tops come in three grain styles. Edge grain shows long boards on their side and balances cost and durability. End grain stands the wood fibers vertically like a true chopping block, self-heals knife marks, and costs the most. Face grain shows the widest flat boards and looks beautiful but scratches easily, so it suits decorative islands more than heavy prep stations. Match the grain to how hard you will actually work the surface.
Standard Island Dimensions
Plan a countertop height of 36 inches for standard prep and 42 inches for a raised bar. A minimum footprint of 24 by 40 inches makes a usable island; 36 by 60 inches is a comfortable target for prep plus seating. Critically, leave at least 36 to 42 inches of clear walkway on every side, and 48 inches on the working sink-and-range side, so two cooks can pass. If you cannot maintain 36 inches of clearance, the island is too big for the room.
Seating and Overhang Requirements
For comfortable stool seating, provide 24 inches of linear counter per person and a 12-inch countertop overhang so knees fit underneath. A 15-inch overhang is more generous but usually needs steel brackets or corbels for support. Standard counter-height islands at 36 inches pair with 24-inch stools, while 42-inch bar-height tops pair with 30-inch stools.
Countertop Options for a Wooden Base
You need not top a wooden island with wood. Many homeowners build a wooden base and cap it with granite, quartz, or butcher block. Quartz resists stains and needs no sealing. Granite handles heat well. Solid butcher block keeps the all-wood look but requires oiling. A popular hybrid puts durable quartz on the main run and a butcher-block section at one end for chopping, combining the best of both surfaces.
Building Your Own Wooden Island
A budget DIY approach starts with two or three stock base cabinets screwed back to back, skinned with beadboard or shiplap, and topped with a pre-made butcher-block slab. Anchor the cabinets to the floor with cleats. Add a 12-inch overhang supported by hidden steel brackets for seating. A capable DIYer can complete this over a weekend for $400 to $900 in materials, a fraction of a custom-built island.
Finishing and Sealing the Wood
How you finish depends on use. For a cutting surface, apply food-safe mineral oil or a beeswax-mineral oil blend, re-oiling monthly at first and then quarterly. For a decorative-only top, a hard varnish or polyurethane gives a wipeable, durable film but cannot be cut on. Never leave raw wood unsealed near a sink; unsealed end grain drinks water and will crack or blacken with mildew.
Maintenance and Care
Wipe spills promptly and never let standing water pool on the surface. Re-oil oiled tops when water stops beading, roughly every one to three months. Sand out deep scratches with 120-grit paper and re-oil. Disinfect a butcher block naturally with a coarse salt and lemon scrub or a light vinegar wipe. Keep the island out of direct, prolonged sunlight, which fades and dries the wood over time.
Adding Storage and Function
The interior of a wooden island can work as hard as your imagination allows. Open lower shelves suit cookbooks and baskets, while closed cabinets hide small appliances and pots. Consider deep drawers for pots and pans, a built-in wine rack, a towel bar on the end panel, or a spot to tuck a compact microwave. Some islands incorporate a butcher-block chopping station at one end and a hidden trash pull-out, turning the island into a true prep command center.
Electrical and Plumbing Considerations
If you want outlets, a prep sink, or a cooktop in your island, plan the utilities before the base goes in. US electrical code requires receptacles on most island counters, and running power means a licensed electrician fishing a circuit under the floor. A prep sink needs supply lines and a drain routed through the slab or crawlspace. These upgrades push a built-in island toward the higher end of the cost range but dramatically increase its usefulness for serious cooks.
Lighting Above the Island
An island deserves dedicated lighting both for function and to anchor the space visually. Pendant lights hung 30 to 36 inches above the countertop provide task light for prep and dining. As a spacing rule, plan one pendant per 24 to 30 inches of island length, so a 60-inch island suits two pendants and a 90-inch island suits three. Warm 2700K to 3000K bulbs flatter wood tones, and a dimmer lets the same fixtures shift from bright prep to soft dining light.
Common Mistakes to Avoid
The biggest planning error is oversizing the island until walkways choke below 36 inches, making the kitchen feel cramped. Others skimp on seating overhang and leave guests with no knee room, or seal a chopping surface with polyurethane that they then cut through. Forgetting to anchor a built-in island lets it rock. And treating soft pine as a work surface guarantees a dented, disappointing top within months.
Reclaimed and Sustainable Wood Choices
For a distinctive island with an environmental edge, reclaimed barn wood, salvaged flooring, or FSC-certified lumber deliver character and lower impact. Reclaimed boards often show old nail holes, saw marks, and a patina that new wood cannot fake, giving a built-in island genuine age. Just have salvaged wood checked and kiln-dried to kill insects and stabilize moisture before building. Sustainably harvested species like bamboo, though technically a grass, also make hard, attractive tops at a friendly price.
Frequently Asked Questions
Can I put a stovetop in a wooden island? Yes, but keep the cooktop set into a heat-resistant countertop insert like quartz or stone, never directly in raw wood, and maintain code clearances. Will a butcher-block top stain? Sealed and oiled wood resists stains, but standing tomato or beet juice can mark it if left; wipe promptly. How long does a wooden island last? A well-built, well-maintained solid-wood island easily lasts 20 to 30 years and can be refinished repeatedly.
Summary: Planning the Perfect Wooden Kitchen Island
A well-chosen wooden kitchen island transforms both the look and workflow of a kitchen, but success comes down to right-sizing the footprint, picking a wood species that matches your use, and sealing the surface correctly. Keep 36 to 42 inches of clearance on every side, plan a 12-inch overhang for stools, and decide honestly whether you need a movable cart or a permanent built-in. Care for the wood with regular oiling and it will serve as a beautiful, functional centerpiece for generations.