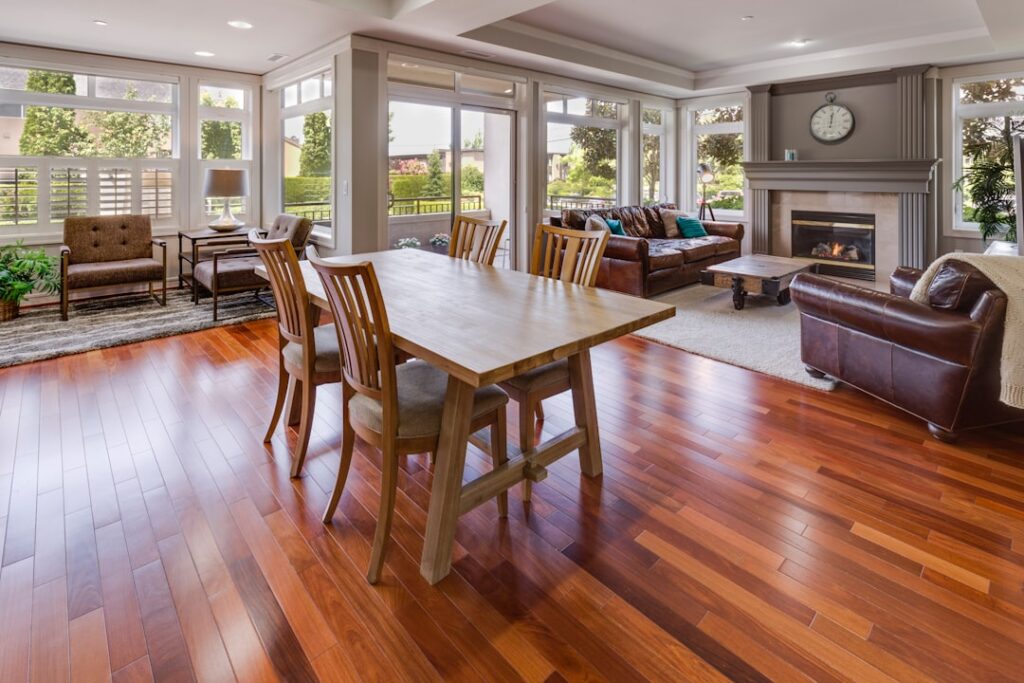
Narrow strip oak is the backbone of the American hardwood floor, and after 20 years of installing and refinishing it I still reach for it first when a client wants a floor that looks like it belongs. 2 inch wide red oak flooring — and its close cousin the 2-1/4 inch strip — is the classic width you see in mid-century homes, bungalows, and new construction that wants a timeless feel. It sands flat, takes stain evenly, and hides seasonal movement better than the wide planks everyone chases today.
If you are weighing this floor for a remodel or a new build, the width is only the start of the decision. You also have to sort out solid versus engineered, which grade to buy, how it gets fastened down, and what all of that actually costs installed. This guide walks through each of those in the order you will face them, with the numbers and details I give my own customers.
Why 2-Inch and 2-1/4 Inch Strip Is the Classic Choice
Strip flooring is defined by the trade as any board under 3 inches wide, and the 2-1/4 inch dimension has been the default for close to a century. The actual face you see on a 2-1/4 inch board is right around 2 inches once you account for the tongue, so the two sizes look almost identical on the floor. True 2 inch strip exists too, milled slightly narrower, and it reads as even more traditional and fine-grained underfoot.
The narrow width is not just an aesthetic preference. Wood expands and contracts across its width with humidity, so a 2 inch board moves far less at each seam than a 5 or 7 inch plank. That means fewer noticeable gaps in a dry winter and less cupping in a humid summer. In a home without tight climate control, narrow strip is genuinely the more forgiving floor, which is a big part of why it has survived so long.
Red oak specifically gives you a warm, slightly pinkish tone and a pronounced open grain that camouflages dust and minor dents. It is a touch softer than white oak on the Janka scale — about 1,290 versus 1,360 — but it stains more readily and hides wear better in a busy household. For most families it is the more practical of the two oaks.
Solid vs. Engineered 2-Inch Red Oak
Solid red oak strip is a single piece of wood, typically 3/4 inch thick, tongue-and-groove milled on all four edges. Its great advantage is longevity: a 3/4 inch board has enough material above the tongue to be sanded and refinished six or more times, which realistically means a lifetime of service and then some. This is the product in almost every old home you admire, and it is still the standard for above-grade installs over a wood subfloor.
Engineered red oak uses a thinner veneer of real oak — usually 2mm to 4mm — bonded over a plywood or high-density core. It is more dimensionally stable, so it tolerates concrete slabs, basements, and radiant heat far better than solid wood. The tradeoff is fewer refinishes; a 2mm wear layer generally gives you one careful sanding, maybe two. In narrow strip, engineered is less common than in wide plank, but it is available and worth considering if you are going over concrete.
My rule of thumb: if you are on or above grade over a plywood or OSB subfloor, buy solid 3/4 inch and never look back. If you are on a slab, in a basement, or over hydronic radiant heat, spend the money on a quality engineered strip with a thick wear layer instead of fighting physics with solid wood.
Understanding Red Oak Grades
Grade describes appearance, not strength — every grade of red oak is equally sound structurally. The cleanest and most expensive is Select and Better, sometimes called clear, which shows long boards, minimal color variation, and very few knots or streaks. It gives a formal, uniform look and costs the most because more of each log is rejected to produce it.
Number 1 Common is the workhorse grade and my most-recommended for real homes. It shows moderate color variation, some small knots, mineral streaks, and shorter board lengths mixed in. On a finished floor it reads as character rather than defect, and it costs meaningfully less than Select. Number 2 Common goes further still, with more knots, wider color swings, and more short pieces — a great rustic look and the best value per square foot if you like that busier, cabin-style floor.
There is also a shorts or “utility” bundle sold at a discount, made of the short offcuts. For a closet, a small hallway, or a budget project it can stretch your dollar, but you will have more end joints to nail and it takes patience to lay out well. Match your grade to your room: Select for a formal entry, Number 1 Common for the whole-house standard, Number 2 for a den or a deliberately rustic space.
Nail-Down Installation Step by Step
Solid 3/4 inch strip is installed by nailing or stapling through the tongue into a wood subfloor, and it is the single most important reason these floors last. The boards need to acclimate in the room for at least three to five days first, stacked so air moves around them, so their moisture content settles within about 2 to 4 percentage points of the subfloor. Skipping acclimation is the number one cause of gaps and cupping I get called to fix.
Start by rolling out a vapor-retarding underlayment paper, then snap a chalk line for your first course, leaving a 1/2 to 3/4 inch expansion gap at every wall that the baseboard will hide. The first two or three rows near the wall are face-nailed or blind-nailed by hand because a pneumatic floor nailer will not fit tight to the wall. Once you have room, a flooring nailer or stapler driven with a mallet sets fasteners through the tongue every 8 to 10 inches and at every board end.
Rack out several rows ahead of yourself, staggering end joints at least 6 inches from row to row and mixing board lengths and colors from several bundles so no obvious pattern forms. Snug each board to the last with a tapping block, never by hitting the tongue directly. Work steadily; a first-timer might lay 100 to 150 square feet in a day, while a two-person crew will do a whole main floor in that time.
Sanding and Finishing Unfinished Red Oak
If you buy unfinished strip — still common and often cheaper than prefinished — you sand and finish it in place, which is a real advantage because it produces a perfectly flat, seamless surface with no micro-bevels between boards. The sanding sequence runs coarse to fine: a drum or belt sander with 36 or 40 grit to flatten, then 60, then 80 or 100 grit, with an edger following behind at the walls and a buffer screen at 120 grit to blend everything before finishing.
Red oak takes stain beautifully thanks to its open pores, so this is your chance to dial in any color from a natural clear to a deep walnut or a fashionable white-oak-mimicking gray. Apply stain evenly, wipe the excess within a few minutes, and let it dry overnight — typically 8 to 24 hours depending on product and humidity — before topcoating.
For the finish itself, oil-based polyurethane is the durable, amber-toned classic and runs two to three coats with 4 to 8 hours of dry time between, plus light buffing. Water-based poly dries faster, stays clear, and lets you recoat the same day, but usually wants an extra coat for equal wear. Either way, keep foot traffic off for at least 24 hours and hold furniture back for a few days while the finish fully cures.
What 2-Inch Red Oak Flooring Costs
Material for solid unfinished 2 inch or 2-1/4 inch red oak strip typically runs about $3 to $6 per square foot depending on grade, with Number 1 Common landing in the middle of that range and Select pushing the top. Prefinished solid strip costs a bit more, roughly $4 to $8, because the factory finish and aluminum-oxide wear layer are baked in. Engineered narrow strip overlaps at around $4 to $9 per square foot.
Professional installation for nail-down strip generally adds $3 to $6 per square foot, and if you are buying unfinished and having it sanded and finished on site, add another $3 to $5 for that labor and materials. All in, a professionally installed and site-finished solid red oak floor commonly lands between $8 and $14 per square foot, while a DIY nail-down of prefinished strip can come in closer to $5 to $9 if you own or rent the tools.
Budget for waste, too. Order about 5 percent extra on a simple rectangular room and 10 percent for rooms with lots of angles, closets, or diagonal layouts, since every cut end and defect you set aside adds up. It is far cheaper to have a few leftover boards for future repairs than to run short and chase a dye-lot match later.
Is 2-Inch Red Oak Right for Your Home?
For the vast majority of above-grade homes, a solid 3/4 inch red oak strip floor is one of the smartest flooring investments you can make. It looks appropriate in almost any style, it can be refinished for generations, and its narrow width quietly manages the seasonal movement that makes wide planks so finicky. The classic proportions simply never go out of fashion.
Choose engineered only when your subfloor demands it, pick your grade to match the formality of the room, and do not cut corners on acclimation or fastening schedule. Get those fundamentals right and a 2 inch red oak floor will still be flattening under a sander and coming back to life long after most modern flooring has been hauled to the curb. That durability, more than any trend, is why this humble strip remains the standard by which other wood floors are judged.
Prefer to explore on your own?
See how new flooring looks in your actual room in seconds — free, no signup.
Try the free Floor Studio →