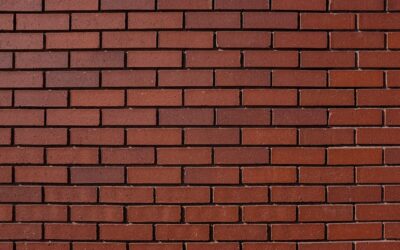
A mudroom takes more abuse per square foot than any other floor in the house: wet boots, rock salt, sand, dog paws and the occasional dropped shovel. A brick mudroom floor handles that punishment better than most materials because fired clay is hard, fireproof and naturally mottled, so a dusting of dirt simply blends into the color variation. Modern thin brick, cut about 1/2 inch thick, installs like tile, so you get the farmhouse look without the weight and height of full bricks.
For most homes the best setup is thin brick set in thinset over a stable substrate, grouted with a cement-based mortar or grout, and sealed with a penetrating masonry sealer. Add a recessed or full-size drain mat by the door and a boot tray for slush, and the floor can last for decades with little more than sweeping and an occasional damp mop.
Brick is not perfect. It is more porous than porcelain, can feel cold underfoot and needs resealing every few years in a high-salt climate. Still, for a mudroom, those tradeoffs are easy to manage compared with scratched wood, peeling vinyl or light tile that shows every footprint.
Why a Brick Mudroom Floor Works So Well
Three traits make brick a natural fit for an entry floor. First, color variation: a classic red, brown or tumbled blend has flecks and tonal shifts that disguise mud, grit and water spots. Second, hardness: quality floor brick is fired at high temperature and resists abrasion from sand and salt crystals far better than softer stones or wood. Third, texture: the slightly rough, matte face offers more grip than glazed tile when the floor is wet.
Brick also pairs well with a lot of styles. A herringbone brick mudroom floor reads as traditional and cottage-like, while a running bond in a gray or whitewashed brick feels more modern. Because the pieces are small, they handle out-of-square rooms and floor transitions gracefully.
Thin brick vs full pavers
Thin brick tiles are typically about 1/2 to 3/4 inch thick and weigh far less than full pavers. They fit over a standard subfloor with cement board or an uncoupling membrane and keep the finished floor height close to adjoining rooms. Full-thickness pavers, roughly 1 1/4 to 2 1/4 inches, need a stronger structure or a slab and usually a mortar bed. For an existing house, thin brick is almost always the practical choice. Make sure the product is rated for floor use, not just walls, since wall-only veneers may be too soft.
Sealed vs Unsealed Brick in a Mudroom
Unsealed brick absorbs water, salt brine and oily stains. In a mudroom that leads to white salt bloom, darkened traffic paths and grout that looks dirty within a season. A sealed brick floor resists these problems and cleans up much faster, which is why most installers recommend sealing for entry areas.
- Penetrating sealer: soaks into the brick and grout, keeps the natural matte look, and does not make the floor slippery. Best for most mudrooms.
- Topical or film-forming sealer: adds sheen and color depth but can scuff, turn cloudy under salt and become slick when wet.
- Color-enhancing penetrating sealer: deepens the reds and browns while keeping traction close to natural.
Plan on applying a masonry sealer before grouting (as a grout release) and again after the grout cures. In snowy regions, reseal every two to three years or whenever water stops beading on the surface. A simple test: drip a little water in a traffic lane; if it darkens the brick within a minute, it is time to reseal.
Planning the Layout, Pattern and Drain Mat
Good mudroom planning starts at the door. Map where people stop to kick off boots and where wet gear drips. That zone should get a durable recessed mat or a heavy rubber-backed boot mat sized for at least two full steps, about 3 by 5 feet in a family entry. A recessed mat well, framed into the floor during installation, keeps the mat flush so it never becomes a trip hazard.
Choosing a pattern
- Running bond: simplest, fastest and least waste.
- Herringbone: classic and busy enough to hide dirt, but needs more cuts.
- Basketweave: traditional and forgiving in small rooms.
- Stack bond: modern, but shows misaligned joints, so it needs careful layout.
Run the long direction of the pattern toward the main door or along the longest wall. Dry-lay a few rows to check how cuts fall at the threshold and at cabinets or benches. Keep grout joints around 3/8 to 1/2 inch for an authentic brick look. Mid-tone gray or sand-colored grout hides dirt far better than bright white.
If the mudroom sits on a slab and gets a lot of melting snow, consider a slight slope toward the door or toward a floor drain, but only with proper planning. A drain must be tied into plumbing by a licensed plumber, and sloping a floor is easiest when built into a new mortar bed.
Tools and Materials
- Thin brick floor tiles plus 10 to 15 percent overage for cuts and pattern waste
- Cement board or uncoupling membrane over a stiff subfloor, or a clean, cured slab
- Polymer-modified thinset and a 1/4 by 3/8 inch notched trowel
- Wet saw with a masonry blade and an angle grinder for notches
- Grout bag, jointing tool or sanded grout and float
- Penetrating masonry sealer, applicator pad and lint-free rags
- Kneepads, gloves, safety glasses and an N95 or better mask for cutting
Installation Steps
- Check the structure. Brick and mortar add weight. Make sure joists are sound and the subfloor does not flex; add blocking or a second subfloor layer if needed.
- Prep the substrate. Install cement board or an uncoupling membrane per its instructions, or clean and patch a slab.
- Snap layout lines. Start from the center of the main traffic path and square to the door.
- Cut wet. Use a wet saw for brick cuts to keep silica dust down, and work outdoors or with a shop vacuum fitted with a HEPA filter.
- Set the brick. Spread thinset, back-butter each piece, and press with a slight twist. Check flatness often, since thin brick varies more than porcelain.
- Pre-seal. After the thinset cures, apply a light coat of penetrating sealer to brick faces so grout cleans off easily.
- Grout. Bag the joints for a classic mortar look or float sanded grout, tool the joints and clean haze promptly.
- Final seal. Once the grout cures, usually a few days, apply the final masonry sealer coats.
Safety Notes
Cutting brick creates fine crystalline silica dust, which is harmful to lungs. Always cut wet, wear an N95 or P100 respirator, and clean with a HEPA vacuum rather than dry sweeping. Many masonry sealers contain solvents. Ventilate well, wear the gloves and eye protection the label specifies, and keep vapors away from pilot lights and furnaces in nearby utility rooms. Never mix sealers, acids or efflorescence cleaners. Keep mats flat with non-slip backing and edges that lie down, and remove any curling mat right away.
Troubleshooting and Maintenance
- White powder on the surface: efflorescence or salt residue. Scrub with clean water and a stiff brush; use a masonry efflorescence cleaner only per the label, then reseal.
- Dark traffic lanes: sealer has worn away. Clean thoroughly and reseal that area.
- Loose or hollow bricks: poor coverage or a flexing subfloor. Remove, clean and reset with fresh thinset.
- Slippery when wet: a glossy topical sealer is the usual cause. Strip it and switch to a penetrating sealer.
Day to day, sweep or vacuum grit before it grinds into the surface, and damp mop with a pH-neutral cleaner. Avoid acidic cleaners, which attack grout and strip sealers.
Cost Ranges
Thin brick floor tile typically costs more per square foot than basic ceramic but less than many natural stones. Installed prices often land in a moderate range per square foot, rising for herringbone or basketweave layouts that take more cutting and labor. A small 40 to 60 square foot mudroom often comes in somewhere in the low thousands installed, while a large entry with built-ins and a recessed mat well costs more. Sealer and maintenance add a small yearly expense.
When to Call a Pro
Hire a tile or masonry installer if your floor needs structural reinforcement, if you want a slope or a floor drain, or if you are setting full-thickness pavers on a mortar bed. A licensed plumber must handle any drain connection. Older homes deserve one more check: flooring and adhesives installed before the 1980s may contain asbestos, so test before tearing them out. For a straightforward thin brick install over a solid, flat floor, an experienced DIYer can build a brick mudroom floor that hides dirt and lasts for decades.
Frequently Asked Questions
Is brick a good floor for a mudroom?
Yes. Brick is hard, slip resistant when matte and naturally mottled, so it hides mud and holds up to boots, salt and pets better than most floors.
Should I seal brick flooring in a mudroom?
Sealing is strongly recommended. A penetrating masonry sealer blocks salt brine and stains without making the surface slick.
Can thin brick go over a wood subfloor?
It can, as long as the subfloor is stiff and covered with cement board or an uncoupling membrane rated for tile and stone.
Does a brick floor feel cold?
Brick stays cooler than wood or vinyl. Electric radiant floor heat under the brick or a washable runner makes it comfortable in winter.
How often should I reseal a mudroom brick floor?
Every two to three years in snowy climates, or whenever water soaks in instead of beading on the surface.
Prefer to explore on your own?
See how new flooring looks in your actual room in seconds — free, no signup.
Try the free Floor Studio →