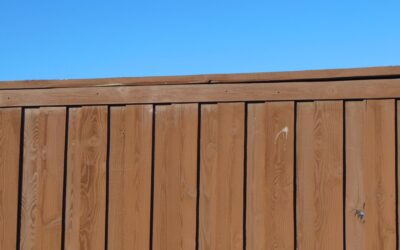
Cedar is naturally rot resistant, which leads many homeowners to assume it needs no care at all. Leave it alone and it will last a while, but it will also gray, check, cup and grow mildew years sooner than it should. Good cedar fence maintenance comes down to a predictable rhythm: a light inspection and rinse every year, a deeper clean and brightening every few years, and a fresh coat of sealer or stain on a schedule that matches your climate and the product you used.
Part of our Decks & Outdoor guide — explore the full guide →
The short version: wait for new cedar to dry (often a few weeks to a few months), seal or stain it in the first year, wash it every spring, recoat clear and toner sealers every 1 to 2 years and semi-transparent stains every 2 to 4 years, and check posts and fasteners annually. Repairs caught early cost a few dollars in screws; repairs caught late cost new posts.
Cedar Fence Maintenance Schedule by Year
Use this table as a planning calendar. Intervals vary with sun exposure, rainfall and finish type, and the cost ranges are general DIY figures for a typical 150 to 200 linear foot backyard fence, with pro ranges noted where useful.
| When | Task | Why it matters | General cost |
|---|---|---|---|
| Install to month 3 | Let new wood dry; check moisture before finishing | Sealer will not soak into wet or mill-glazed wood | Free; a moisture meter is inexpensive |
| Year 1 | Clean, brighten, apply first sealer or stain | Locks in color and slows checking and graying | Roughly $150 to $500 DIY; $800 to $2,500 pro |
| Every spring | Rinse, inspect boards, posts, gate and fasteners | Catches loose boards, rot and mildew early | Under $50 in hardware |
| Every 1 to 2 years | Recoat clear or toner sealer | Clear finishes break down fast in UV | Roughly $100 to $350 DIY |
| Every 2 to 4 years | Clean, brighten, recoat semi-transparent stain | Pigment protects longer against sun | Roughly $150 to $500 DIY; $800 to $2,500 pro |
| Every 3 to 5 years | Replace damaged boards, tighten or swap rusted fasteners | Prevents sagging sections and gate drift | A few dollars to $15 per board |
| Year 10 and on | Assess posts for rot at grade; reset or replace as needed | Post base is where most fences fail | Roughly $150 to $400 per post by a pro |
Tools and Materials
- Garden hose with a spray nozzle, or a pressure washer used at low pressure with a wide fan tip
- Oxygen-based wood cleaner (sodium percarbonate type) for gray and mildewed wood
- Oxalic acid wood brightener to restore color and neutralize the cleaner
- Stiff synthetic-bristle brush on a pole
- Penetrating oil-based or water-based fence sealer or semi-transparent stain
- Pump sprayer or fence stain sprayer plus a brush for back-brushing
- Exterior-rated stainless or hot-dip galvanized screws or ring-shank nails
- Chemical-resistant gloves, safety glasses, and a respirator rated for the product label
- Drop cloths or plastic to protect plants, siding and hardscape
Safety Before You Start
Cleaners, brighteners and stains are chemicals, and the fumes and splashes deserve respect. Work outdoors with good airflow, wear gloves and eye protection, and use a respirator if the product label calls for one, especially when spraying. Never mix chemicals: apply the cleaner, rinse thoroughly, then apply the brightener as a separate step. Bleach in particular should never be combined with other cleaners and is hard on cedar fibers anyway.
Oil-based stains and their vapors are flammable. Keep them away from pilot lights, grills, fire pits and running equipment. Rags soaked in oil-based finish can self-heat and catch fire, so spread them flat outdoors to dry or store them in a sealed metal container filled with water before disposal. Wet down nearby plants before and after applying cleaners, and keep children and pets away until surfaces dry.
Step-by-Step Annual and Recoat Routine
1. Inspect the whole fence
Walk the line every spring. Push on each post near the top; any that rocks more than slightly needs attention. Probe the base of posts at soil level with a screwdriver: soft, punky wood means rot. Look for split or cupped boards, popped nails, rusted fasteners, sagging rails and a gate that drags.
2. Rinse and clean
For routine years, a hose rinse and a soft scrub remove pollen, dust and light mildew. For a recoat year, wet the fence, apply oxygen cleaner per the label, let it dwell 10 to 15 minutes without drying, scrub, then rinse. If you use a pressure washer, stay at the low end (often 500 to 1,200 psi for softwood), keep the tip 12 inches or more from the surface, and move with the grain. Cedar is soft, and high pressure raises fuzz and gouges the boards.
3. Brighten
Apply an oxalic acid brightener while the wood is still damp from rinsing. It restores the warm tone, removes tannin stains and rust marks, and balances the pH after the cleaner. Rinse well.
4. Let it dry
Allow 24 to 48 hours of dry weather, longer in humid climates. Wood should feel dry and look evenly light. A moisture meter reading under about 15 percent is a good target for most penetrating finishes; follow your product’s guidance.
5. Make repairs
Drive new exterior screws next to popped nails rather than renailing the same hole. Replace badly split boards with matching cedar. Square a sagging gate with a turnbuckle and cable kit or an added diagonal brace.
6. Apply sealer or stain
Work in shade or on an overcast day between roughly 50°F and 90°F, with no rain forecast for 24 hours. Spray a section, then back-brush immediately to push the finish into the grain and catch drips. Apply one coat for most penetrating products; a second wet-on-wet coat only if the label allows. Avoid film-forming coatings that sit on top; they peel on fences and are hard to redo.
Choosing a Finish and How Long It Lasts
The finish you choose sets the length of your recoat cycle. Clear water repellents protect against moisture but let UV gray the wood, so they need attention every year or two. Toners and lightly tinted sealers add a little pigment and stretch to about 1 to 3 years. Semi-transparent stains, the most popular choice for cedar, show the grain while blocking more sun, and usually last 2 to 4 years on vertical boards. Solid stains last longest (often 4 to 6 years) but hide the grain and can peel if applied too thick.
South and west sides of the fence weather fastest. Many homeowners spot-treat those faces a year sooner than the shaded side, which keeps the whole fence looking even without full recoats every time.
Troubleshooting Common Cedar Fence Problems
- Black spots or green film: mildew or algae. Clean with oxygen cleaner, improve airflow by trimming plants back, and use a finish with mildewcide.
- Silver-gray boards: UV breakdown of the surface fibers. Clean and brighten; the color usually returns underneath.
- Dark streaks under nails: tannin reacting with steel. Use stainless or coated fasteners and treat stains with oxalic brightener.
- Peeling finish: a film-forming product or a coat applied too heavily. Strip it, then switch to a penetrating finish.
- Cupping or warping boards: uneven moisture. Sealing both faces evenly reduces it; badly cupped boards are best replaced.
- Leaning posts: rot at grade or frost heave. Brace temporarily and plan a post repair or replacement.
- Fuzzy, rough wood after washing: too much pressure. Let it dry and lightly sand the worst spots before finishing.
Cedar Fence Maintenance Costs Over Time
A well-kept cedar fence often lasts 15 to 30 years, compared with considerably less for an unfinished one. Over a 10-year span, budget for three or four recoat cycles, a handful of replacement boards and possibly one or two post repairs. DIY, that is often a few hundred dollars per cycle in cleaner, brightener and stain. Professional cleaning and staining typically runs from under a dollar to a few dollars per square foot of fence face, depending on height, condition and region. Compared with the cost of replacing a fence outright, a steady cedar fence maintenance routine is easily the cheapest way to extend its life.
When to Call a Pro
Hire a fence contractor when several posts are rotted at once, when a section leans more than a few inches, or when the gate frame has racked badly. Posts set in concrete need digging out, and before you dig any new post hole, call 811 so underground utilities are marked. Check local rules and HOA guidelines on fence height and placement before replacing whole sections. A painting or staining contractor makes sense for long runs, two-sided finishing on tall privacy fences, or when you would rather not handle cleaners and solvent-based stains yourself.
Frequently Asked Questions
How often should a cedar fence be sealed?
Clear and toner sealers typically need recoating every 1 to 2 years, semi-transparent stains every 2 to 4 years, and solid stains every 4 to 6 years, depending on sun and climate.
Should I pressure wash a cedar fence?
Only gently. Use low pressure, a wide fan tip and keep the nozzle at least 12 inches away. A hose, oxygen cleaner and a brush are often enough.
How long should new cedar dry before staining?
Often a few weeks to a few months, depending on how wet the lumber was and your weather. Test with a moisture meter or sprinkle water: if it soaks in quickly, the wood is ready.
Can I let my cedar fence go gray?
Yes, some people like the silver look. The wood still needs cleaning and fastener checks, and unfinished cedar tends to check, cup and grow mildew sooner.
What is the best way to clean mildew off cedar?
Use an oxygen-based wood cleaner, scrub with a soft brush, rinse, and follow with an oxalic acid brightener. Avoid chlorine bleach, which damages fibers.
How long does a cedar fence last?
With regular maintenance, many cedar fences last 15 to 30 years. Posts in wet soil usually fail first, so inspect them every year.