A backsplash is one of the highest-impact, lowest-cost upgrades you can make in a bathroom — a small strip of material behind the sink that protects the wall from splashes while completely changing the room’s personality. The best part is that a great-looking backsplash does not require a contractor or a big budget. These cheap bathroom backsplash ideas prove you can get a designer look for well under a couple hundred dollars, often in a single weekend, using materials from any home center. Whether you want the timeless charm of subway tile or the instant gratification of peel-and-stick, there is an affordable option that fits your skill level and your wallet.
Part of our Bathroom Remodeling & Flooring guide — explore the full guide →
This guide walks through the best budget backsplash materials, what each really costs, and the tips that make a cheap backsplash look expensive.
Peel-and-Stick Tile: Fastest and Cheapest
If you want maximum change for minimum effort, peel-and-stick backsplash is hard to beat. These adhesive-backed panels and tiles come in vinyl, gel, and thin metal or stone-look versions that mimic real subway tile, mosaic, and marble. You cut them with scissors or a utility knife and press them onto a clean, dry wall — no thinset, no grout, no wet saw.
Expect to pay $5 to $12 per square foot, and a typical vanity backsplash uses only a few square feet, so the whole project often lands between $20 and $60. Peel-and-stick is ideal for renters and first-time DIYers, and while it is not as durable as real tile over decades, in a low-splash bathroom it holds up well and can be removed later.
Classic Subway Tile on a Budget
Real ceramic subway tile is one of the cheapest genuine tiles you can buy, often just $0.20 to $0.50 per tile or under $2 per square foot. Behind a bathroom vanity, you only need a small area, so the material cost for real tile can be as low as $15 to $40. Installing it yourself with premixed thinset or mastic and a small bag of grout keeps labor free.
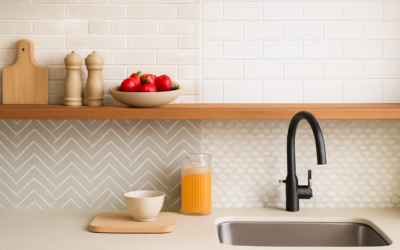
To make budget subway tile look upscale, pay attention to two details: choose a grout color that either matches for a seamless look or contrasts for a graphic one, and lay the tile in a considered pattern — a vertical stack or herringbone reads more custom than a plain running bond. The tile itself is cheap; the styling makes it look expensive.
Beadboard and Wainscoting Panels
For a cottage or traditional bathroom, beadboard paneling behind the sink is a warm, budget-friendly alternative to tile. A 4-by-8-foot sheet of MDF or PVC beadboard runs $20 to $40 and covers a generous area. Cut it to height, glue and nail it to the wall, cap it with a thin chair-rail molding, and paint it in a durable semi-gloss to resist moisture. PVC versions are fully waterproof and ideal near water.
The finished look — crisp vertical lines topped with trim — reads far more expensive than the material cost suggests, and it is one of the more forgiving projects for a beginner.
More Affordable Backsplash Options
Beyond the top three, several other materials deliver a lot of style for little money. Each suits a different aesthetic:
- Glass mosaic sheets: Mesh-backed mosaics install quickly and add sparkle; sheets run $5 to $15 each and a small vanity needs only a few.
- Penny tile: Vintage charm on mesh sheets for a classic bathroom look at a modest price.
- Painted accent wall: A durable semi-gloss or a moisture-rated paint in a bold color behind the sink costs only the price of a sample pot.
- Board-and-batten: Thin strips of trim over painted drywall create architectural texture for the cost of a few pieces of lumber.
- Reclaimed or shiplap boards: Sealed against moisture, they bring rustic warmth cheaply.
Cost Comparison at a Glance
Here is roughly what each option costs for a typical small vanity backsplash, materials only:
- Peel-and-stick tile: $20 to $60.
- Real ceramic subway tile: $15 to $50 plus thinset and grout.
- Beadboard paneling: $25 to $60 with trim.
- Glass mosaic sheets: $30 to $75.
- Painted accent or board-and-batten: $10 to $40.
Even the priciest of these comes in under $100 for a standard vanity, which is why a backsplash refresh is such a satisfying, low-risk project.
Tips to Make a Cheap Backsplash Look Expensive
The secret to a budget backsplash that reads high-end is in the finishing. Take your time on the edges — a clean bead of paintable caulk where the backsplash meets the countertop, wall, and any trim hides the transitions and makes everything look intentional. Keep your lines straight by measuring, marking a level reference line, and dry-fitting before you commit. And do not skimp on the top edge: a thin metal trim strip, a bullnose tile, or a piece of molding caps the backsplash cleanly instead of leaving a raw edge.
Color and pattern discipline matter too. A restrained palette and a deliberate layout look more custom than a busy mix of materials. When in doubt, keep it simple and let good workmanship carry the look.
Matching the Backsplash to Your Bathroom Style
A cheap backsplash looks best when it fits the room it lives in rather than fighting it. In a modern bathroom with a floating vanity and matte-black fixtures, a stacked white subway tile or a solid painted band keeps the clean, minimal feel. In a farmhouse or cottage bath, beadboard or a small penny tile reinforces the traditional character. A powder room can handle something bolder — a graphic peel-and-stick pattern or a moody paint color makes a small space memorable without much cost. The trick is to echo a finish or color that already exists in the room, whether that is the faucet metal, the mirror frame, or the shower tile, so the new backsplash feels connected rather than tacked on. That sense of intention, more than the price of the material, is what makes a budget backsplash look designed.
The Bottom Line
You do not need a remodeling budget to transform a bathroom. These cheap bathroom backsplash ideas — from five-minute peel-and-stick to classic subway tile to painted beadboard — deliver real style for the price of a nice dinner, and most are within reach of a first-time DIYer. Pick the material that matches your bathroom’s character and your comfort with tools, focus on clean edges and straight lines, and you will end up with a backsplash that looks like it cost far more than it did.