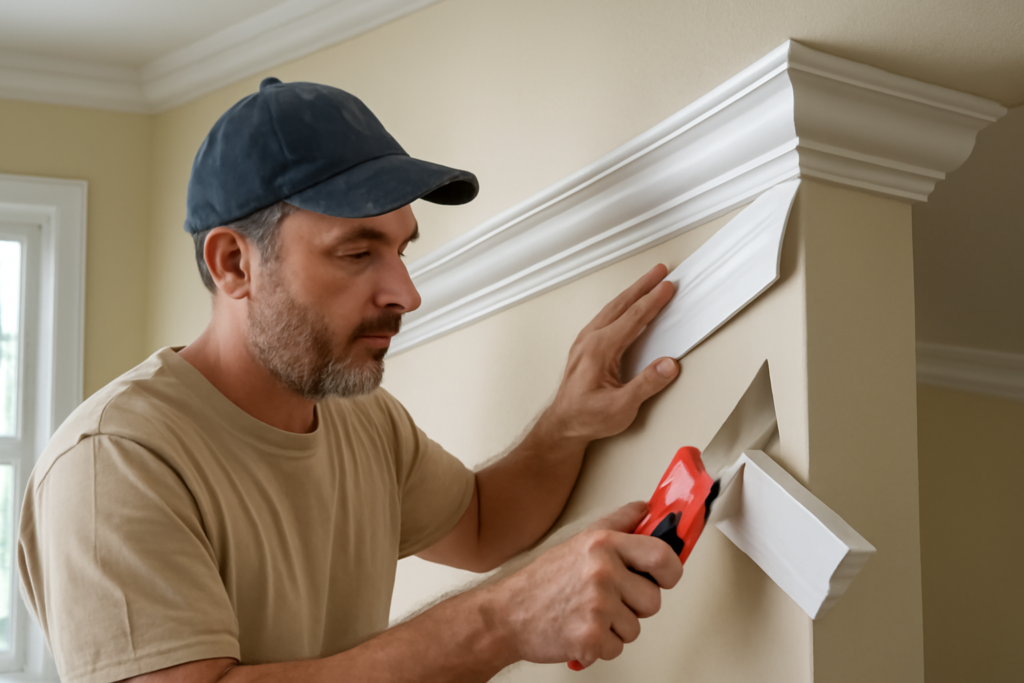
Crown molding installation is the finishing detail that gives a room architectural weight, softening the harsh line where walls meet the ceiling and lending even a plain box of a room a sense of craftsmanship and permanence. It is also the trim carpentry project that intimidates homeowners most, because the angled corners require careful cutting and a bit of geometry. Master the corners, and the rest is straightforward measuring and nailing. This guide breaks down the tools, techniques, and sequence so you can hang crown that looks professionally done.
- Understanding Crown Molding Angles
- Tools and Materials You'll Need
- Choosing Your Molding Material
- Measuring and Planning the Room
- Cutting Inside Corners: Cope or Miter
- Cutting Outside Corners
- Nailing It Up
- Filling, Caulking, and Finishing
- What Crown Molding Installation Costs
- Working With Uneven Walls and Ceilings
- Design Choices: Size, Style, and Where to Use It
- Final Tips for Success
Understanding Crown Molding Angles
Crown molding is unique because it sits at an angle spanning the wall and the ceiling, not flat against either surface. Most crown has a spring angle of 38 or 45 degrees, which describes how it tilts away from the wall. This angle is why cutting it is tricky: you cannot just miter it flat like baseboard. There are two approaches. You can cut it nested, held upside down and backward in the miter saw at its spring angle against the fence, replicating how it sits on the wall. Or you can lay it flat and use compound miter angles from a reference chart. Nesting is more intuitive for beginners because what you see is what you get.
Tools and Materials You’ll Need
- Compound miter saw (a sliding model helps with wide crown)
- Coping saw for inside corners
- Brad or finish nailer with 2-inch to 2.5-inch nails, or hammer and finish nails
- Stud finder, tape measure, pencil, and a good ladder
- Painter’s caulk, wood filler, and touch-up paint
- A miter angle finder or protractor for out-of-square corners
Choosing Your Molding Material
Crown comes in several materials at different price points. MDF is smooth, affordable, and paints beautifully, but it dents and cannot get wet. Primed pine and poplar are lightweight, easy to cut, and can be stained or painted. Solid hardwoods like oak suit stained, natural finishes. Polyurethane and polystyrene foam crown is lightweight, moisture-proof, and easy to install with adhesive, ideal for bathrooms and for beginners since it cuts cleanly and forgives small gaps. For most painted interior rooms, MDF or primed pine offers the best balance of cost and workability.
Measuring and Planning the Room
Start by measuring the perimeter of the room and sketching it, noting each corner as inside or outside. Buy 10 to 15 percent extra material to cover miscuts and future repairs. Locate and mark the ceiling joists and wall studs, because crown must be nailed into solid framing, not just drywall. Where a run is longer than your molding stock, you will need a scarf joint, two pieces joined with matching 45-degree bevels that overlap for a nearly invisible seam. Plan your starting wall so that the least visible corner from the doorway gets any imperfect joints.
Cutting Inside Corners: Cope or Miter
Inside corners are the crux of a clean crown job. You have two options:
- Mitered inside corners — Cut both pieces at opposing 45-degree angles. Fast, but gaps open up if the walls are not exactly 90 degrees, which they rarely are.
- Coped inside corners — Cut the first piece square into the corner and run it wall-to-wall. Miter the second piece, then use a coping saw to cut along the profile line, removing the back so the piece nests tightly over the face of the first. Coped joints stay tight even when corners are out of square and as the house shifts.
Coping takes practice but is what separates amateur from professional results. Most experienced installers cope every inside corner.
Cutting Outside Corners
Outside corners, where a wall juts out, are cut with opposing miters that wrap around the corner. Always test-fit before nailing, because few corners are a true 90 degrees. Use a bevel gauge or angle finder to measure the actual corner, then split that angle between the two pieces. Cut slightly long and trim in small increments, since it is easy to remove more material but impossible to add it back. For a crisp outside corner, some installers glue the mitered joint before nailing so it never opens.
Nailing It Up
With pieces cut, install them working around the room. Start with a wall that has two coped ends receiving it, or a wall you cope into on one end. Hold the crown at its spring angle against the wall and ceiling and nail into the studs along the bottom edge and into the ceiling joists or top plate along the top edge. Space nails every 16 inches to hit framing, and add nails near every joint. Where there is no backing at the top, install triangular nailer blocks in advance or use construction adhesive to supplement. Have a helper support long pieces so they do not sag or snap.
Filling, Caulking, and Finishing
Once the crown is up, the finishing makes it look built-in. Fill every nail hole with wood filler, let it dry, and sand smooth. Run a thin bead of paintable caulk along the top edge where crown meets ceiling and the bottom edge where it meets the wall, tooling it smooth with a damp finger to erase the shadow lines and hide small gaps. Caulk any hairline gaps at the corners too. Then prime any bare filler and paint. This caulking step hides the minor imperfections that are inevitable when working against wavy walls and ceilings.
What Crown Molding Installation Costs
Materials are modest. Crown molding runs $1 to $3 per linear foot for MDF and foam, $2 to $6 for pine and poplar, and $5 to $12 for hardwoods and elaborate profiles. A typical 12-by-12 room needs about 48 feet, so $50 to $300 in material. If you hire a finish carpenter, labor adds $4 to $12 per linear foot depending on complexity and ceiling height, putting a professionally trimmed room at $400 to $1,000. DIY saves that labor, and the payback for learning to cope corners is significant across a whole house.
Working With Uneven Walls and Ceilings
The dirty secret of crown molding installation is that no room is perfectly square, level, or straight, and pretending otherwise leads to frustrating gaps. Walls bow, ceilings sag in the middle of a long span, and corners are rarely a true 90 degrees. Experienced installers work with these imperfections rather than against them. For a bowed wall, push the molding tight to the wall and let the ceiling gap ride, since a gap at the top is easier to caulk and less visible than one along the wall. For an out-of-square corner, measure the actual angle with a bevel gauge and split it, rather than defaulting to 45 degrees. Coping inside corners, rather than mitering them, is itself a strategy for beating uneven walls, because a coped joint conforms to whatever angle the corner actually is. Accept that generous caulking is part of the process, not a sign of failure.
Design Choices: Size, Style, and Where to Use It
Crown molding comes in profiles from simple and modern to ornate and traditional, and the size should suit the room’s ceiling height. As a rough guide, rooms with 8-foot ceilings look balanced with crown 3 to 5 inches tall, 9-foot ceilings suit 4 to 7 inches, and 10-foot or taller ceilings can carry 6-inch or larger profiles without looking skimpy. Undersized crown in a grand room looks like an afterthought, while oversized crown in a small room feels heavy and closes in the space. Beyond living rooms and bedrooms, crown molding elevates dining rooms, entryways, and home offices, and a simpler version tops kitchen cabinets and bookcases beautifully. In more casual or contemporary homes, a clean cove or a simple stepped profile suits the aesthetic better than an elaborate Victorian design. Match the molding’s formality to the home’s overall style for a cohesive result.
Final Tips for Success
Practice your cuts and copes on scrap before touching your good material. Cut a couple of test corners to confirm your saw angles produce tight joints. Work with a helper for long runs and high ceilings. Keep your saw blade sharp for clean cuts in MDF, and remember the carpenter’s rule to measure twice and cut once. Crown molding rewards patience: take the corners slowly, caulk generously, and you will add a touch of architecture that makes every room feel more finished and more valuable.