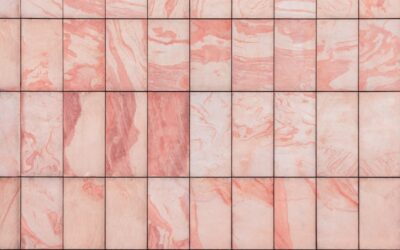
A well-chosen fireplace backsplash does two jobs at once: it protects the wall around your firebox from radiant heat and it turns a plain surround into the focal point of the room. Whether you are framing a gas insert or a wood-burning masonry firebox, the surface you select has to shrug off temperature swings that would crack drywall or peel paint within a season.
Part of our Kitchen Remodeling guide — explore the full guide →
I have installed dozens of these surrounds over the years, and the same questions come up every time. Which tile can actually take the heat? How close to the opening can I get? What does it cost? This guide walks through materials, clearance codes, patterns, and installation so you can plan a surround that looks sharp and passes inspection.
Why a Fireplace Surround Needs Special Material
The area immediately around a fireplace opening can reach 150°F to 200°F on the wall surface, and the mantel shelf traps rising heat above that. Standard latex-painted drywall discolors, and cheap adhesives soften. That is why the surround field should be a noncombustible, heat-stable material set over a cement backer board rather than paper-faced gypsum.
Manufacturers rate most porcelain and glazed ceramic tile to well above 400°F of intermittent exposure, which is more than adequate for the outer surround. The critical zone is the noncombustible band right at the opening, and that is governed by code, not preference.
Clearance and Code: The 6-Inch Rule
Every install starts with clearances. The International Residential Code and most manufacturer specs require that combustible trim, mantels, and wood framing stay at least 6 inches from the firebox opening, and any combustible material projecting more than 1.5 inches (like a mantel) must sit even farther back, roughly 1 inch of additional clearance for every 1/8 inch of projection.
- Noncombustible band: Keep a minimum 6-inch border of tile, stone, or metal around the opening on all sides.
- Backer, not drywall: Set the surround over 1/2-inch cement board such as Durock or HardieBacker, not directly on gypsum.
- Check the appliance manual: Gas and wood inserts list their own clearance-to-combustible figures, which override the general rule.
When in doubt, pull a permit. A local inspector would rather answer a clearance question up front than red-tag a finished surround.
Best Materials for a Fireplace Backsplash
Not every attractive tile belongs near flame. Here is how the common choices stack up.
Porcelain and Glazed Ceramic
Porcelain is the workhorse. Fired above 2,200°F, it is dense, low-absorption, and dimensionally stable under heat. Glazed ceramic performs nearly as well for the outer field. Both run roughly $3 to $12 per square foot for the tile itself and are the easiest to keep clean.
Natural Stone: Marble, Slate, and Travertine
Natural stone reads as luxury. Honed marble in a classic subway or herringbone layout suits traditional rooms, while slate and travertine lean rustic. Stone handles heat well but is porous, so it must be sealed. Expect $8 to $30 per square foot for the material.
Stacked Stone and Brick Veneer
Stacked stone panels and thin brick veneer deliver a full floor-to-ceiling statement. Real thin brick is fireproof and needs no sealing on the face, while manufactured stone veneer is a lighter, cheaper stand-in. These run $6 to $20 per square foot and add serious texture.
Popular Patterns and Design Ideas
Layout changes the whole feel of the surround. A few combinations I return to often:
- Herringbone marble for an upscale, magazine-cover look that draws the eye upward.
- Stacked stone floor-to-ceiling to anchor a great room with a two-story wall.
- Vertical stacked subway tile to visually raise a low ceiling.
- Large-format porcelain slabs for a seamless, grout-light modern surround.
Match the surround to the mantel and flooring rather than the wall paint, which changes more often. A stone that pulls a tone from your hardwood floor ties the room together without feeling matched to a fault.
Installation Over Cement Board
The build sequence mirrors a shower surround. Fasten 1/2-inch cement board to the framing with backer-board screws, tape the seams with alkali-resistant mesh, and thinset over them. Use a polymer-modified thinset rated for the substrate, and for stone use a white thinset so it does not bleed through translucent marble.
Set tile from a level ledger line, maintain consistent grout joints with spacers, and let the thinset cure 24 hours before grouting. For the band closest to the firebox, a high-heat mortar or refractory-rated setting material is worth the small upcharge on wood-burning units.
Setting the Band Nearest the Firebox
Tile the outer field first and work inward, saving the noncombustible band at the opening for last so you can dial in tight, even cuts against the metal firebox flange. Leave a 1/8-inch expansion gap between the tile and the appliance face, then fill it with a high-temperature silicone rather than rigid grout. Metal expands more than tile when it heats, and a flexible joint keeps that movement from cracking your finish work over the first few burning seasons.
Sealing and Maintenance
Porous materials need protection. Seal natural stone, travertine, and cement grout with a penetrating sealer before first use and again every 12 to 18 months. Glazed porcelain and ceramic need no sealer on the face, only the grout lines. Wipe soot with a pH-neutral stone cleaner rather than vinegar, which etches marble and travertine.
For wood-burning fireplaces, expect more soot than a gas unit produces, and clean the surround at the end of each heating season before the film hardens. A soft microfiber cloth and warm water handle routine dust, while a poultice made for stone lifts stubborn smoke staining from marble without scrubbing the polish away. Inspect grout lines once a year and touch up any hairline cracks promptly, since open joints let moisture and soot reach the backer board behind the tile.
Common Mistakes to Avoid
A handful of errors show up again and again on DIY surrounds:
- Tiling directly over drywall near the opening instead of switching to cement board, which fails the code inspection and the heat test.
- Ignoring the mantel clearance and mounting a deep wood shelf too close to the firebox, a genuine fire risk.
- Using standard silicone or mastic at the hot zone instead of a high-temperature adhesive and sealant.
- Skipping the sealer on stone, then watching soot soak permanently into the surface within one winter.
Slow down at the layout stage. Dry-lay a full row on the floor first, plan where your cut tiles fall so the small slivers land at the edges rather than dead center, and center the pattern on the firebox opening for a balanced, intentional look.
What a Fireplace Backsplash Costs
Budget $15 to $50 per square foot installed, materials plus labor combined. A modest 25-square-foot surround in glazed ceramic lands near $400 to $700, while a floor-to-ceiling stacked-stone wall in a two-story room can pass $2,000 once scaffolding and high-heat setting materials are figured in. Herringbone and mosaic layouts add labor because of the extra cuts.
Spend where it shows and stays safe. A quality porcelain or sealed stone surround over proper cement board and honest clearances will outlast the appliance behind it and hold its value when you sell. Measure twice, respect the 6-inch rule, and your fireplace backsplash will be the room’s centerpiece for decades.