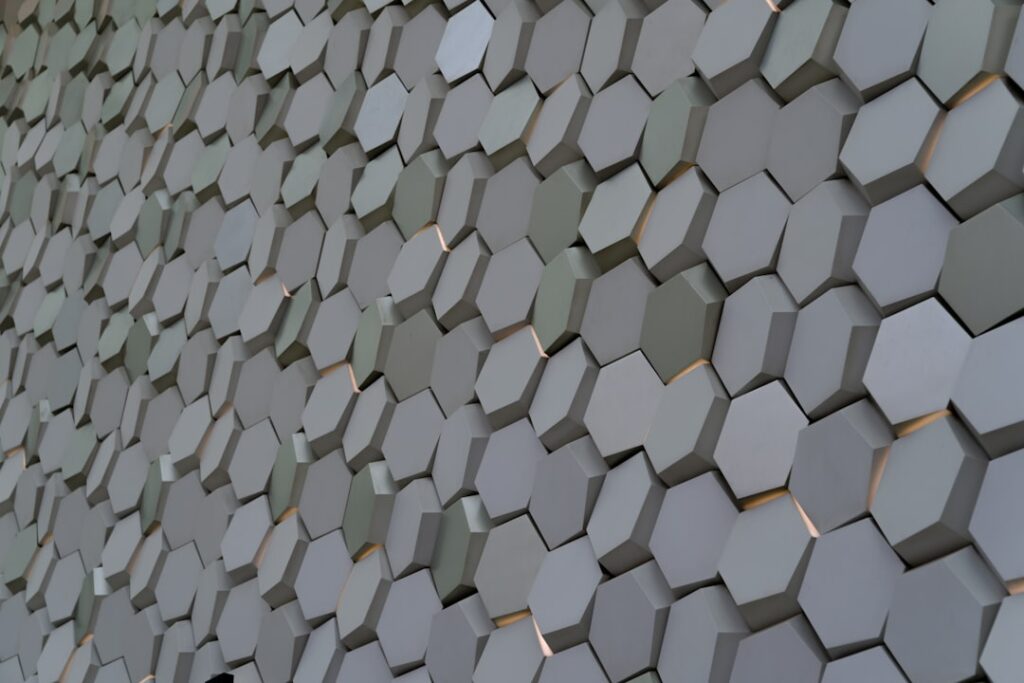
Few tile patterns pack as much personality into a small footprint as the hexagon, and a well-executed honeycomb backsplash can transform an ordinary kitchen wall into the room’s defining feature. The six-sided geometry reads as both retro and thoroughly modern, which is exactly why designers keep specifying it for everything from vintage cottages to sleek city apartments. If you are weighing this look for your own space, understanding the tile options, layout choices, and installation quirks will save you money and second-guessing.
The appeal of the honeycomb goes beyond looks. Hexagonal tiles interlock without the long continuous grout lines of a subway layout, which hides minor wall imperfections and gives the eye a rhythm that feels handcrafted rather than mass-produced.
What Makes the Honeycomb Pattern Work
The strength of the hexagon is its shared edges. Every tile meets six neighbors, distributing visual weight evenly and creating a surface that feels cohesive from any angle. That geometry also means the pattern never looks unfinished the way a half-laid brick bond can, so even a modest backsplash strip between counter and cabinets reads as intentional design.
Scale changes the whole character. Penny-size hexagons feel busy and vintage, mid-size 2- to 3-inch tiles strike a contemporary balance, and large-format hexes measuring 6 inches or more give a bold, architectural statement. Choose the scale to match the size of your wall and how much attention you want the backsplash to command.
Popular Materials and Finishes
Honeycomb tile comes in nearly every material, and each brings a different feel and price point to the wall:
- Ceramic and porcelain: The workhorse choice, durable and affordable at roughly $4 to $12 per square foot, available in matte, glossy, and textured glazes.
- Marble and natural stone: Carrara or Calacatta hexagons deliver luxury veining but need sealing and run $12 to $30 per square foot.
- Glass: Reflective and easy to clean, ideal for bouncing light in darker kitchens.
- Cement and encaustic: Bold color and pattern, though porous and demanding of sealer.
- Metal and mosaic-mesh: Small hexes pre-mounted on 12-inch sheets for faster installation.
Mesh-backed mosaic sheets are the most DIY-friendly because the tiles arrive pre-spaced, dramatically cutting the fiddly alignment work that individual hexes demand.
Choosing the Right Color and Grout
Grout is not an afterthought with hexagons; it defines the pattern. A contrasting grout, such as charcoal against white tile, makes each hexagon pop and emphasizes the honeycomb geometry. A matching grout, like white with white tile, softens the effect into a subtle textured field. Decide which reading you want before you buy, because it changes the entire mood of the wall.
For color, white and soft gray hexagons remain the safest resale-friendly choices, while blush, sage, navy, and terracotta have surged in popularity for homeowners wanting warmth. If you go bold on color, keep the surrounding cabinetry and counters neutral so the backsplash stays the star rather than competing for attention.
Layout and Design Options
Even within the honeycomb format there is room to customize the installation:
- Point-up versus flat-top: Orienting hexes with a point up feels taller and more dynamic; flat-top orientation feels grounded and calm.
- Gradient or blend: Mixing two or three tones creates an ombre effect that fades up the wall.
- Accent inlays: Scatter a few colored or metallic hexes among neutrals for a confetti effect.
- Full-height feature wall: Run the honeycomb from counter to ceiling behind a range for maximum impact.
Full-height installations behind a cooktop have become a signature move, turning what would be a simple backsplash into a floor-to-cabinet focal wall.
Installation Considerations
Hexagonal tile is more demanding to install than square or rectangular formats because there are more angles to keep aligned and more cuts around outlets and edges. Individual hexes require careful spacing with wedges, while mesh sheets speed the field but still need attention where sheets meet so the seams disappear. Cutting hexagons cleanly calls for a wet saw with a diamond blade; nippers alone will chip the delicate points.
Wall prep matters. Start with a clean, flat, primed surface and snap a level reference line, because any drift compounds quickly across a hex field. Use the correct thinset for your tile, white thinset for translucent glass and marble to avoid shadowing, and back-butter larger stone hexes for full coverage. Budget extra time compared with a subway layout; a competent DIYer should plan on the project taking noticeably longer.
Cost and Budget Planning
For a typical kitchen backsplash of 30 square feet, material costs range widely with the choices above. Ceramic hexagons might total $120 to $360 in tile, while marble could reach $600 to $900. Add thinset, grout, sealer, and edge trim for another $60 to $150. Professional installation for hexagonal tile typically runs $12 to $20 per square foot because of the added labor, so a pro-installed 30-square-foot wall might land between $360 and $600 in labor alone.
DIY brings the total down substantially if you own or rent a wet saw, but be honest about your patience for detail work. A honeycomb backsplash rewards precision and punishes rushing.
Care and Longevity
Once sealed and grouted, a honeycomb backsplash is easy to live with. Wipe glazed ceramic and glass with a damp cloth and mild cleaner; avoid abrasive pads that dull the finish. Reseal natural stone and cement tile annually, or whenever water stops beading on the surface, to keep stains and grease from soaking in.
Because the pattern hides minor grime in its many small joints better than large flat tile, it stays looking sharp between deep cleans. With proper sealing and routine wiping, a quality honeycomb backsplash will look as striking in a decade as it did the day it was installed, making it one of the more timeless statement choices in kitchen design.
Pairing Honeycomb With the Rest of the Kitchen
A hexagon field never lives in isolation, and the surrounding materials decide whether it feels curated or chaotic. Warm-toned wood cabinets soften a crisp white honeycomb and keep a kitchen from feeling clinical, while flat-front slab doors in a matte finish let a bold colored hex become the room’s exclamation point. Counters matter too: a busy, heavily veined quartz or granite fights a busy backsplash, so pair dramatic hexagons with a calm solid-surface counter and save the veining for a quieter tile.
Hardware and fixtures tie the look together. Brass or matte-black cabinet pulls echoed in the faucet give the eye a repeating accent that makes a colored honeycomb feel deliberate. In small kitchens and galley layouts, keeping the hexagons and grout in a tight tonal range visually enlarges the space, whereas a generous open-plan kitchen can absorb high contrast without feeling cramped. Think of the backsplash as one instrument in an ensemble rather than a solo act, and the honeycomb will read as designed rather than merely trendy. When in doubt, pull one accent color from the room and repeat it in a few scattered hexes, and the whole scheme snaps into cohesion.