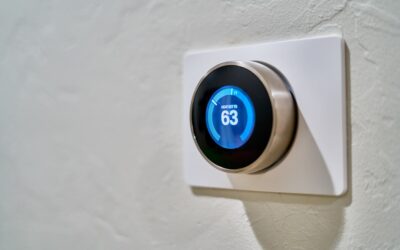
Learning to install Nest smart thermostat hardware yourself is one of the most satisfying and money-saving home upgrades you can tackle in an afternoon. A Google Nest thermostat can trim heating and cooling costs, learn your schedule, and let you control the temperature from your phone, and for most homes the installation takes under an hour with a screwdriver. This guide walks through compatibility checks, wiring, the tricky C-wire question, setup, and the mistakes that trip people up.
- Check Compatibility First
- Understand the C-Wire Question
- Gather Your Tools
- Step-by-Step Installation
- Setup and Configuration
- Common Mistakes to Avoid
- When to Call a Professional
- What You’ll Save
- Understanding Your Thermostat Wires
- Getting the Most From Nest Features
- Maintaining Your Thermostat Over Time
Check Compatibility First
Before you buy or begin, confirm your system works with Nest. The vast majority of standard 24-volt forced-air, heat pump, and radiant systems are compatible, but high-voltage baseboard heat (120V or 240V) and some proprietary systems are not. Google offers an online compatibility checker where you enter the wires connected to your current thermostat. Turn off power to your HVAC at the breaker, remove your existing thermostat cover, and take a clear photo of the wiring, noting which terminals are used (R, W, Y, G, C, and so on). This photo is your roadmap for the whole install and your safety net if you need to revert.
Understand the C-Wire Question
The most common installation hurdle is the C-wire, or common wire, which provides continuous power to the thermostat. Some Nest models can run without a dedicated C-wire by drawing small amounts of power through other wires, but this can cause issues like the thermostat failing to charge or intermittently dropping offline, especially on certain systems. If your current thermostat has a wire on the C terminal, you are set. If not, you have options: use the Nest Power Connector or a separate C-wire adapter included with some models, run a new C-wire from your furnace, or check whether your specific Nest model is designed to work without one. Sorting this out before you start prevents the most frequent post-install frustration.
Gather Your Tools
You need very little to complete the job:
- A Phillips or flat-head screwdriver (Nest includes a handy combo tool).
- A smartphone with the Google Home app installed.
- Masking tape and a pen to label wires.
- A pencil and a small level for mounting.
- A drill if you need to make new holes in drywall (wall anchors are included).
- Your compatibility photo from the previous step.
Step-by-Step Installation
- Turn off power to your heating and cooling system at the breaker box. Confirm the system is dead by trying to change the temperature on the old thermostat.
- Remove the old thermostat faceplate to expose the wiring and terminals.
- Label each wire with the included stickers or masking tape, matching the terminal letter, then disconnect them.
- Unscrew and remove the old base plate, taking care not to let the wires fall back into the wall (wrap them around a pencil if needed).
- Mount the Nest base plate, leveling it and marking screw holes. Drill and insert anchors if mounting to drywall.
- Connect the wires to the matching Nest terminals, pressing each button and inserting the correct wire until it clicks.
- Attach the display by snapping it onto the base until it clicks.
- Restore power at the breaker.
Setup and Configuration
Once powered, the Nest boots up and walks you through on-screen setup. It will detect your connected wires and ask you to confirm them. Connect it to your home Wi-Fi, then open the Google Home app on your phone to link the thermostat to your account. The app guides you through identifying your system type, setting your location, and choosing energy-saving preferences. Learning models begin studying your adjustments to build an automatic schedule, while other models let you set a schedule manually. Enable features like Home/Away sensing, which lowers energy use when nobody is home, and Eco temperatures to maximize savings.
Common Mistakes to Avoid
A few errors cause most failed installs:
- Forgetting to cut power, which risks shorting your HVAC control board, a costly repair.
- Not labeling wires, leaving you guessing during reconnection.
- Letting wires slip into the wall, which can be maddening to fish back out.
- Ignoring the C-wire issue, leading to a thermostat that keeps losing charge.
- Forcing incompatible wiring, such as jumping R and Rc incorrectly; follow Nest’s on-screen guidance instead.
- Mounting it near a heat source like a lamp or sunny window, which skews temperature readings.
When to Call a Professional
DIY works for most standard systems, but call an HVAC pro if your compatibility check fails, if you have high-voltage or line-voltage heating, if your system has more wires than the Nest supports, or if you need a new C-wire run and are not comfortable working at the furnace. A professional installation typically costs $75 to $200, still a modest sum against years of energy savings. If you smell gas, see scorched wiring, or your system behaves erratically after install, stop and get expert help.
What You’ll Save
A properly configured Nest thermostat can meaningfully reduce heating and cooling costs by learning when you are away, easing back temperatures automatically, and letting you adjust settings remotely so you are never heating an empty house. Real-world savings vary with climate, home efficiency, and habits, but many households see a noticeable drop on their utility bills over a year. Combined with the convenience of app control, voice commands, and energy usage reports, the thermostat often pays for itself within a couple of heating and cooling seasons.
Understanding Your Thermostat Wires
Knowing what each wire does removes the mystery from the job. In a typical system, the R (or Rh/Rc) wire carries 24-volt power from the transformer, W controls heating, Y controls cooling (the compressor), and G runs the fan (blower). The C wire is the common that completes the circuit for continuous power. Heat-pump systems add an O/B wire for the reversing valve and sometimes auxiliary and emergency heat wires. Multi-stage systems have W2 or Y2 for second stages. You do not have to memorize all of this, because Nest’s setup walks you through confirming each connected wire, but recognizing the letters helps you label correctly and spot when your system is more complex than a basic single-stage furnace, which is your cue to double-check compatibility.
Getting the Most From Nest Features
Installation is only the beginning; the savings come from the features. Enable Home/Away Routines so the thermostat eases off heating and cooling when it senses nobody is home using your phone’s location and the unit’s motion sensor. Use the Eco temperature settings to define energy-saving setpoints for those away periods. Learning-capable models build a schedule from your manual adjustments over the first week, so nudge the temperature to your real preferences and let it adapt. Review the monthly Energy History and Leaf indicator, which rewards efficient settings, to fine-tune your habits. You can also group multiple thermostats, integrate with smart speakers for voice control, and get alerts if your home gets unusually hot or cold, useful for catching a failed furnace before pipes freeze.
Maintaining Your Thermostat Over Time
A Nest thermostat needs little upkeep, but a few habits keep it running smoothly. If your model relies on a rechargeable battery topped up through the system wiring, watch for low-battery notifications that can indicate a marginal power situation, often the sign of a missing or weak C-wire that a Power Connector will cure. Keep the unit’s firmware updated, which happens automatically over Wi-Fi. Gently dust the display and sensor occasionally. Change your furnace air filter on schedule; Nest can even remind you, since a clogged filter strains the system and undercuts efficiency. If you ever move, you can factory-reset the thermostat and take it with you, or leave it and transfer control to the new owner, since it is your device linked to your account.
With a compatibility check, a labeled-wire photo, attention to the C-wire, and about an hour of careful work, most homeowners can install a Nest smart thermostat themselves and start enjoying a smarter, more efficient home the same day. Take your time, kill the power first, and follow the on-screen setup, and you will have keyless comfort control at your fingertips.