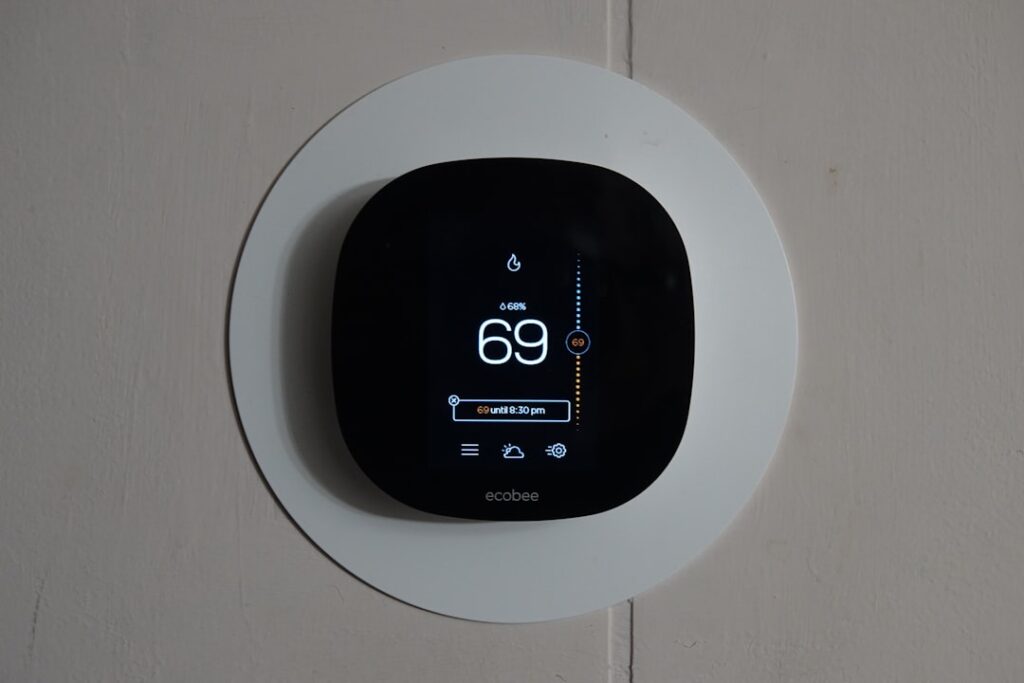
The Ecobee Smart Thermostat Essential is the budget model in Ecobee’s lineup, and it hits a sweet spot for anyone who wants app control and scheduling without paying for a room sensor or a built-in speaker. At roughly $130, the Ecobee Smart Thermostat Essential gives you the same clean 3.5-inch touchscreen and reliable Wi-Fi control as pricier siblings, minus a few extras most homeowners never use.
- What You Get for the Money
- The C-Wire Requirement
- Safety First: Shut Off Power
- Compatibility Check
- Step-by-Step Installation
- First-Time Setup and the App
- Getting Real Energy Savings
- Troubleshooting Common Issues
- Room Sensors and Multi-Room Comfort
- Warranty and Support
- Is the Essential the Right Ecobee?
This guide walks through what it does, whether your wiring supports it, how to install it in about 30 minutes, and how to set it up so it actually saves money instead of just looking nice on the wall.
What You Get for the Money
The Essential ships as a single thermostat unit with a trim plate, mounting screws, wire labels, and a small setup guide. Unlike the mid-range Enhanced and the older SmartThermostat Premium, it does not include a remote SmartSensor in the box, though it is compatible with them if you buy a pack later (about $80 for two).
Key features at this price:
- 3.5-inch color touchscreen with a bright, glare-resistant finish
- Wi-Fi and the full Ecobee app for iOS and Android
- Works with Alexa, Google Home, Apple HomeKit, and SmartThings
- Eco+ energy-saving automations, including time-of-use and community energy savings
- Built-in occupancy and proximity sensing so the screen wakes as you walk up
What it drops versus higher tiers: no built-in Alexa speaker, no included room sensor, and no smart air-quality monitoring. For most single-zone homes, none of that is a dealbreaker.
The C-Wire Requirement
This is the single most important thing to check before you buy. The Ecobee Smart Thermostat Essential requires a common wire, known as a C-wire, to power the display and Wi-Fi radio continuously. The C-wire delivers a steady 24-volt return so the thermostat never has to “steal” power from your heating or cooling call.
Here is how to find out what you have:
- Turn off power to your HVAC system at the breaker before touching anything.
- Remove your existing thermostat faceplate and photograph the wiring.
- Look for a wire seated in a terminal labeled C. It is often blue or black, but color is not a guarantee — the terminal label is.
Unlike the Nest, which can run without a C-wire in some setups, the Essential does not include Ecobee’s Power Extender Kit (PEK) in the box the way the Enhanced does. If you have no C-wire and no spare conductor, you have three options: run a new cable, buy a PEK-style adapter separately (around $25), or use a plug-in 24V C-wire adapter. Systems with only two wires (common on some heat-only or millivolt setups) may not be compatible at all.
Safety First: Shut Off Power
Even though thermostat wiring runs on low-voltage 24V control power, the furnace or air handler it connects to runs on 120V or 240V. Always switch off the HVAC system at the breaker panel or the furnace service switch before removing wires. This prevents shorting a wire against a terminal and blowing the 3- or 5-amp control-board fuse, which is the most common self-inflicted failure during a DIY swap. Label each wire with the included stickers as you disconnect it. Do not rely on wire color alone.
Compatibility Check
The Essential works with the large majority of residential systems:
- Conventional gas, oil, and electric furnaces
- Central air conditioning
- Heat pumps with auxiliary/emergency heat (up to 2 heat / 2 cool stages)
- Boilers and radiant systems with 24V control
It does not work with line-voltage (120V/240V) baseboard heaters, and it is not designed for high-voltage systems. If your current thermostat is a bulky unit with thick wires and its own power switch, you likely have line voltage and need a different product. Run Ecobee’s online compatibility checker with your photographed wiring before you commit.
Step-by-Step Installation
Plan on 20 to 40 minutes for a straightforward single-zone swap.
- Power down. Flip the HVAC breaker or service switch to off. Confirm the system is dead by trying to raise the temperature on your old thermostat.
- Label and disconnect. Photograph the old wiring, apply the labeled stickers to each wire, then release them from the terminals.
- Remove the old base. Unscrew it, but hold the wires so they do not fall back into the wall. A pencil or clip keeps them from disappearing.
- Mount the trim plate and backplate. Feed the wires through, level the plate, and mark your screw holes. Use the included drywall anchors on hollow walls.
- Insert wires. Press each labeled conductor into the matching terminal — R, C, W (heat), Y (cool), G (fan), and so on. The terminals push open and clamp shut.
- Snap on the thermostat. Align the pins and press until it clicks.
- Restore power and let it boot.
First-Time Setup and the App
On boot, the Essential walks you through connecting to your 2.4 GHz Wi-Fi network, creating or signing into an Ecobee account, and confirming your equipment type. It auto-detects most wiring, but you should verify heat and cool stages match your system so it does not short-cycle.
In the app, spend a few minutes on:
- Schedules. Set comfort profiles for Home, Away, and Sleep. A typical winter setup might run 68°F when home, 62°F asleep, and 60°F away.
- Eco+. Opt into the automations that fit you — feels-like adjustments and time-of-use scheduling can trim summer bills if your utility has peak pricing.
- Smart Home/Away. Uses your phone’s location and the thermostat’s occupancy sensor to hold back conditioning when the house is empty.
Getting Real Energy Savings
The hardware only saves money if the schedule reflects your life. The biggest wins come from setbacks — letting the house drift a few degrees while you sleep or are at work. The Department of Energy estimates roughly 1% savings for each degree of setback held over an 8-hour stretch. Pair that with the geofencing so the system does not heat or cool an empty house all afternoon.
Add a SmartSensor later if you have a room that runs hot or cold — a bedroom over the garage, say. The sensor lets Ecobee average temperatures or prioritize the occupied room instead of only reading the hallway where the thermostat sits.
Troubleshooting Common Issues
Most problems trace back to power or wiring:
- Screen won’t turn on: almost always a missing or loose C-wire, or a blown 3-5 amp fuse on the furnace control board. Recheck the C terminal and inspect the fuse.
- Short-cycling (heat or cool clicks on and off rapidly): usually a mis-set equipment type. Confirm your stage count and heat-pump reversing valve setting (O/B) in the app.
- Won’t connect to Wi-Fi: the Essential uses 2.4 GHz only. If your router broadcasts a combined 2.4/5 GHz network under one name, temporarily separate the bands or move closer during setup.
- Auxiliary heat runs too often: adjust the heat-pump balance point and compressor-to-aux threshold so the expensive backup strips don’t fire prematurely.
If the display flickers or reboots, that’s a classic under-power symptom on a no-C-wire hack — add a proper common wire or adapter rather than living with it.
Room Sensors and Multi-Room Comfort
The Essential reads temperature at the wall where it’s mounted, which is fine for an open, well-mixed floor plan but poor for homes with a cold bedroom or a sunny office. Adding a pack of Ecobee SmartSensors (about $80 for two) lets the thermostat factor in those rooms. You can set it to average all sensors, or to follow only the occupied rooms so the system heats where people actually are. Each sensor also detects motion, feeding the Smart Home/Away logic. For a two-story house, one sensor upstairs and one down evens out the classic hot-upstairs, cold-downstairs imbalance without touching the ductwork.
Warranty and Support
Ecobee backs the Smart Thermostat Essential with a 3-year limited warranty, longer than the 1-year coverage on many competitors, which reflects the brand’s confidence in the hardware. Register the unit in the app to activate coverage. Firmware updates arrive automatically over Wi-Fi, steadily adding features and fixing bugs, so a thermostat you buy today keeps improving. If you hit a wiring question during install, the app’s live compatibility tool and Ecobee’s support line can confirm your setup before you power anything back on.
Is the Essential the Right Ecobee?
Choose the Essential if you have a C-wire, a single well-mixed zone, and you mainly want reliable app control, scheduling, and geofencing. Step up to the Enhanced (around $160) if you want the included Power Extender Kit for a no-C-wire home or plan to lean on room sensors and radar presence detection. Go Premium only if you want the built-in speaker and air-quality monitor.
For the money, the Ecobee Smart Thermostat Essential is one of the easiest ways to modernize an aging dial or basic programmable thermostat. Confirm your C-wire, kill the power before you wire it, and you will have a smarter, app-controlled system running before dinner.