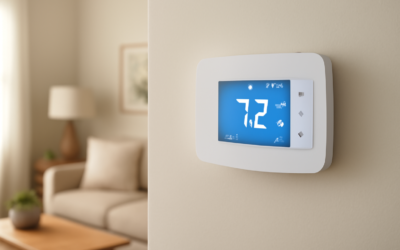
Upgrading to a connected thermostat is one of the easiest ways to cut heating and cooling costs while adding convenience. The honeywell home x2s smart thermostat offers app control, scheduling, and energy-saving features at an accessible price. This guide covers its features, installation, compatibility, and whether it’s the right fit for your home.
- What Is the X2S Smart Thermostat?
- Key Features
- Energy Savings
- Compatibility Check
- Installation Steps
- The App Experience
- Scheduling and Setbacks
- Voice Control Integration
- How Much Does It Cost?
- Who Should Buy It?
- The C-Wire Explained
- Identifying Your HVAC System Type
- Step-by-Step Wiring Safety
- Maximizing Energy Savings
- Troubleshooting Common Issues
- Geofencing and Smart Scheduling
- Frequently Asked Questions
- Final Thoughts
What Is the X2S Smart Thermostat?
The Honeywell Home X2S is a Wi-Fi-connected smart thermostat designed to give you remote control over your home’s heating and cooling. It replaces a standard thermostat and connects to your home network, letting you adjust temperature, set schedules, and monitor your system from the Honeywell Home app on your phone, whether you are home or away.
Key Features
- Remote app control: Adjust temperature from anywhere via the app.
- Flexible scheduling: Program temperatures around your daily routine.
- Voice assistant support: Hands-free control through popular assistants.
- Energy-saving modes: Automatic setbacks when you are away.
- Filter and maintenance reminders: Alerts to keep your HVAC system healthy.
Energy Savings
A programmable smart thermostat can meaningfully lower energy bills. The Environmental Protection Agency notes that proper temperature setbacks, turning the temperature down in winter or up in summer while asleep or away, can save around 10% a year on heating and cooling. The X2S automates these setbacks through scheduling and remote control, so you capture those savings without constant manual adjustment.
Compatibility Check
Before buying any smart thermostat, verify it works with your HVAC system. The X2S is designed for common 24-volt residential systems, including most forced-air furnaces, central air conditioners, and heat pumps. A key consideration is the C-wire (common wire), which provides continuous power. Many smart thermostats need one, so check whether your existing wiring includes a C-wire or whether an adapter is required.
Installation Steps
Installing the X2S is a manageable DIY project for most homeowners:
- Turn off power to your HVAC system at the breaker for safety.
- Remove the old thermostat cover and photograph the wiring.
- Label each wire with the provided stickers before disconnecting.
- Mount the new base plate and connect the wires to matching terminals.
- Attach the thermostat and restore power.
- Follow the app prompts to connect to Wi-Fi and configure settings.
If you lack a C-wire or are unsure about your wiring, hire an HVAC professional.
The App Experience
The Honeywell Home app is the control center for the X2S. From it you can adjust the temperature, create and edit schedules, switch between heating and cooling modes, and view your system status remotely. The app also delivers maintenance reminders and alerts, and it enables features like geofencing on supported setups, adjusting the temperature based on whether your phone is home or away.
Scheduling and Setbacks
The core money-saving feature of any smart thermostat is scheduling. With the X2S you can set different target temperatures for waking, leaving, returning, and sleeping. This ensures the system is not heating or cooling an empty house at full effort. Once configured, the schedule runs automatically, and you can override it anytime from the app or the device itself.
Voice Control Integration
The X2S works with common voice assistants, letting you change the temperature by voice without touching the device or your phone. Saying a simple command to raise or lower the temperature is convenient when your hands are full or you are settling in for the night. Integration is set up through the respective assistant’s app after the thermostat is connected to Wi-Fi.
How Much Does It Cost?
The X2S is positioned as an affordable smart thermostat:
- The thermostat itself: typically $50 to $100
- C-wire adapter if needed: often included or around $10 to $30
- Professional installation if required: $100 to $200
Given the potential energy savings, many households recoup the cost within a heating and cooling season or two.
Who Should Buy It?
The X2S suits homeowners who want smart-thermostat convenience and savings without paying premium prices for advanced learning features. It is ideal if you want reliable app control, scheduling, and voice support on a standard 24-volt HVAC system. Those wanting fully automatic learning behavior or elaborate room sensors may look at higher-end models, but for straightforward smart control, the X2S delivers strong value.
The C-Wire Explained
The common wire, or C-wire, is the detail that trips up most smart-thermostat installs. Older thermostats often ran on just two wires and drew tiny amounts of power from the heating and cooling wires. Smart thermostats need continuous power for their Wi-Fi radio and display, which the C-wire provides. Before buying, remove your existing thermostat cover and look for a wire in the terminal labeled C. If there is none, you have options: use an included C-wire power adapter, repurpose an unused wire in the bundle, or have an HVAC pro run a new wire.
Identifying Your HVAC System Type
Compatibility depends on your system, so identify it before purchasing:
- Conventional forced-air: A gas, oil, or electric furnace with central AC, the most common and widely compatible setup.
- Heat pump: Uses a reversing valve and often an O/B wire; confirm the thermostat supports heat pumps.
- Multi-stage systems: Two-stage heating or cooling needs a thermostat that supports staging.
- Line-voltage (120/240V) systems: Common with electric baseboard heat and generally NOT compatible with low-voltage smart thermostats.
The X2S targets standard 24-volt low-voltage systems, so verify yours is not line-voltage before buying.
Step-by-Step Wiring Safety
Working on a thermostat involves your HVAC wiring, so follow safe practice:
- Switch off power to the furnace and air handler at the breaker, not just the thermostat.
- Photograph the existing wiring before touching anything, as a reference.
- Label each wire with the letter of its terminal using the provided stickers.
- Note that despite the low 24V, shorting wires can blow a control-board fuse, so keep wires separated.
- Match each labeled wire to the same terminal on the new base plate.
- Restore power only after the thermostat is mounted and wiring double-checked.
Maximizing Energy Savings
To capture the roughly 10% annual heating and cooling savings the EPA associates with proper setbacks, configure your schedule around real routines. Set the temperature back 7 to 10 degrees while you sleep and while the house is empty during work hours, and program it to return to a comfortable level shortly before you wake or arrive home. Avoid the myth that holding a constant temperature saves money; letting the temperature drift during unoccupied hours and recovering it on a schedule uses less energy overall.
Troubleshooting Common Issues
- Thermostat won’t power on: Almost always a missing C-wire; install the adapter or add a C-wire.
- Won’t connect to Wi-Fi: Confirm you are joining a 2.4GHz network, which smart thermostats require.
- System won’t heat or cool: Recheck that each wire is in the correct terminal against your photo.
- Short cycling: Verify the system type is set correctly (heat pump vs. conventional) in setup.
- App loses connection: Ensure strong Wi-Fi at the thermostat location; add a mesh node if signal is weak.
Geofencing and Smart Scheduling
Beyond fixed time-based schedules, the X2S can use your phone’s location for smarter control on supported setups. Geofencing detects when your phone leaves or approaches a set boundary around your home and adjusts the temperature accordingly, easing back the heating or cooling when everyone is out and restoring comfort as you head back. This handles irregular schedules better than rigid time blocks, since it responds to actual comings and goings rather than assuming you are home at fixed hours. Combined with a baseline schedule, geofencing helps capture savings even when your routine varies day to day.
Frequently Asked Questions
Homeowners considering the X2S ask these questions most. Do I really need a C-wire? Most smart thermostats, including this one, need continuous power, so either a C-wire or the included adapter is required. Will it work with my system? It suits standard 24-volt forced-air, central AC, and most heat pumps, but not line-voltage electric baseboard heat. Can I install it myself? Yes, most homeowners can in under an hour if a C-wire is present; hire a pro if wiring is unclear. How much will it save? Proper setbacks can trim around 10% off heating and cooling costs annually. Does it need Wi-Fi? Yes, a 2.4GHz network powers the app control, scheduling, and voice features.
Final Thoughts
The honeywell home x2s smart thermostat is a practical, budget-friendly upgrade that brings remote app control, scheduling, and voice operation to your heating and cooling system. With proper wiring, including a C-wire, most homeowners can install it themselves in under an hour and start saving on energy bills. For dependable smart-thermostat features at an accessible price, it is a solid choice.