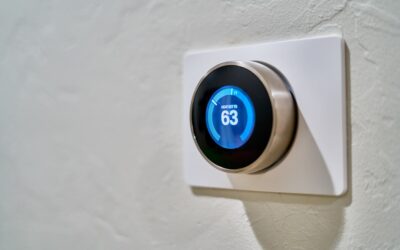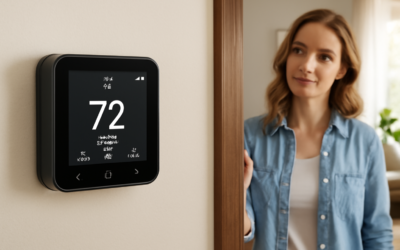
Upgrading your heating and cooling controls is one of the easiest ways to cut energy bills and add convenience, and the x8s smart thermostat is a budget-friendly option that brings app control, scheduling, and voice commands to older HVAC systems. This guide covers compatibility, wiring, setup, and how to get the most out of it.
- What a Smart Thermostat Does
- System Compatibility
- The C-Wire Question
- Tools and Safety Before You Start
- Step-by-Step Installation
- App Setup and Wi-Fi
- Building an Efficient Schedule
- Voice Control and Automations
- Understanding Heat-Pump Settings
- Troubleshooting Common Issues
- Maintenance and Filter Reminders
- Understanding Your Wiring Terminals
- Placement Matters for Accuracy
- Getting the Most from the App
- Costs and Payback
- Who It’s Best For
- Final Thoughts
What a Smart Thermostat Does
A smart thermostat replaces your basic wall unit and adds Wi-Fi connectivity, a companion phone app, and automation. Instead of walking to a dial, you set temperature from your phone, build weekly schedules, and let the device adjust automatically based on time of day or whether anyone is home. Over a year, thoughtful scheduling commonly trims 8 to 15 percent off heating and cooling costs.
System Compatibility
Before buying any smart thermostat, confirm it matches your HVAC system. The X8S-class units generally support common 24-volt systems: single and multi-stage forced-air furnaces, central air conditioning, and many heat pumps. They are not designed for high-voltage line systems like 120V or 240V baseboard or in-wall electric heaters, which need a dedicated line-voltage thermostat.
- Works with: gas, oil, and electric forced-air furnaces, central AC, and standard heat pumps.
- Check terminals: R, C, W, Y, G, and heat-pump terminals like O/B are the ones that matter.
- The C wire (common) supplies steady power and is strongly recommended for reliable Wi-Fi operation.
The C-Wire Question
The single most common installation snag is the C wire. Older homes often ran thermostats with only heating and cooling control wires and no common wire to deliver continuous 24V power. Without it, some smart thermostats behave erratically or drop offline. If you lack a C wire, you have three paths: use an included add-a-wire adapter at the furnace board, repurpose an unused wire in the bundle, or run new thermostat cable. When in doubt, an HVAC technician can add a common wire in under an hour.
Tools and Safety Before You Start
Installing a thermostat is low-voltage work, but you still cut power first. Turn off the furnace or air handler at the breaker before touching any wires. You will need a small screwdriver, a smartphone, painter’s tape or a marker to label wires, and possibly a level and drill for the new mounting plate.
Step-by-Step Installation
- Switch off power to the HVAC system at the breaker and confirm the old thermostat screen is dark.
- Remove the old faceplate and photograph the wiring so you have a reference.
- Label each wire with the terminal letter it connects to using tape or the included stickers.
- Disconnect the wires and gently pull them through the wall opening so they do not fall back.
- Mount the new base plate, using the level, and thread the wires through the center.
- Connect each labeled wire to the matching terminal, seating each firmly.
- Snap on the display, restore power at the breaker, and let the unit boot.
App Setup and Wi-Fi
Once powered, download the companion app and create an account. Pairing walks you through connecting the thermostat to your home network. Like most smart-home gear, these thermostats connect to the 2.4 GHz band rather than 5 GHz, so if pairing fails, verify you are selecting the correct network. During setup you tell the app your system type so it maps the wired terminals correctly.
Building an Efficient Schedule
The savings come from scheduling. Set the thermostat to ease off heating and cooling when you are asleep or away and to recover to comfort before you wake or return. A common winter pattern keeps the house around 68 degrees while active, drops to 62 overnight, and pulls back during work hours. In summer, hold around 76 to 78 when home and let it rise several degrees when the house is empty.
- Each degree of setback over 8 hours contributes roughly 1 percent in annual savings.
- Use separate weekday and weekend schedules to match real routines.
- Avoid extreme swings on heat pumps, which run less efficiently when recovering large gaps.
Voice Control and Automations
The X8S-class thermostats typically integrate with Amazon Alexa and Google Assistant, letting you change temperature by voice. Geofencing, if supported in the app, uses your phone’s location to switch to an away setting when the last person leaves and to resume comfort as you head home, which removes the guesswork from scheduling entirely.
Understanding Heat-Pump Settings
If you have a heat pump, the O/B terminal setting is critical. This reversing-valve wire tells the system whether it energizes on cooling or heating, and setting it wrong makes the system blow cold when you want heat. The app or on-screen setup asks about this; if temperatures behave backward after install, revisit the O/B configuration first.
Troubleshooting Common Issues
Most problems have simple fixes:
- Thermostat won’t power on: check the breaker and confirm the C wire or adapter is delivering 24V.
- Drops off Wi-Fi: move closer to the router mentally, but usually it is a weak 2.4 GHz signal or a missing C wire.
- System short-cycles: enable the minimum run-time or cycle-protection setting in the app.
- Wrong temperature reading: let the unit acclimate for an hour and calibrate the offset in settings if needed.
- Heating and cooling reversed: recheck the heat-pump O/B setting or the W and Y wiring.
Maintenance and Filter Reminders
Smart thermostats can track HVAC runtime and remind you to change the air filter, usually every 60 to 90 days for a standard 1-inch filter. A clean filter keeps airflow strong and protects the blower motor. Keep the thermostat’s firmware updated through the app, since updates fix bugs and improve connectivity.
Understanding Your Wiring Terminals
Knowing what each terminal does removes most of the fear from a thermostat swap. The R terminal is 24V power from the transformer, and some systems split it into Rh for heating and Rc for cooling. The C wire is the common return that completes the circuit for continuous power. W drives heating, Y drives the cooling compressor, and G controls the fan. On heat pumps, O/B controls the reversing valve, and additional terminals handle second-stage and auxiliary heat. When you label wires by terminal during removal, matching them on the new thermostat becomes a simple one-to-one transfer.
Placement Matters for Accuracy
Where a thermostat lives affects how well it reads your home. It should sit on an interior wall roughly 52 to 60 inches above the floor, away from direct sunlight, supply vents, doorways, and kitchens. A thermostat baking in afternoon sun will read hot and under-heat the house, while one near a drafty door will over-run the system. If you are replacing a poorly placed unit, this is a chance to relocate it, though moving it requires running new wire. Most of the time you keep the existing location and simply calibrate any small offset in the app.
Getting the Most from the App
Beyond basic control, the companion app usually offers energy reports, runtime history, and reminders that help you fine-tune comfort and cost. Review how many hours your system runs each day and adjust schedules to trim waste. Use vacation mode before a trip so the system idles at a safe temperature and resumes comfort before you return. Enable maintenance and filter reminders so airflow stays strong. These small habits, layered on top of scheduling, are where a smart thermostat quietly saves money month after month.
Costs and Payback
Budget smart thermostats in this category are among the least expensive ways into a connected home, often costing far less than premium brand-name units while covering the same core features. If you install it yourself, the only cost is the device. When you factor in typical energy savings, the payback period is often a single heating and cooling season.
Who It’s Best For
This class of thermostat suits homeowners and renters with a standard 24V forced-air system who want app control and scheduling without paying flagship prices. If you have complex zoning, proprietary communicating equipment, or line-voltage electric heat, verify compatibility carefully or choose a purpose-built controller instead.
Final Thoughts
The x8s smart thermostat is a practical, affordable upgrade that brings modern scheduling, remote control, and voice integration to most conventional HVAC systems. Confirm your wiring, sort out the C wire, set a realistic setback schedule, and keep the filter fresh, and you will get comfort and meaningful energy savings without a big investment.