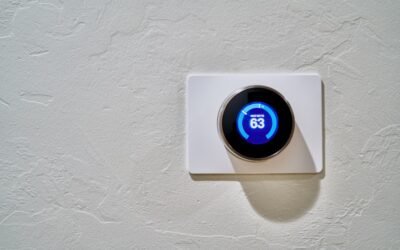
A nest smart thermostat learns your schedule, adjusts your heating and cooling automatically, and can trim energy bills without constant fiddling. This guide covers the current models, wiring and compatibility, real savings, installation steps, and troubleshooting so you can decide if one fits your home. It is one of the easiest smart-home upgrades to install yourself, but a few wiring details make the difference between flawless operation and a frustrating restart loop.
- What a Nest Thermostat Does
- The Current Models
- HVAC Compatibility
- The C-Wire Question
- Energy Savings You Can Expect
- How to Choose Between Models
- Installation Step by Step
- Setting It Up for Savings
- What It Costs to Own
- Maintenance and Care
- Troubleshooting Common Issues
- Mistakes to Avoid
- Final Verdict
What a Nest Thermostat Does
Made by Google, the Nest thermostat replaces your existing wall thermostat and connects to your home Wi-Fi network. It builds a heating and cooling schedule from your behavior over the first week or two, senses when you are away using motion and phone location, and lets you adjust the temperature from your phone wherever you are. Over time it aims to reduce runtime during hours you do not need conditioning, which is exactly where the savings come from. Beyond automation, it also tracks your energy history so you can see which habits cost the most, turning an invisible utility bill into something you can actually manage.
The Current Models
There are two main options to weigh. The Nest Learning Thermostat, now in its fourth generation, features a premium machined-metal ring, a bright high-resolution display, auto-scheduling, and the ability to pull readings from remote temperature sensors. The Nest Thermostat, the more affordable model, drops the auto-learning in favor of suggested schedules and uses a mirrored plastic finish that hides the display when idle. Both control the vast majority of 24-volt residential HVAC systems. The Learning model suits those who want true hands-off comfort, while the standard model appeals to budget-minded buyers who do not mind setting a schedule themselves.
HVAC Compatibility
Nest works with the vast majority of forced-air, heat pump, radiant, and combi-boiler systems running on 24 volts. It supports up to two stages of heating and cooling on the Learning model, which covers most modern variable systems. High-voltage baseboard systems running at 120 or 240 volts are not compatible and require a dedicated line-voltage thermostat instead. Before buying, use Google’s online compatibility checker by entering the wire labels behind your current thermostat, such as R, W, Y, G, and C. Taking a clear photo of your existing wiring makes this check fast and prevents an expensive mistake at the register.
The C-Wire Question
The common wire, or C-wire, provides continuous 24-volt power to keep the thermostat’s battery topped up and its Wi-Fi radio alive. The premium Learning Thermostat can often run without a dedicated C-wire by trickle-charging its battery through the heating and cooling wires, but the budget Nest Thermostat frequently requires one. If you lack a C-wire, options include running a new wire, using a Nest Power Connector at the furnace board, or installing a plug-in adapter. A missing or marginal C-wire is the single most common cause of random restarts, dead batteries, and Wi-Fi dropouts, so resolve it during installation rather than fighting it later.
Energy Savings You Can Expect
Google’s independent studies found savings averaging 10 to 12 percent on heating and about 15 percent on cooling for typical households. For a home spending roughly $900 a year on heating and cooling, that translates to $130 to $145 in annual savings, meaning the thermostat can pay for itself in two to three years. Real results depend on your climate, insulation quality, and how manual your old habits were, so a household that never programmed its old thermostat will see the biggest gains. Many electric and gas utilities also offer $50 to $100 rebates on qualifying smart thermostats, shortening the payback further.
How to Choose Between Models
Pick the Learning Thermostat if you want true hands-off automation, remote room sensors, and a premium look, and you are comfortable paying around $280. Choose the standard Nest Thermostat near $130 if you prefer a lower price and do not mind setting schedules yourself. Households with rooms that heat or cool unevenly benefit most from the Learning model’s remote sensor support, which lets the system prioritize the room you actually occupy. Renters and simple single-zone homes are usually well served by the cheaper model, while larger multi-zone homes get more value from the flagship.
Installation Step by Step
Installation typically takes 20 to 40 minutes with only a screwdriver. First, turn off power to the HVAC system at the breaker to avoid shorting the low-voltage board. Photograph your existing wiring, then label each wire with the included stickers so you can match them exactly. Remove the old thermostat, mount the Nest base plate, and use the built-in bubble level for a straight fit. Insert wires into the labeled ports, attach the display until it clicks, restore power, and follow the on-screen setup to connect Wi-Fi and identify your system type. The guided setup walks you through system detection, so take your time confirming each answer.
Setting It Up for Savings
Enable Home and Away routines so the thermostat sets back automatically when everyone leaves the house. Set a modest overnight setback of 6 to 8 degrees in winter, since you sleep better cooler and save energy doing it. Use the Eco temperature range to cap how far the system runs when nobody is home. Reviewing the monthly Energy History and watching for the Leaf indicator, which appears when you choose an efficient temperature, helps you learn which settings save the most. Small, consistent setbacks add up to far more savings than a single dramatic change you later override.
What It Costs to Own
Beyond the $130 to $280 purchase price, ongoing costs are minimal since Nest charges no subscription for basic thermostat features. Optional remote temperature sensors run about $40 each or come in discounted two-packs. Professional installation, if you prefer not to DIY, adds $75 to $150 depending on whether a C-wire needs to be run. Factor in utility rebates that can offset $50 to $100 of the purchase, and the net cost of even the flagship model becomes quite reasonable for the comfort and savings it delivers.
Maintenance and Care
The thermostat itself needs very little upkeep. Keep firmware current, which happens automatically over Wi-Fi, so you rarely have to think about it. If the display dims or restarts, check the battery status in the app; a chronically low battery almost always signals a power supply issue traced to a missing or marginal C-wire. Clean the display with a soft, dry cloth and avoid liquid cleaners. Replace any remote sensor batteries roughly once a year when the app warns you, and dust the unit occasionally so its occupancy sensor reads the room accurately.
Troubleshooting Common Issues
If the thermostat will not hold a charge, it is almost always a wiring or C-wire problem at the furnace, not a defective unit. Wi-Fi dropouts often trace to weak signal at the thermostat location or the same power issue draining the radio. If heating or cooling short-cycles, verify the correct system type and staging were selected during setup, since a mislabeled two-stage system confuses the logic. A delayed message after a temperature change is normal compressor protection that lasts up to five minutes and prevents damage to your equipment.
Mistakes to Avoid
Do not skip photographing the old wiring; it is your recovery plan if setup goes sideways. Never assume your high-voltage baseboard heat will work, because it will not and can be damaged. Avoid mounting the unit on an exterior wall or in direct sun, which fools the temperature sensor into false readings. And do not ignore repeated battery warnings, since running on trickle charge alone eventually causes the frustrating restart loop that a proper C-wire prevents entirely.
Final Verdict
A nest smart thermostat is a proven upgrade that pays for itself over a few years through automated setbacks and smarter scheduling. Confirm your wiring and C-wire situation before buying, choose the Learning model for true automation or the standard model to save money, and set up the away routines to capture the full energy savings. With a correct install, it quietly manages your comfort and your utility bill for the better part of a decade.