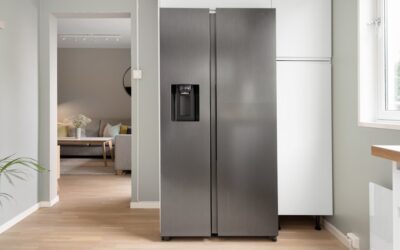
A clogged KitchenAid refrigerator water filter is the single most common reason your dispenser slows to a trickle and your ice starts tasting like the inside of a plastic jug. Swapping the KitchenAid refrigerator water filter takes about two minutes, no tools, and it is the cheapest thing you can do to keep 20-plus cubic feet of appliance running the way it should.
Part of our Kitchen Remodeling guide — explore the full guide →
I’ve replaced these filters on hundreds of service calls, and the mistakes are always the same: wrong part number, filter not seated, or nobody reset the indicator light. This guide walks through all of it so you only do the job once.
- How Often to Change It
- Finding the Right Filter Model
- Genuine vs. Aftermarket Filters
- How to Replace the Filter, Step by Step
- Resetting the Filter Indicator Light
- Troubleshooting Common Problems
- Air Filters Are a Separate Job
- Water Pressure and Your Supply Line
- Can You Run Without a Filter?
- What It Costs to Keep Up
How Often to Change It
KitchenAid rates its filters for roughly 200 gallons or six months, whichever comes first. In a household of four running the dispenser daily, six months is realistic. If you have hard water above 10 grains per gallon, or your area runs a lot of sediment, plan on four to five months instead.
Don’t wait for the water to slow down. By the time flow drops noticeably, the carbon has been saturated for weeks and it is no longer reducing chlorine taste, lead, or the other contaminants the cartridge is certified for. The dispenser status light will glow yellow at about 90 percent capacity and red when it’s spent.
Finding the Right Filter Model
KitchenAid and its parent Whirlpool use a handful of filter series, and using the wrong one is the number-one cause of leaks. The current lineup:
- EveryDrop Filter 1 (EDR1RXD1 / W10295370A) — most side-by-side and French-door models with the filter in the upper-right corner of the fresh-food section.
- EveryDrop Filter 2 (EDR2RXD1 / W10413645A) — many French-door units with the filter behind the top grille or in the ceiling of the compartment.
- EveryDrop Filter 3 (EDR3RXD1 / 4396841) — older Push Button “PUR” style filters in the base grille.
- EveryDrop Filter 4 (EDR4RXD1 / UKF8001) — older bottom-freezer and French-door models, common on 2005-2012 units.
To be sure, pull the old filter and read the number printed on its side, or check the label inside the fresh-food compartment on the right sidewall. You can also punch your full model number (a 12-to-14-character code on that same label, like KRFF305ESS) into the parts lookup on the manufacturer site.
Genuine vs. Aftermarket Filters
A genuine EveryDrop filter runs about $45 to $55. Aftermarket compatibles from brands like Waterdrop, GlacialPure, or AquaCrest cost $12 to $20 for a two- or three-pack. The good aftermarket options carry NSF/ANSI 42 (taste and odor) and sometimes NSF 53 (lead, cysts) certification — look for that certification printed on the box, not just “tested to NSF standards.”
Cheap uncertified filters are where people get burned. I’ve pulled aftermarket cartridges that swelled and cracked the housing, and a few that leaked because the O-rings were a hair off spec. If you go aftermarket, stick with an NSF-certified brand and inspect the seals before installing.
How to Replace the Filter, Step by Step
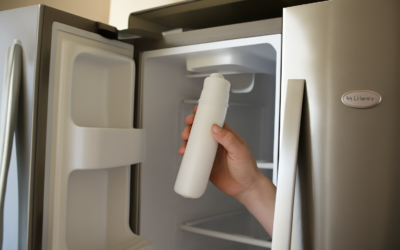
Most modern KitchenAid units use a push-in or quarter-turn filter in the upper-right corner of the fridge compartment. Here’s the process:
- You don’t need to shut off the water supply for the in-fridge style — the housing self-seals when the filter comes out.
- Push the old filter in slightly and release, or press the eject button, then pull it straight out. For base-grille models, twist a quarter turn counterclockwise and pull.
- Remove the protective caps from the new filter and note the arrows or alignment marks.
- Slide the new filter in until it clicks, or twist a quarter turn clockwise until it locks flush.
- Dispense water for two to three minutes (about 3 to 4 gallons) to purge air and loosen carbon fines. The water may sputter and look cloudy at first — that’s trapped air, not a defect.
If water sprays or drips when you first dispense, the filter isn’t fully seated. Pull it and reseat it firmly.
Resetting the Filter Indicator Light
Changing the cartridge does not reset the status light — you have to do that manually. The method depends on your control panel:
- Dispenser models with a “Filter” button: press and hold for 3 seconds until the light changes from red back to blue or off.
- Models with “Water Filter” on the touch panel: hold it for about 3 seconds.
- Older units: hold the “Light” and “Lock” buttons together, or the “Max Ice” and “Max Cool” buttons, for 3 seconds until it beeps.
Check your owner’s manual for the exact combination — Whirlpool changes it across model years. If the light won’t reset, try holding for the full 3 seconds and watch for a single confirmation beep or a color change.
Troubleshooting Common Problems
Slow or no water after replacement: Trapped air is normal for the first few glasses. If it persists past a gallon or two, the filter may be an incompatible model that’s restricting flow, or your home water pressure is below the 35 psi minimum these dispensers need.
Leaking around the filter: Almost always a seating problem or a damaged O-ring on an aftermarket cartridge. Pull it, check the rings for nicks, lightly wet them, and reinsert.
Water still tastes bad: Give it a full three-gallon flush. If the taste lingers, the supply line or the reservoir tank behind the crisper may be harboring old carbon or biofilm — flush an extra few gallons and dump the first batch of ice.
Ice maker stopped after the swap: Some models cut ice production if they sense no filter or a poor seal. Confirm the cartridge is locked in, then give the ice maker up to 24 hours to refill and cycle.
Air Filters Are a Separate Job
Don’t confuse the water filter with the air filter. Many KitchenAid French-door models also carry a small fresh-flow air filter — part FreshFlow AIR1 (W10311524) — mounted on the rear wall of the fresh-food compartment. It absorbs odors so your leftovers don’t taste like last week’s onions, and it’s rated for about six months, the same interval as the water filter. It clicks in and out of a little door and costs $15 to $20. If your produce smells off even with a fresh water filter, the air filter is the thing you forgot.
Water Pressure and Your Supply Line
KitchenAid dispensers want at least 35 psi at the fridge to pour properly, and 40 to 60 psi is ideal. If your whole house runs low pressure, even a brand-new filter will feel weak. Check the saddle valve or shutoff behind the refrigerator — a partially closed valve is a frequent culprit after someone moves the unit to clean behind it. The 1/4-inch copper or plastic supply line should have no sharp kinks; a crimped line strangles flow no matter how new the cartridge is. If you’re on a well, sediment loads the filter faster, so a whole-house sediment pre-filter will stretch each cartridge’s life considerably.
Can You Run Without a Filter?
Yes. Every KitchenAid that takes an internal filter ships with a bypass plug, or the housing will keep water flowing unfiltered when empty. If you’re between filters or on a well with separate whole-house filtration, running the bypass is fine — the water just won’t get the extra carbon polish. Order the bypass cap (often included with the fridge) if you want to keep the housing sealed and pressurized without a cartridge in place.
What It Costs to Keep Up
Budget roughly $90 to $110 a year for two genuine filters, or $30 to $50 a year with certified aftermarket cartridges. Compare that to a service call — a tech visit runs $90 to $150 just to walk in the door — and a $50 filter you install yourself is the best money you’ll spend on the appliance. Set a phone reminder for the six-month mark so you’re changing on schedule instead of waiting for the trickle.
Keep the model number of your fridge and the matching filter number written inside a cabinet door. The next time you reorder, you won’t have to pull the crisper drawer or squint at a label behind the milk to figure out which cartridge you need.