Here is the uncomfortable truth most showrooms gloss over: standard laminate and standing water do not mix, yet laminate tile flooring for bathroom installations has become one of the fastest-growing categories in home improvement. The reason is simple. A new generation of water-resistant and waterproof-core laminates now delivers the warm, cushioned feel of laminate with a convincing ceramic or stone-tile look, minus the cold, hard, expensive reality of real tile. Whether it belongs in your bathroom depends entirely on which product you buy and how carefully it is installed.
- Why People Choose Tile-Look Laminate for Bathrooms
- Water Resistant vs Waterproof: Know the Difference
- The Pros of Laminate Tile Flooring for Bathroom Use
- The Cons and Real Risks
- Installation Tips That Keep Water Out
- Style Options: Matching the Tile Look You Want
- How It Compares to Vinyl and Real Tile
- Cost Breakdown for a Typical Bathroom
- The Bottom Line
This guide walks through the real pros and cons, the core technologies that make bathroom use possible, realistic costs, and the install details that keep water out.
Why People Choose Tile-Look Laminate for Bathrooms
The appeal is a mix of comfort, cost, and looks. Real porcelain tile is unbeatable for wet areas but it is hard underfoot, cold in winter without radiant heat, and expensive to install because it needs a mortar bed, grout, and a skilled hand. Laminate that mimics tile gives you the grout-line grid, the stone or marble visual, and the wide-format look for a lot less money and a much easier install.
It also warms up a bathroom. Laminate has an insulating wood-based core, so it never feels as icy as ceramic on a January morning. For a half bath, powder room, or guest bathroom that rarely sees a flooded floor, a quality water-resistant tile-look laminate is a genuinely practical pick.
Water Resistant vs Waterproof: Know the Difference
This distinction is everything in a bathroom, and manufacturers use the terms loosely. Read the spec sheet, not the marketing.
- Standard laminate: Uses an HDF (high-density fiberboard) core that swells permanently if water reaches it. Never use this in a bathroom.
- Water-resistant laminate: Has a treated or coated HDF core and tighter seams, rated to resist surface spills for a stated time, often 24 to 72 hours. Fine for powder rooms and low-splash areas.
- Waterproof laminate: Uses a fully waterproof core, sometimes a stone-polymer or specially sealed composite, with sealed edges. This is the only type appropriate for a full bath with a tub or shower.
If a product does not carry a clear waterproof rating and a warranty that specifically covers wet-area or bathroom installation, treat it as unsuitable for anything more than a powder room.
The Pros of Laminate Tile Flooring for Bathroom Use
- Lower cost: Material runs $1.50 to $4 per square foot versus $3 to $10 for porcelain tile, and installation is far cheaper.
- Warmer and softer underfoot than ceramic or stone.
- Fast DIY install with click-lock planks and no mortar or grout curing time.
- Realistic looks: Modern printing captures marble veining, travertine, and slate convincingly, often with embossed-in-register texture that matches the grout grid.
- Scratch resistance from the aluminum-oxide wear layer, which handles grit tracked in from outdoors.
The Cons and Real Risks
No product is perfect, and bathrooms punish the wrong choice. The biggest risk is standing water finding a seam. Even waterproof laminate relies on tight, sealed joints; a poor install with gaps at the tub or toilet base can let water reach the subfloor. Once trapped, it breeds mold you cannot see.
Other drawbacks include resale perception, since some buyers still equate real tile with quality in bathrooms, and repairability. A single damaged plank in a floating floor can be tricky to swap out mid-run. Laminate also cannot be refinished; when the wear layer is gone, the plank is done. Finally, in a full bathroom you must caulk every perimeter and penetration, which turns a simple floating floor into a more careful job.
Installation Tips That Keep Water Out
The product matters, but the install determines whether it lasts. Follow these bathroom-specific steps:
- Acclimate the planks in the bathroom for 48 hours so they adjust to the humidity before locking together.
- Use the manufacturer’s moisture barrier underlayment, especially over concrete slabs and in basements.
- Leave the expansion gap of 1/4 to 3/8 inch around all walls and fixtures, then hide it under baseboard, never under the toilet.
- Silicone-caulk every perimeter edge and around the tub, shower, and vanity so surface water cannot slip under the planks.
- Set the toilet on top of finished flooring with a proper wax or rubber seal, and caulk the base to seal it.
- Wipe spills promptly and use a bath mat at the shower exit to catch the worst of the drips.
Style Options: Matching the Tile Look You Want
Tile-look laminate is not one style but a whole family of looks, and choosing the right one keeps the floor from reading as a cheap imitation. The most popular formats mimic large-format porcelain, marble, travertine, and slate. Here is how they tend to perform in a bathroom setting:
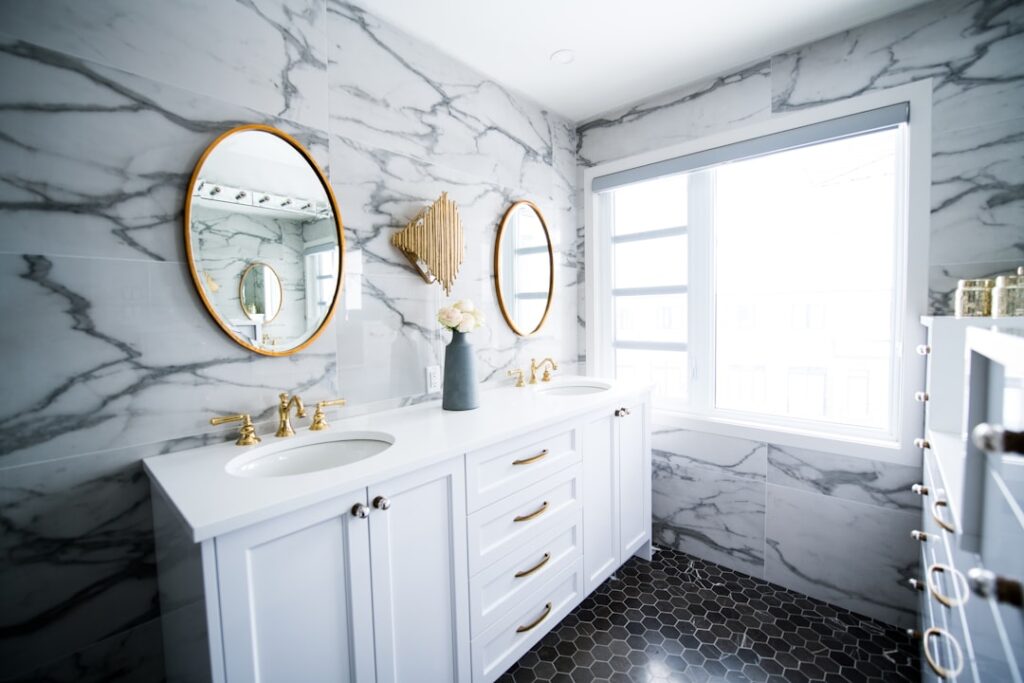
- Marble-look: Soft veining on a light background makes a small bathroom feel luxe. Choose a matte finish so it does not look plasticky.
- Slate and stone-look: Darker, textured surfaces hide water spots and hair between cleanings, a practical pick for busy family baths.
- Travertine and concrete-look: Neutral, on-trend tones that pair with almost any vanity color.
- Grouted grid patterns: Some planks are scored to look like individual square tiles with a printed grout line, which reads more convincingly as real tile than a plain plank does.
Wider, longer tile-format planks show fewer seams, which means fewer places for water to intrude and a cleaner overall look. Where you can, favor a larger format with embossed-in-register texture, where the surface bumps line up with the printed grout and stone pattern for a tactile, believable finish.
How It Compares to Vinyl and Real Tile
It helps to know where tile-look laminate sits against its two main rivals. Luxury vinyl tile (LVT) is fully waterproof by nature and is the safer bet for a primary bathroom that sees heavy shower use, but it can feel harder and less warm than laminate and sometimes has a shallower texture. Real porcelain tile is the gold standard for durability and resale in wet areas, yet it costs more, installs slower, and feels cold and hard underfoot. Laminate lands in the middle: warmer and cheaper than tile, often more realistic in texture than budget vinyl, but demanding more care around moisture than either. For a guest bath or powder room, that middle ground is exactly where many homeowners want to be.
Cost Breakdown for a Typical Bathroom
For a 50-square-foot bathroom, waterproof tile-look laminate at $3 per square foot puts materials at about $150. Add underlayment, transition strips, and a couple tubes of quality silicone for another $40 to $60. DIY installation is free beyond your time; professional install runs $2 to $5 per square foot, or roughly $100 to $250 for a small bath. All in, expect $200 to $450 done yourself and $350 to $650 with a pro, comfortably under the $700 to $1,500 a real tile install of the same room would cost.
The Bottom Line
Laminate tile flooring for bathroom projects works well when you match the product to the room and install it with moisture in mind. For powder rooms and guest baths, a water-resistant tile-look laminate is a cost-effective, warm, good-looking choice. For a primary bathroom with a tub or shower, insist on a true waterproof core, seal every edge, and it can serve you reliably for 15 to 20 years. Buy the wrong core or skip the caulk, and you will be replacing both the floor and the subfloor sooner than you think.
Prefer to explore on your own?
See how new flooring looks in your actual room in seconds — free, no signup.
Try the free Floor Studio →