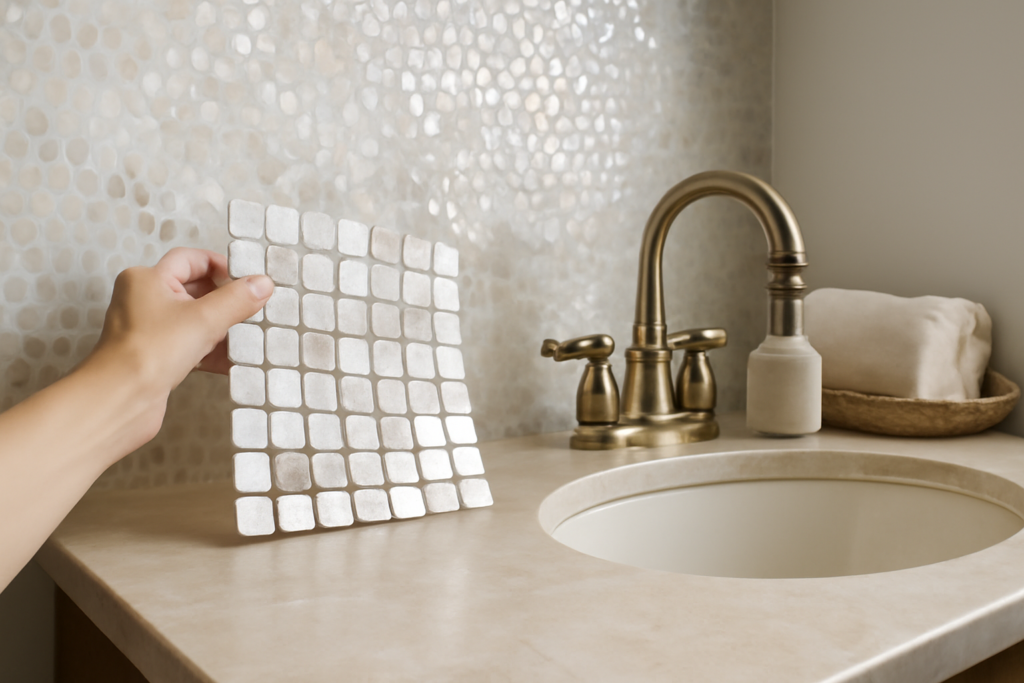
Pearl tile describes any tile finished with a pearlescent, iridescent, or mother-of-pearl sheen that shifts color as light and viewing angle change. Rather than a single material, pearl tile is a look, achieved through glazes, metallic oxides, or genuine shell inlays, and it brings a soft, luminous glow to backsplashes, feature walls, and shower niches. Homeowners drawn to subtle luxury love how the surface reads creamy white in one light and faintly rose, silver, or champagne in another.
Part of our Tile & Grout guide — explore the full guide →
Because the term covers several product types, knowing what you are actually buying matters. This guide breaks down the materials behind the shimmer, where the look works, what it costs, and how to install and clean it without dulling that signature glow.
What “Pearl” Actually Refers To
The label gets applied to a handful of distinct products, and prices swing dramatically depending on which you choose:
- Genuine mother-of-pearl tile: Thin slices of real oyster or capiz shell mounted on mesh. Stunning, but delicate and expensive.
- Pearlescent glass tile: Glass with an iridescent coating that mimics the shell effect at a fraction of the cost.
- Pearl-finish ceramic or porcelain: Standard tile bodies with a lustrous, opalescent glaze fired onto the surface.
- Pearl-colored stone: Marble or limestone in soft ivory-white tones marketed as “pearl” for their creamy coloring rather than any shimmer.
Read the product description carefully. A $6 pearlescent glass mosaic and a $40 genuine capiz-shell tile can look similar in a small online photo but perform very differently in a wet shower.
Why Homeowners Choose the Pearl Look
The appeal is almost entirely visual. Iridescent surfaces catch and scatter light, so a pearl tile backsplash reflects daylight around the room and makes small kitchens and bathrooms feel larger and brighter. The color-shifting quality also pairs beautifully with a wide palette; the same tile can complement warm brass fixtures or cool chrome depending on the surrounding tones.
Designers often use pearl tile as a controlled accent rather than a whole-room surface. A shimmering strip inside a shower niche, a mosaic band above a vanity, or a single feature wall delivers the luxury effect without overwhelming the space or the budget.
Best Rooms and Applications
Pearl finishes shine, quite literally, in these spots:
- Kitchen backsplashes: The reflective surface bounces light off countertops and resists grease when properly sealed.
- Bathroom feature walls and niches: Iridescence reads spa-like and elegant.
- Powder rooms: A low-traffic space where delicate mother-of-pearl can be used freely.
- Fireplace surrounds and accent bands: The glow adds warmth to a focal point.
Genuine shell tiles are generally not recommended for floors or heavy-traffic showers because the natural material scratches and can delaminate under constant water pressure. For floors, choose a pearl-finish porcelain rated for the traffic instead.
What Pearl Tile Costs
Budget varies more here than with almost any other tile category. Pearlescent glass mosaics typically run $8 to $20 per square foot. Pearl-glazed ceramic and porcelain land around $5 to $12. Genuine mother-of-pearl and capiz-shell tiles are the premium tier at $25 to $60 or more per square foot, reflecting the hand-cut shell and labor-intensive mounting.
Installation adds $10 to $25 per square foot because mosaics and shell tiles require careful handling, extra layout time, and often specialized adhesives. The good news is that accent applications use so little material that even a premium tile stays affordable; a shower niche might need only two or three square feet.
Installation Considerations
Iridescent and shell tiles demand more finesse than standard field tile. Keep these points in mind:
- Use a white polymer-modified thinset or a clear glass-tile adhesive. Gray thinset can show through translucent glass and mute the pearl effect.
- Spread adhesive with a fine-notch trowel, typically 3/16 inch, to avoid ridges telegraphing through thin tiles.
- Never cut mother-of-pearl on a standard wet saw; use fine snips or a rotary tool, and wear a dust mask.
- Choose an unsanded grout for glass and shell to prevent scratching the delicate surface.
- Match grout color thoughtfully. A bright white grout keeps the look crisp, while a warm gray adds depth.
For shell tile specifically, confirm the manufacturer approves the intended location. Many products are rated for walls only.
Pairing Pearl Tile With the Rest of the Room
Because iridescent surfaces already do a lot of visual work, the surrounding materials should support rather than compete with them. Neutral counters in white quartz, warm marble, or honed concrete let the pearl finish stay the star. Cabinet colors in soft white, greige, or pale sage read especially well against a shimmering backsplash, while deep navy or charcoal cabinetry turns the same tile into a glamorous, high-contrast accent.
Fixtures matter too. Warm metals like brushed brass and champagne bronze amplify the champagne and rose undertones in many pearl glazes, while polished chrome and nickel bring out the cooler silver and white tones. Lighting is the final lever: because the finish shifts with light, layering in dimmable warm LEDs lets you dial the mood from bright and crisp during the day to soft and glowing at night.
Common Pearl Tile Shapes and Patterns
The shimmer comes in nearly every format, and shape strongly influences the final feel:
- Subway and brick: Classic 3 by 6 inch pearl-glazed tiles bring a timeless, clean-lined look.
- Penny rounds and small mosaics: Tiny pieces multiply the number of reflective facets for maximum sparkle.
- Fish-scale and fan shapes: Scalloped tiles echo seashells and lean coastal or Art Deco.
- Hexagons: A modern geometric option that still catches light from many angles.
Smaller and more faceted shapes intensify the iridescent effect but add grout lines and installation time, so weigh the drama against the upkeep before you commit to an intricate mosaic.
Cleaning and Long-Term Care
Protecting the shimmer is mostly about avoiding abrasives. Wipe surfaces with a soft microfiber cloth and a pH-neutral cleaner or plain warm water with a drop of dish soap. Skip anything containing bleach, ammonia, or grit, which can etch coatings and cloud the iridescent layer over time.
Genuine mother-of-pearl needs a penetrating natural-stone or shell sealer applied on installation and refreshed periodically to guard against water spots. Pearlescent glass, by contrast, is nonporous and needs no sealing, though the grout lines around it still benefit from an annual sealer. Blot standing water in showers and wipe down after use to keep the finish looking fresh for years.
Is Pearl Tile Right for Your Project?
The decision comes down to placement and expectations. If you want a durable, low-maintenance shimmer for a backsplash or floor, a pearl-finish porcelain or iridescent glass delivers the look with real toughness. If you are creating a jewel-box powder room or a one-of-a-kind accent and can commit to gentle care, genuine mother-of-pearl rewards the investment with a depth no printed tile matches.
Order 15 to 20 percent extra for mosaics, since sheet-mounted tiles are easy to break during cutting and hard to color-match later. Confirm the location rating, pick the right adhesive and grout, and a well-chosen pearl tile becomes the glowing detail guests remember long after they leave the room.
Prefer to explore on your own?
See how new flooring looks in your actual room in seconds — free, no signup.
Try the free Floor Studio →