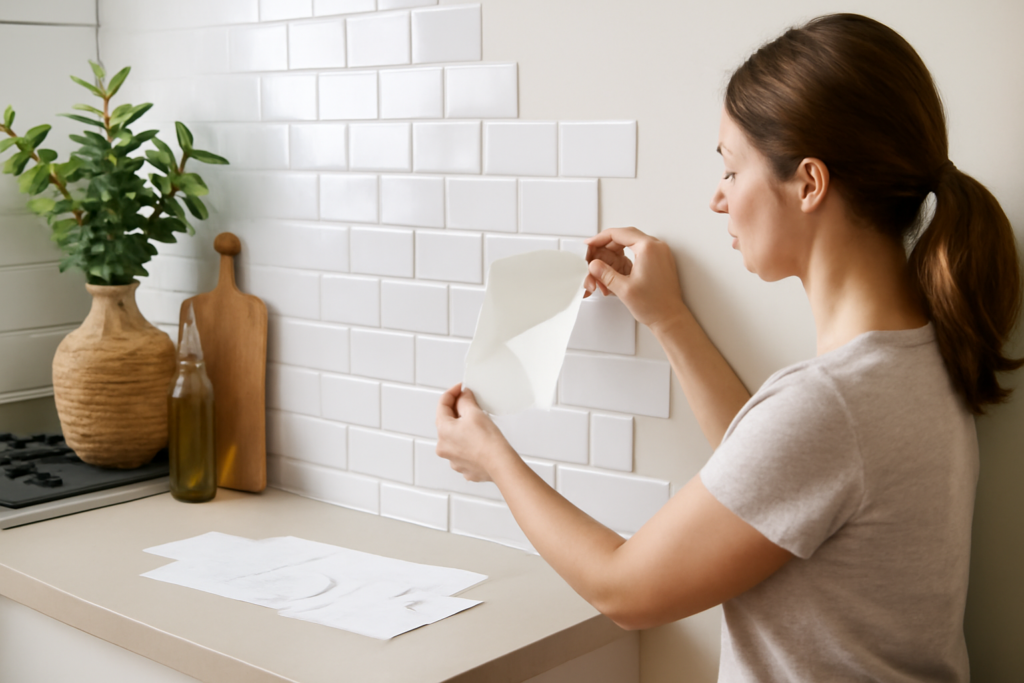
The classic subway tile look has been a kitchen and bath staple for over a century, but installing real ceramic tile takes skill, tools, and time. Peel and stick subway tile offers a shortcut: self-adhesive tiles or sheets that deliver that crisp rectangular brick pattern with no mortar, no grout float, and no wet saw. For renters and weekend DIYers, it is one of the easiest ways to get a fresh backsplash in an afternoon.
Part of our Tile & Grout guide — explore the full guide →
It is not identical to real tile, and it has limits, but for the right space it is a smart, affordable upgrade. Here is everything you need to know.
What Is Peel and Stick Subway Tile?
Peel and stick subway tile comes in a few forms. Some are individual lightweight tiles with adhesive backing, while others are full sheets, often 10 to 12 inches, printed and textured to look like a grid of subway tiles complete with simulated grout lines. Materials include vinyl, gel-based composite, and thin metal or stone-look options. You simply peel off the backing and press the tile onto a clean wall, no special tools needed beyond scissors or a utility knife.
Where It Works Best
These tiles perform best on smooth, dry vertical surfaces in moderate conditions.
- Kitchen backsplashes: the most common use, behind counters and around the sink.
- Bathroom walls: behind a vanity or as a partial wall accent, away from direct shower spray.
- Laundry rooms and bar areas: a quick style boost in low-moisture zones.
- Rentals: a removable upgrade that does not require permanent tile work.
Avoid areas with constant water contact, like inside a shower, and surfaces exposed to high heat, such as directly behind a gas stove burner.
What It Costs
Affordability is a major selling point. Materials typically run about $4 to $12 per square foot, and there is no labor cost if you install it yourself. A standard kitchen backsplash of 25 to 35 square feet might cost roughly $100 to $400 in materials. Real ceramic subway tile, by contrast, often runs $7 to $20 or more per square foot installed once you add labor, mortar, and grout.
Pros and Cons
Advantages
- Fast, tool-light installation with no grout or mortar
- Lower cost than traditional tile
- Easy to cut with scissors or a utility knife
- Renter-friendly and often removable
Drawbacks
- Less durable and heat-resistant than real tile
- Can peel in high heat or humidity if not applied to a clean surface
- Looks slightly less authentic than ceramic up close
- Adhesive bond depends heavily on surface prep
How to Install Peel and Stick Subway Tile
Surface prep makes or breaks the result. The adhesive needs a clean, smooth, dry wall to grip.
- Clean the wall with a degreasing cleaner to remove grease and dust, then let it dry completely. Lightly sand glossy paint for better adhesion.
- Measure and plan your layout, marking a level reference line so your first row is straight.
- Peel and place the first tile along the line, pressing firmly from the center outward to avoid air bubbles.
- Work outward, aligning each tile or sheet so the simulated grout lines stay continuous.
- Cut to fit around outlets, edges, and corners with a sharp utility knife and straightedge. Turn off power and remove outlet covers first.
- Press the whole surface firmly once finished, and add a bead of caulk along countertop and edge seams in damp areas.
Care and Removal
Wipe the tile with a soft cloth and mild cleaner; avoid abrasive scrubbers that can dull the finish. To remove, many products peel away by warming the adhesive gently with a hair dryer and pulling slowly, though some residue cleanup is usually needed. Because results vary by brand and surface, test removal in a small corner if you are renting and need to restore the wall.
Types of Peel and Stick Subway Tile
The category includes a few distinct materials, and each behaves differently. Vinyl peel and stick is the most common and affordable, flexible and easy to cut, but the least heat-resistant. Gel-based or 3D tiles have a raised, glossy surface that looks more like real ceramic and feels more substantial, often performing better near moderate heat. Metal and stone-look composite tiles offer a premium appearance and more durability at a higher price. When choosing, weigh how authentic you want the look versus how much you want to spend and how much heat or moisture the area sees.
Surface Prep Makes or Breaks It
If there is one rule for peel and stick tile, it is that the adhesive is only as good as the surface beneath it. Grease is the number one enemy in kitchens, so a thorough degreasing wipe-down is non-negotiable. The wall must be completely dry, since trapped moisture defeats the bond. Glossy paint should be lightly scuffed with fine sandpaper so the adhesive has something to grip. Textured or heavily uneven walls are a poor fit, because the tile cannot make full contact and will lift at the high spots. Spend the extra twenty minutes on prep and your tile will stay put for years instead of peeling within months.
Design Tips for a Convincing Look
A few choices make peel and stick read more like real tile. Keep your first row dead level, because any tilt compounds across the wall and gives the installation away. Align the simulated grout lines carefully between sheets so the pattern stays continuous. Choose a finish that matches your kitchen’s style, glossy white for a classic look or a matte tone for something modern. Adding a thin bead of color-matched caulk along the countertop seam creates a clean, finished transition that sells the illusion.
Is It Worth It?
For a quick, affordable, low-commitment backsplash in a kitchen, bathroom, or laundry room, peel and stick subway tile is hard to beat. Keep it away from direct water and high heat, prep the surface carefully, and you can have a fresh, classic-looking wall in a few hours for a fraction of the cost of real tile. For a permanent, high-end result in a heavy-use area, traditional ceramic still wins, but for most everyday refreshes, peel and stick delivers.
Prefer to explore on your own?
See how new flooring looks in your actual room in seconds — free, no signup.
Try the free Floor Studio →