Nothing dates a kitchen faster than pendants hung at the wrong height or spaced by guesswork. Getting pendant lights over kitchen island installations right comes down to three numbers you can calculate before you buy a single fixture: how high to hang them, how far apart to space them, and how many the island can carry without looking crowded or bare. I have re-hung more crooked, too-high, and too-few pendant installs than I can count, almost always because the homeowner eyeballed it instead of measuring. Spend twenty minutes with a tape measure and the layout designs itself.
The island is the visual anchor of most modern kitchens, and its lighting does two jobs at once: it provides task light for prep and it delivers the decorative statement everyone sees. Balance those and the whole room reads as intentional.
The Right Hanging Height
The single most common mistake is hanging pendants too high, where they float uselessly near the ceiling. The correct distance from the countertop to the bottom of the pendant is 30 to 36 inches. That range keeps the light low enough to illuminate the work surface and read as intentional, yet high enough that someone seated at the island can see across it and no one standing bumps their head.
If your ceilings are taller than the standard 8 feet, do not raise the pendants to compensate. Keep the 30-to-36-inch gap above the counter and let the longer downrods or cords fill the space above. For a bar-height island counter at 42 inches instead of the standard 36, measure your clearance from that higher surface. A quick field check: hang the fixture, then stand and sit at the island to confirm sightlines and headroom before you tighten anything.
How Many Pendants Your Island Needs
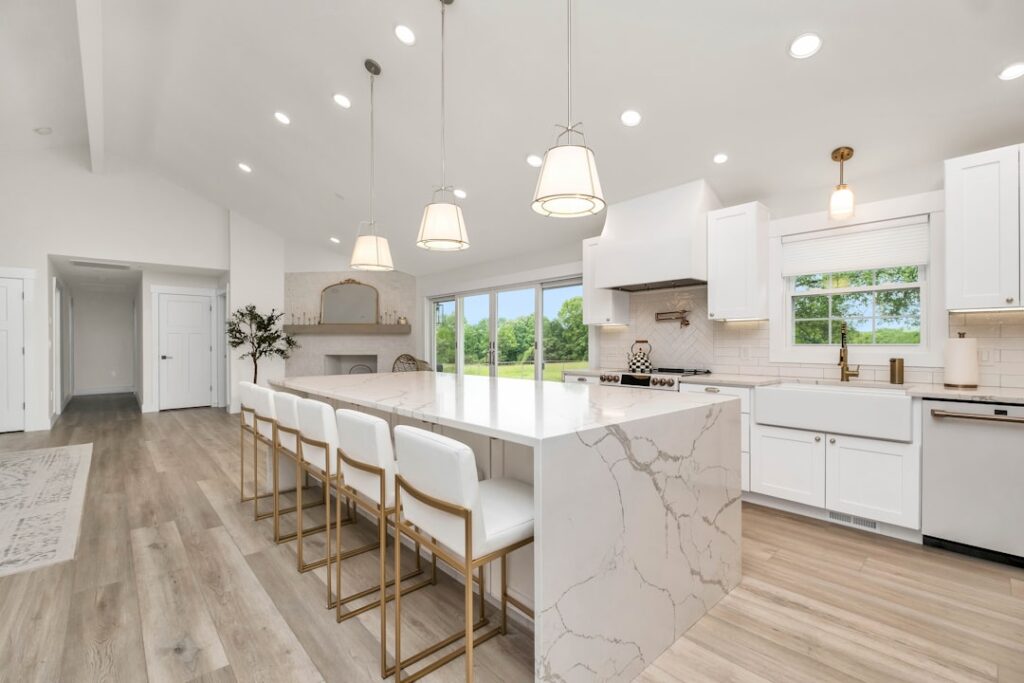
Count follows island length, not preference. A good rule is one pendant per 24 to 30 inches of island length, but the look matters as much as the math. Odd numbers, three pendants, generally look more balanced than even numbers for larger islands, while two pendants suit a shorter island cleanly.
- Island up to 4 feet (48 inches): Two small pendants or one larger statement fixture.
- Island 4 to 6 feet: Two to three pendants.
- Island 6 to 8 feet: Three pendants is the sweet spot.
- Island 8 feet and longer: Three larger or four smaller pendants, or a linear suspension fixture.
For very long islands, a single linear pendant or a light bar avoids the busy look of four separate fixtures and simplifies wiring to one junction box.
Spacing Pendants Evenly
Even spacing is where installs go wrong, because people measure from the wall or the ends instead of the pendant centers. The reliable method: find the center of the island, then work outward. For a three-pendant layout, center one pendant on the island midpoint and space the outer two an equal distance to each side. For a two-pendant layout, divide the island into equal thirds and place a pendant at the one-third and two-thirds marks.
Keep the outermost pendants at least 12 to 18 inches in from the ends of the island so they do not crowd the edges. As a spacing target, aim for 24 to 30 inches between pendant centers. Mark every center on the ceiling with painter’s tape before you cut any boxes, then sight down the line from a few feet back to confirm they read as evenly spaced to the eye, which sometimes beats the tape by a fraction.
Sizing the Fixtures Themselves
A pendant that is too small looks like an afterthought; one too large overwhelms the island. Scale the diameter to the island and the number of fixtures. For multiple pendants over an island, each fixture in the 7-to-12-inch diameter range works for most kitchens. For a single statement pendant over a compact island, go larger, 14 to 20 inches, so it holds the space on its own.
A quick sizing formula: add the room’s length and width in feet, and the sum in inches is a reasonable combined diameter for your island lighting. A 12-by-14-foot kitchen suggests about 26 inches of total fixture diameter, which you might split across two 12-inch pendants or three 8-inch ones. Confirm the fixtures do not span wider than the island itself, keeping them within the countertop footprint.
Getting the Light Output Right
Style aside, these fixtures have to light the counter you cook on. Island task lighting wants roughly 30 to 40 lumens per square foot of counter. A 3-by-6-foot island is 18 square feet, so target somewhere around 540 to 700 lumens total across the pendants. With LED bulbs producing about 800 lumens each at 9 to 10 watts, two to three bulbs usually cover it.
Choose a color temperature between 2700K and 3000K for a warm, inviting kitchen, or 3500K to 4000K if you want a crisper, brighter prep light. Put the pendants on a dimmer so you can run them bright for cooking and low for entertaining. Open-bottom or clear-glass pendants throw more downward task light; drum or opaque shades give softer ambient light and may need a higher lumen count to keep the counter usable.
Layering Pendants With the Rest of the Kitchen
Pendants are only one layer of a well-lit kitchen, and treating them as the whole scheme leaves the room either too dim or oddly spotlit. Think in three layers: ambient light from recessed cans or a ceiling fixture for general fill, task light from the pendants and under-cabinet strips for work surfaces, and accent light inside glass cabinets or on a backsplash for depth. The pendants handle island task lighting; the recessed cans handle the rest of the floor.
Keep the recessed cans off the island itself so they do not fight the pendants or cast a second set of shadows on the counter. A common layout rings the perimeter with cans on one dimmer and puts the island pendants on a separate dimmer, so you can balance the two. Match color temperatures across every layer, running 3000K pendants against 4000K cans reads as a mistake, so pick one warmth and hold it throughout the room for a cohesive, intentional look.
Choosing a Pendant Style That Fits the Room
Once the sizing and spacing math is settled, the style choice ties the lighting to the kitchen’s design. Clear glass globe or schoolhouse pendants suit transitional and classic kitchens and throw plenty of downward task light. Metal dome or cone shades read industrial or modern and focus a tight pool of light on the counter, ideal when you want strong task lighting. Drum and fabric shades soften the light for a warmer, more ambient feel but usually need a higher lumen bulb to keep the work surface bright enough.
Coordinate the pendant finish with your existing hardware and faucet, brushed nickel with brushed nickel, matte black with matte black, so the fixtures look chosen rather than random. Scale the visual weight to the island too: a chunky, oversized fixture overwhelms a small island, while three delicate pendants can look lost over a large one. When in doubt, hold a cardboard cutout of the pendant’s diameter at the planned height and live with it for a day before committing, since a fixture that looks right in a catalog can read very differently over your actual counter.
Wiring and Mounting Considerations
Each pendant, or a group on a single canopy, needs a ceiling junction box rated for the fixture weight, and the boxes must land exactly on your marked centers. If you are adding pendants where none existed, plan for an electrician to run a new circuit or tap an existing one, and put the island lights on their own switch and dimmer separate from the recessed cans. Retrofitting boxes into a finished ceiling means opening drywall, so coordinate this before any ceiling patching or painting.
Match the metal finish of the pendants to your cabinet hardware and faucet for a cohesive look, and confirm the canopy and downrod hardware suits your ceiling height. Done with measured heights, even spacing, and correct output, pendant lights over kitchen island layouts do exactly what they should: light the work surface beautifully and pull the whole kitchen together.