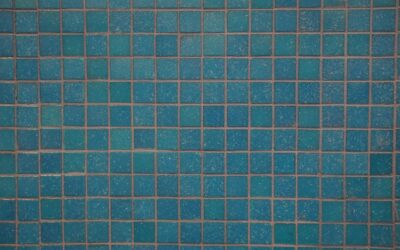
When a client asks me for a shower floor that grips wet feet, or an entry that reads with rich texture and pattern, I almost always steer them toward porcelain mosaic floor tile. These are the small tiles — penny rounds, hexagons, mini subway, tiny squares — assembled into roughly 12×12 sheets on a mesh backing so you can set dozens of pieces at once. The dense grid of grout lines that some people see as a maintenance chore is actually the mosaic’s superpower on a floor: all those joints create phenomenal slip resistance and let the tile conform to slopes that a big tile never could.
Part of our Tile & Grout guide — explore the full guide →
In this guide I will cover what makes porcelain mosaics distinct, the design possibilities from penny round to hex, why they are the go-to for shower floors, and the install details that matter — trowel size, mesh-backed sheet technique, and the grout and sealing reality you should plan for. I will also give you honest cost ranges so you can budget without surprises.
What Makes Porcelain Mosaic Different
A mosaic is simply small tile, generally with faces under about 2 inches, mounted in a pattern on a backing so you handle it in sheets rather than piece by piece. The porcelain part matters: porcelain is fired dense and hard, with very low water absorption, which makes it durable and frost-resistant enough for floors, entries, and wet areas where softer ceramic or glass might struggle. You get the design flexibility of tiny tile with the toughness of porcelain.
Most porcelain mosaics arrive on a fiberglass or polymer mesh backing bonded to the tile backs, sized around 12 inches by 12 inches per sheet. That sheet format is what makes mosaics practical to install — instead of setting a hundred penny rounds individually, you set nine sheets to cover a square foot of floor in a fraction of the time, and the factory spacing keeps your pattern consistent.
Some mosaics are face-mounted with a paper or film on the top instead of mesh on the back, which you peel off after setting. The back-mesh type is far more common and more forgiving, since you can see the tile faces as you set and adjust. Either way, the sheet system is what turns an impossibly tedious tiling job into a manageable one.
Design Options: Penny Round, Hex, and More
The design vocabulary of porcelain mosaics is huge, and it is where these tiles get fun. Penny rounds — small circles the size of a coin — give a soft, vintage, slightly playful surface with a distinctive pebble-like rhythm. They are a classic for bathroom floors and read beautifully in both period and contemporary rooms depending on color and grout.
Hexagons are the other perennial favorite, from tiny 1-inch hexes that echo old-school bathroom floors to larger 2-inch and 3-inch hexes with a crisper, more modern geometry. Mini subway mosaics, tiny squares, herringbone chips, and basketweave patterns round out the menu. You can find marble-look, concrete-look, terrazzo-look, and solid-color porcelain mosaics, so the aesthetic range runs from Victorian to ultra-modern.
Because the sheets are small and flexible, mosaics also let you do things large tile cannot. You can run them up a curved shower wall, wrap them into a niche, band them as a decorative stripe within a larger-tile floor, or carpet an entire powder room in pattern. That versatility, combined with the durability of porcelain, is why mosaics remain a designer staple.
Why Mosaics Rule the Shower Floor
Here is the practical reason mosaics dominate shower floors: slip resistance and drainage geometry. A shower floor slopes to the drain — typically about 1/4 inch per foot — and it needs to shed water while staying grippy underfoot. A big tile cannot bend to follow that slope in two directions, but a mesh-backed mosaic sheet flexes and conforms to the compound slope of a shower pan without lippage.
Then there is grip. All those small tiles mean a dense network of grout lines across the floor, and grout is far less slippery than glazed tile. That grid gives bare wet feet something to hold onto, dramatically improving traction in the one place in the house where a slip is most likely and most dangerous. This is why you constantly see 1-inch and 2-inch mosaics on shower floors paired with larger tile on the walls.
The dense grout grid does mean more joints to keep clean and sealed, which is the trade-off. But in a shower, the safety and the ability to follow the slope outweigh the extra grout maintenance every time. For steam showers, wet rooms, and curbless entries, porcelain mosaic on the floor is simply the right tool.
Installing Mesh-Backed Mosaic Sheets
Installing mosaics is different from setting individual tiles, and the trowel is smaller. Because the tiles are thin and the pieces are little, you spread thinset with a fine-notch trowel — a 1/4 inch by 1/4 inch square notch is my standard for most floor mosaics. On a shower floor over a waterproof membrane, that notch lays down enough mortar for full support without so much that it oozes up between every tiny tile.
You press each sheet into the mortar and then flatten it with a beating block and a rubber mallet, or a grout float, tapping evenly so all the little tiles seat to the same plane and the mesh embeds fully. This flattening pass is important — with so many pieces, a few can sit high or low, and the beating block levels them into one surface. You also nudge the sheet edges so the spacing between sheets matches the spacing within them; nothing gives away a mosaic job like a fat seam where two sheets meet.
Full mortar coverage matters here too, especially on a wet shower floor. You want mortar supporting every piece, not just the mesh, so those small tiles do not pop loose over time. Check your coverage by pulling up a set sheet early in the job and confirming the backs are buttered with mortar. Once you dial in the mortar consistency and pressure, the sheets go down quickly.
Grout: More Joints, More Sealing
The flip side of all that slip-resistant grout is that a mosaic floor has a lot of grout to install, clean, and seal. When you grout a mosaic, you are filling many times more joint length per square foot than you would on a large-format floor. Plan for more grout material, more time working it into every tiny joint, and a more thorough cleanup pass to clear haze from all that textured surface.
I use a quality grout and, on floors and wet areas, I lean toward products that resist staining and moisture. Many pros favor high-performance cement grouts or, for the ultimate in stain and water resistance, epoxy grout on shower floors — epoxy is tougher to install and less forgiving of sloppy cleanup, but it never needs sealing and shrugs off the constant moisture. For a standard cement grout, budget to seal the joints after cure and to reseal periodically.
Grout color is also a real design lever on mosaics. A matching grout lets the pattern read as texture; a contrasting grout makes every penny round or hex pop as a distinct shape. On floors I usually pick a mid-tone that hides dirt between cleanings, because a bright white grout on a floor will show every scuff. Whatever you choose, commit to keeping those joints sealed — the grout is the maintenance heart of a mosaic floor.
Where Else Porcelain Mosaics Shine
Beyond shower floors, porcelain mosaics work anywhere you want texture, pattern, or grip. Powder room floors done entirely in hex or penny round make a small space feel intentional and jewel-like. Entry and mudroom floors benefit from the slip resistance when people track in rain and snow. Kitchen accent bands and backsplash strips in mosaic add detail against larger field tile.
They also excel on curved and irregular surfaces — the front of a curved shower bench, a rounded step, a barrel-vaulted niche. Where a rigid large tile would have to be cut into slivers, a flexible mosaic sheet simply wraps the form. That adaptability makes mosaics the problem-solver in any tile job with complex geometry.
The one place I temper expectations is very large open floors done entirely in tiny mosaic. It looks stunning but the grout maintenance across a big footprint is real, and the install labor is higher per square foot than large tile. For those, I often suggest mosaics as accents or in the wet zones and larger porcelain in the dry field, getting the best of both.
Cost Ranges and Buying Tips
Porcelain mosaic pricing spans a wide range depending on pattern complexity, finish, and brand. Basic solid-color square and hex mosaics tend to sit at the affordable end, often roughly comparable to mid-range field tile per square foot. Specialty patterns — intricate marble-look blends, waterjet-cut designs, mixed-material sheets — climb well above that, and designer or handmade-look lines can be several times the price of plain sheets.
Remember that the sheet price is only part of the total. Mosaics carry higher install labor per square foot than large tile because of the flattening, coverage, and grout work, and you will use more grout. When you budget, factor the labor and grout premium, not just the tile cost. A cheap mosaic sheet does not stay cheap once the full install is tallied.
When buying, check that the mosaic is rated for floor use and, for wet areas, confirm it carries adequate slip resistance for the application — reputable manufacturers publish this. Buy from one dye lot to keep color consistent, and add roughly 10 to 15 percent overage for cuts, edge pieces, and future repairs. Choose the right sheet, set it with a 1/4-inch notch and a beating block, and keep the grout sealed, and a porcelain mosaic floor tile installation will give you grip, character, and durability that big tile simply cannot match.
Prefer to explore on your own?
See how new flooring looks in your actual room in seconds — free, no signup.
Try the free Floor Studio →