The correct range hood height is not a universal number. It is the mounting band left after the exact range or cooktop instructions, the hood instructions, locally adopted requirements, and the hood’s capture needs all agree.
Part of our Kitchen Remodeling guide — explore the full guide →
Start with that hierarchy, then adjust for sightlines and reach only inside the permitted band. A hood set by cabinet symmetry can be compliant with one manual yet conflict with the other appliance, or sit so high that steam rolls past its front edge.
- Set Range Hood Height From the Clearance Hierarchy
- Measure From the Reference Points the Manuals Name
- Keep the Cooking Plume Inside the Capture Area
- Coordinate the Hood With Cabinets and Backsplash
- Check Headroom, Sightlines, and Control Reach
- Plan Ducting and Building Systems Before Locking Height
- Verify the Mounting Band With a Full-Scale Field Check
Set Range Hood Height From the Clearance Hierarchy
As a planning range, wall and under-cabinet hoods are commonly mounted about 24 to 30 inches above an electric cooktop and about 30 to 36 inches above a gas cooktop, which burns hotter. Over-the-range microwaves often sit lower, near 20 to 24 inches. Treat these as starting brackets, not permission: the exact minimum and maximum come from the appliance and hood instructions and any locally adopted rules.
Collect the installation document for the exact cooking appliance and the exact hood, liner, or insert before drawing an elevation. Model families can share a name while using different burners, controls, mounting hardware, or clearance language. A retailer’s summary and a generic online chart are not substitutes for those documents.
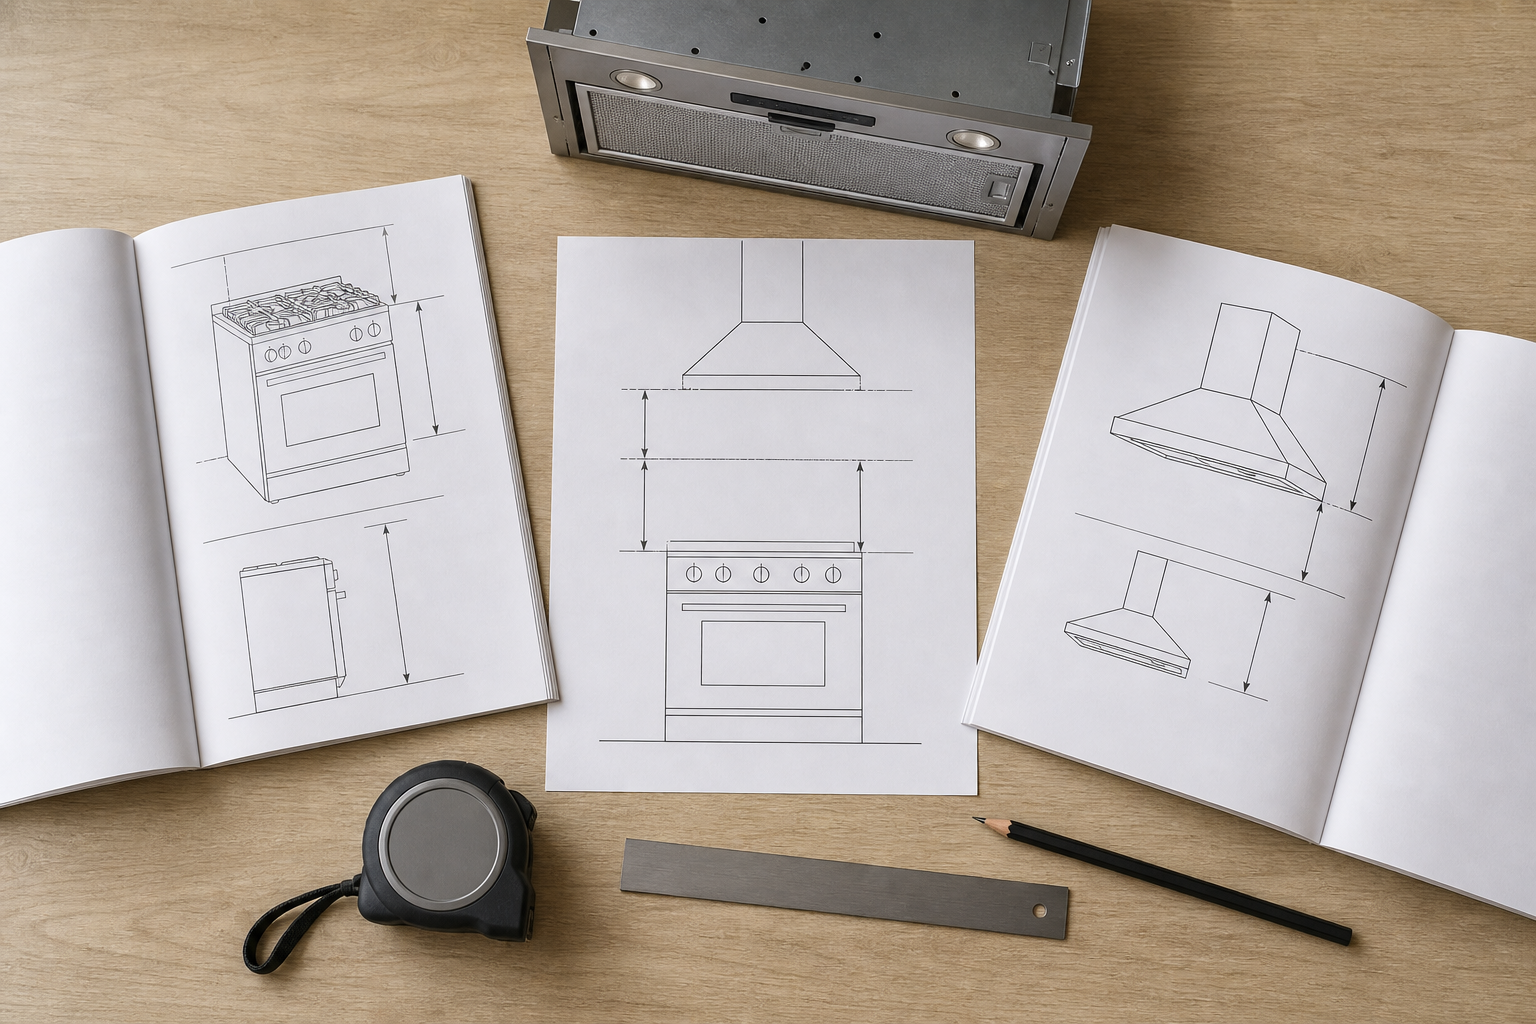
Read both manuals for the vertical reference point, minimum and maximum distances, combustible-material limits, permitted hood type, and any conditions tied to cabinet depth or cooking fuel. Then have the locally adopted rules and inspection expectations checked for your jurisdiction. The hood’s listed instructions, the cooking appliance’s listed instructions, and enforceable local requirements must all be satisfied; you do not get to choose the easiest one.
When the documents seem to conflict, stop. Ask the manufacturers for clarification and involve the licensed installer or code authority. Do not average two figures or assume the larger minimum solves a separate maximum.
Once that compliant band is clear, evaluate capture. Performance, visibility, and appearance are decision layers inside the band, not reasons to move outside it. This sequence prevents a polished kitchen from hiding a clearance problem behind finished trim.
Measure From the Reference Points the Manuals Name
A mounting dimension is useful only when its two endpoints are unambiguous. Many plans measure vertically from the cooking surface to the lowest part of the hood, but grates, raised burner caps, decorative rails, filters, light housings, and sloped hood bodies can confuse the field measurement. Use the endpoints defined for your models, not the points that are easiest to reach with a tape.
Draw a straight section through the appliance and hood. Mark the finished floor, counter, cooking reference plane, hood bottom, cabinet bottom, ceiling, and duct centerline. Include finished material thicknesses. Measuring before the countertop, backsplash, or finished floor is accounted for can shift the real clearance even when the rough framing looked correct.
Check the appliance’s final leveling range and the cabinet manufacturer’s finished dimensions. A slide-in range that is later raised to meet the counter changes the vertical relationship. A thick decorative hood surround can also hang below the actual metal insert, so verify which component controls the clearance to heat and which edge controls headroom.
Record one approved dimension on the elevation and identify both endpoints in words. The installer should be able to reproduce it without guessing. Recheck that dimension after the appliance is leveled and before the hood is permanently enclosed.
Keep the Cooking Plume Inside the Capture Area
Clearance establishes where a hood may go; capture determines whether that location works. Hot air, moisture, grease, and combustion byproducts rise as a moving plume. The hood must intercept that plume across the active cooking footprint before room air, an open door, or a person walking past pushes it beyond the capture area.
Height, hood width, depth, shape, blower operation, and the room’s air movement work together. Raising a hood can widen the plume before it reaches the filters, which makes front burners and the corners harder to capture. A shallow decorative shell may look generous from the front while the working insert ends well behind the cooking surface.
Wall hoods benefit from the wall limiting rearward escape. Island hoods have open sides and are more exposed to cross-drafts, so their approved geometry may differ. An insert also depends on the enclosure around it; review the exact insert requirements before building a custom shell. The DG Floors guide to choosing a range hood insert and enclosure covers that component decision in more detail.
Do not assume a higher fan setting fixes poor geometry. Excess airflow adds noise, can affect room pressure, and still misses a plume that escapes the hood edge. Keep the height inside the written limits and confirm coverage with the product documents and installer.
Coordinate the Hood With Cabinets and Backsplash
Cabinet drawings often freeze the hood position before the appliances are ordered. Reverse that sequence. Select the cooking appliance and ventilation equipment first, establish the permitted mounting band, and then size wall cabinets, fillers, shelves, trim, and backsplash around the approved geometry.
Combustible woodwork deserves particular attention. A wood hood cover may extend lower than the metal liner or add corbels near the cooking area. Decorative trim cannot occupy a prohibited zone simply because the insert itself is higher. Follow the cooking appliance and hood documents for every nearby material, and have uncertain assemblies reviewed before fabrication.
Backsplash layout affects the measurement record, too. A thick stone ledge, shelf, pot rail, or projecting tile can obstruct the hood, crowd controls, or collect grease. Make the elevation show these projections at their finished depth. If the design includes a custom surround, coordinate its build-up with the separate range hood installation planning guide rather than treating finish carpentry as an afterthought.
Leave access for removable filters, lights, fasteners, and service panels. The hood may fit the opening yet become unserviceable once crown molding closes the top or a backsplash shelf blocks the filter path. A compliant height is not a complete design if routine cleaning requires damaging the enclosure.
Check Headroom, Sightlines, and Control Reach
Ergonomics decides where inside the allowed band the hood should land. Stand at the range with the cooking surface protected and the appliance off. Mimic stirring at the front and rear positions, lift the type of pot you normally use, and look toward the back controls. The hood should not force you to duck, hide the cooking surface, or put a sharp corner in the path of your forehead.
Test more than the tallest household member. A shorter cook may struggle to reach hood controls or see a display mounted high on a sloped face. Remote controls, wall controls, or compatible automation may help only if the exact model permits them and normal manual operation remains practical.
View the elevation from the adjacent room and seated positions, but do not let a clean sightline overrule a required clearance. If the hood looks too low or interrupts an important view within its compliant band, change the hood form, cabinet composition, or appliance layout. Moving the same hood beyond its approved range is not a design solution.
Filters must also clear pots and hands when removed. Confirm the removal direction and space needed, then plan how they will reach the sink. For ongoing access and cleaning decisions, see the guide to range hood filter types and maintenance.
Plan Ducting and Building Systems Before Locking Height
The hood’s vertical position affects the duct route, but duct convenience should not dictate an unsafe or ineffective clearance. Map the outlet, required duct size and material, permitted transitions, maximum equivalent length, exterior termination, and service access from the exact hood instructions. Avoid assuming an existing duct is suitable because it reaches the right wall.
A straight, appropriately sized route usually gives the designer fewer conflicts than a run crowded by joists, plumbing, or electrical work, but every installation is model- and house-specific. A lower or higher hood can move the outlet into structure. Resolve those collisions while the elevation can still change, not after cabinets arrive.
The ventilation plan may also affect room pressure and replacement air. Requirements depend on equipment capacity, other exhaust appliances, fuel-burning equipment, the home’s tightness, and locally adopted rules. A qualified HVAC professional and licensed trades should determine duct design, electrical supply, exterior termination, and any replacement-air provisions. This article is clearance planning, not wiring, gas, or duct-installation instruction.
Coordinate fire blocking, structure, and fastening with the appropriate professionals. A heavy custom enclosure needs verified support independent of finish panels. Keep required junctions, blowers, and service points accessible as directed by their manufacturers.
Verify the Mounting Band With a Full-Scale Field Check
Before fabrication, tape the hood outline on the finished elevation or build a lightweight full-size mock-up. Mark the actual lower edge, depth, insert opening, control position, and enclosure projections. Place the leveled cooking appliance or an accurate template at its final height, then repeat the reach, sightline, pot, filter-removal, and headroom checks.
Use a short approval list:
- The exact hood and cooking-appliance documents identify compatible clearance limits.
- Locally adopted requirements and inspection questions have been resolved.
- The recorded measurement uses the precise reference points named in the documents.
- The hood covers the active cooking footprint and is not defeated by obvious cross-drafts.
- Cabinets, combustible trim, backsplash projections, and service paths stay clear.
- Ducting, structure, power, and replacement-air questions have qualified answers.
- The primary cooks can see, reach, and work without a head-strike hazard.
Approve the final range hood height only when every required clearance overlaps with a workable capture and service position. If the compliant band cannot deliver both safety and useful capture, change the equipment or surrounding design before ordering cabinets. The right measurement is the one the whole system can support, not the number that makes the elevation easiest to draw.