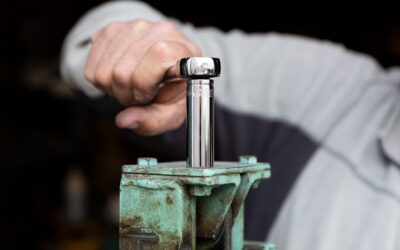
A dripping tub spout or a handle that needs two hands to shut off usually means one worn part, and learning to replace shower valve stem components yourself turns a $250 plumber visit into a $15 parts-run. Stems live inside older two- and three-handle compression valves — the style installed by the millions before single-handle cartridges took over in the 1980s and 90s — and every one of them is serviceable if you can identify it. This guide walks the full job: shut-off, extraction, washer and seat repair, and how to replace shower valve stem hardware when the brand label vanished decades ago.
Part of our Bathroom Remodeling & Flooring guide — explore the full guide →
- How a Compression Stem Works — and Why It Fails
- Tools and Parts to Stage First
- Step-by-Step: Pulling the Stem
- Washer, Packing, and Seat Service
- Identifying a Replacement Stem by Brand
- Reassembly and Testing
- The Diverter Stem: The Third Handle
- Rebuild vs. Replace the Whole Valve
- Three Mistakes That Ruin This Job
How a Compression Stem Works — and Why It Fails
Inside each handle of an older valve sits a threaded brass stem. Turning the handle screws the stem inward until a rubber washer on its tip presses against a machined brass seat, stopping flow. Three wear points cause virtually every symptom. The seat washer hardens and cracks, causing the classic drip that worsens over months. The packing — a washer or graphite string under the packing nut — dries out, causing leaks around the handle only while water runs. And the brass seat itself gets pitted by years of a hard washer grinding against it, which chews up every new washer you install within weeks. A proper stem job addresses all three, which is why a $2 washer swap that ignores the seat often fails by the next season.
Tools and Parts to Stage First
- Shower stem socket set (deep sockets, $10 to $20) or a deep-well socket that fits your bonnet nut — standard sockets are usually too shallow
- Handle puller ($10) for corroded handles that will not lift off
- Seat wrench ($8) — the L-shaped tool with square and hex ends for removing valve seats
- Assorted beveled and flat seat washers with brass screws, packing washers or graphite packing string
- Plumber’s grease (silicone-based), penetrating oil, mini hacksaw blade, flashlight
- Replacement stem, if the old one is stripped — identified per the section below
Stage everything before shutting the water off. Nothing sours a household faster than a mid-repair parts run with the main closed.
Step-by-Step: Pulling the Stem
- Kill the water. Tub/shower valves rarely have local stops, so close the house main and open a low faucet to drain pressure. Plug the tub drain so small parts cannot escape.
- Remove the handle. Pry the index cap (the H/C button), back out the handle screw, and pull the handle straight off. Forty years of mineral welding often fight you here — this is what the handle puller is for; never hammer sideways on old brass.
- Remove trim. Unscrew the escutcheon and any sleeve tube covering the stem. Some escutcheons thread on; some are caulked and need a gentle score-and-twist.
- Extract the stem. Fit the stem socket over the bonnet/packing nut hex, and turn counterclockwise. If the whole valve body seems to flex, stop and apply penetrating oil rather than force — cracking a galvanized nipple inside a wall converts a $15 job into a wall-opening. The stem assembly backs out as one unit.
- Inspect and photograph. Shoot photos from two angles before disassembly. Note stem length, thread style, and the broach (spline) pattern where the handle mounts.
Washer, Packing, and Seat Service
With the stem on the bench, remove the brass screw at the tip and match the seat washer by exact diameter — 00, 0, 1/4R, 3/8R and similar sizes, beveled or flat to match what came off. Replace the brass screw too; they come in the washer assortment for a reason. Renew the packing under the bonnet nut, or wind on three wraps of graphite packing string clockwise if it used string. Then put a flashlight on the seat down in the valve body and run a fingertip across it: any roughness means the seat goes. Insert the seat wrench, tap it firmly into the square or hex broach, and unscrew the seat counterclockwise; match the replacement’s diameter, thread, and height at the hardware store ($3 to $6). If the seat is non-removable (no broach), a seat-dressing tool grinds it flat in place for about $10. Grease the stem threads and the washer face with silicone plumber’s grease before reassembly — it doubles the life of the repair.
Identifying a Replacement Stem by Brand
Stripped threads, a twisted broach, or a bent stem mean full replacement, and this is where identification matters because stems are absolutely not universal. Length, thread pitch, seat style, and the handle broach count all vary by maker. The main families:
- Price Pfister: very common in mid-century homes; many verified stems in the 900-series pattern
- Gerber: distinctive short stems, common in the Midwest and in mobile homes
- Central Brass, Union Brass, Sayco, Sterling, Eljer, Kohler (Trend/Triton-era), American Standard: each with proprietary broaches and lengths
- Crane and Repcal: older still, but replacement patterns exist
Take the complete old stem to the store — supply houses and better hardware stores keep broach gauges and cross-reference boards (Danco and BrassCraft publish them) that match a mystery stem in minutes. Measure overall length, count broach splines (16, 20, and 22 are common), and match thread direction: on many two-handle valves the hot stem is left-hand thread and the cold right-hand, and installing the wrong one means a handle that opens backward. Replacement stems run $10 to $30; buy the matching new handle if the old broach is chewed.
Reassembly and Testing
- Thread the serviced or new stem in by hand until seated, then snug the bonnet nut — firm, not gorilla-tight; overtightened packing makes the handle stiff immediately
- Reinstall trim and handle, open the main slowly, and run both hot and cold for a minute
- Check for drips at the spout with handles closed, and around the stem with water running
- A weep at the handle cures with a 1/8-turn more on the packing nut — adjust live, in small increments
The Diverter Stem: The Third Handle
Three-handle tub/shower valves add a center diverter stem that routes water between spout and showerhead, and it wears just like the others. Symptoms are distinct: water dribbling from the spout while the shower runs means the diverter washer or seat is shot, robbing the head of pressure. Service is identical to a hot or cold stem — socket off the bonnet, replace the washer, dress or replace the seat — and diverter replacement stems run the same $10 to $30. While you are in there, do all three stems in one session; the parts cost an extra $10 and you will not be back in the wall next winter. Note that some three-handle setups instead divert at a lift-gate tub spout, in which case the center stem is absent and a $15 spout swap is the fix.
Rebuild vs. Replace the Whole Valve
A stem service is the right call when the valve body is sound and parts are identifiable — it preserves the tile wall and costs under $40. Move to full valve replacement when you meet any of these: the seat is non-removable and too pitted to dress, stems for the brand are unobtainable, the valve body threads are stripped, or you are already planning tile work. Modern code has a thumb on the scale too: two- and three-handle compression valves have no scald protection, and most jurisdictions require a pressure-balanced single-handle valve whenever the valve is replaced. That job means opening the wall — $400 to $900 with a plumber — so squeezing extra years from a rebuildable stem valve is legitimate, but budget for the conversion at the next real remodel.
Three Mistakes That Ruin This Job
First, forcing a frozen bonnet nut cold — always penetrating oil, ten minutes, then steady pressure with the socket square on the hex. Second, replacing the washer while ignoring a rough seat, which guarantees a repeat drip within a month or two. Third, mixing up hot and cold stems on reassembly and cross-threading a left-hand stem into a right-hand port. Label everything as it comes out, work on a towel so parts stay ordered, and this repair reliably comes in under two hours the first time and under one thereafter.