Two floors can use the exact same tile and look like they came from different houses. The difference is the layout. Square tile patterns range from a quiet grid that disappears into the room to a pinwheel that reads as a rug, and each one changes how much tile you buy, how many cuts you make and how forgiving the install is. Picking the pattern before you order is the smartest money decision in a tile project.
Part of our Tile & Grout guide — explore the full guide →
For most rooms, a straight lay with 10 percent overage is the simplest and cheapest choice. A diagonal layout makes small rooms feel wider but needs about 15 percent extra. Pinwheel, basketweave and random layouts add character but require two or more tile sizes and careful planning. Each layout is broken out with the sizes and rooms it suits, its waste factor, and the mistakes that ruin it.
- How to Choose Among Square Tile Patterns
- 1. Straight Lay (Grid)
- 2. Diagonal
- 3. Checkerboard
- 4. Half Offset (Brick)
- 5. One-Third Offset
- 6. Pinwheel (Hopscotch)
- 7. Basketweave
- 8. Windmill
- 9. Random (Modular or Versailles Style)
- Tools and Layout Tips
- Troubleshooting Common Pattern Problems
- Cost Considerations
- When to Call a Pro
- Frequently Asked Questions
How to Choose Among Square Tile Patterns
Three factors decide which layout works: room size and shape, tile size, and how much visual movement you want. Large tiles (18 by 18 inches and up) look best in simple layouts, because complex patterns cut them into awkward slivers. Small and mid-size tiles, including the classic 12×12 tile patterns, handle almost any layout. Rooms that are out of square, which is most of them, reward patterns that hide crooked walls, like diagonal or random layouts.
Waste also matters. Every layout that runs at an angle to the walls, or mixes sizes, increases cuts along the perimeter. Budget for overage up front, and keep a few spare tiles from the same dye lot for future repairs.
1. Straight Lay (Grid)
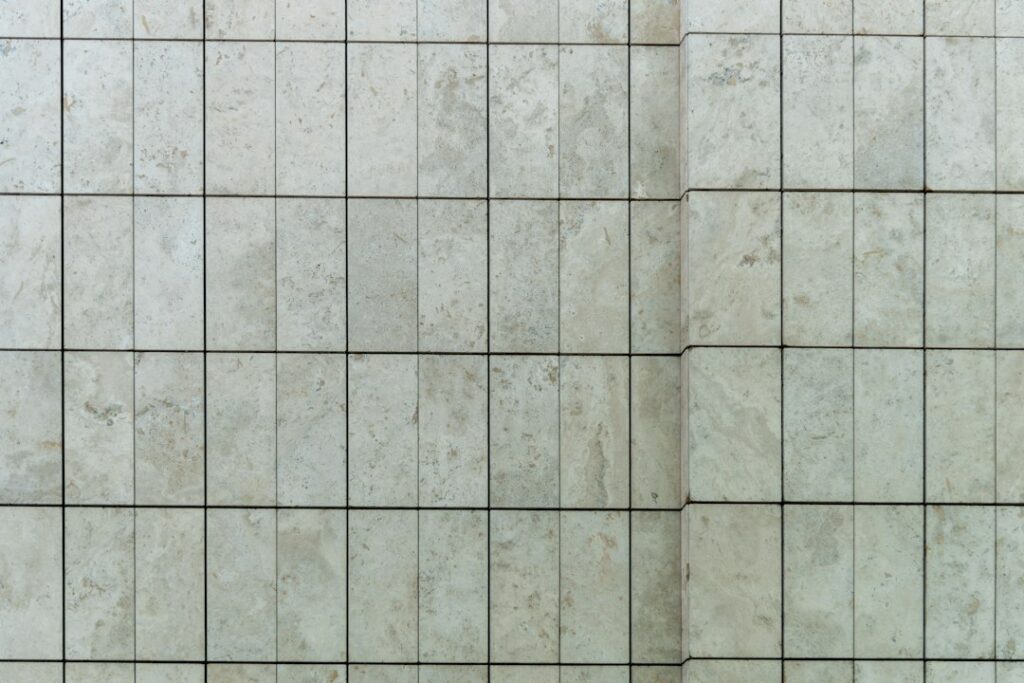
The straight tile pattern stacks square tiles in a grid with grout lines aligned in both directions. It is the most common layout for a reason: it is fast, uses the least tile, and suits any size from 4 inch wall tile to 24 inch porcelain. Waste runs about 10 percent. Its weakness is that it shows every out-of-square wall, because the grout lines run parallel to them. Start from the center of the room and adjust so cut tiles at opposite walls are equal and at least half a tile wide.
Best for: kitchens, large open areas, modern spaces, and large-format porcelain.
2. Diagonal
A diagonal tile pattern rotates the grid 45 degrees. The angled lines draw the eye across the room, making narrow spaces like hallways and small baths feel wider. Because every perimeter tile is a triangle cut, expect 15 percent waste and more saw time. Diagonal layouts are excellent at hiding walls that are not square, since no grout line runs parallel to them. Snap two perpendicular reference lines at the room’s center, then a 45 degree line through their intersection.
Best for: small baths, entries, and traditional rooms using 12 by 12 or smaller tiles.
3. Checkerboard
Checkerboard is a straight lay using two alternating colors. Black and white is the classic, but soft pairings like cream and gray look current. Waste is similar to the straight lay, around 10 percent, though you need to order each color separately with its own overage. Alignment must be precise, because any drift becomes obvious in the color pattern. It can also be laid on the diagonal for a vintage diamond look.
Best for: laundry rooms, retro kitchens, and mudrooms.
4. Half Offset (Brick)
Square tiles can be staggered so each row shifts by half a tile, like a brick wall. It softens the rigid grid and gives a bit of horizontal motion. Waste runs 10 to 12 percent. With square tile the offset is less common than with planks, but it works well with handmade-look and zellige-style tiles where small size variation is part of the charm.
Best for: walls, backsplashes, and rustic floors with small squares.
5. One-Third Offset
Shifting each row by a third of a tile creates a gentle diagonal stagger. With large tiles, the one-third offset also reduces lippage, the height difference at tile edges that occurs when slightly bowed tiles meet at their centers. Waste is about 10 to 12 percent. Many large-format manufacturers recommend no more than a 33 percent offset for exactly that reason.
Best for: large rooms with 16 inch or bigger tile.
6. Pinwheel (Hopscotch)
The pinwheel tile pattern surrounds a small square with four larger squares in a repeating rotation. The usual ratio pairs a large tile with a small insert about one-third or one-quarter of its size, such as 12 by 12 with 4 by 4, or 18 by 18 with 6 by 6. Contrast colors make the small squares pop; matching colors give quiet texture. Waste runs 10 to 15 percent. Lay out a dry run of several repeats before setting, because the pattern only works if the tiles are sized as a true module with the grout joint included.
Best for: bathrooms, entries, and kitchens wanting a classic look.
7. Basketweave
True basketweave usually uses rectangles, but a square version pairs a large square with a set of rectangles or smaller squares that mimic woven strips. Many people buy it as a mesh-backed mosaic for showers and bath floors. Waste is 10 to 15 percent for loose tiles and slightly less for mosaics. Keep grout joints tight and consistent, because the woven effect disappears if joints vary.
Best for: vintage baths, shower floors, and accent areas.
8. Windmill
The windmill wraps four rectangles or squares around a center square, forming a pinwheel of blades. It is busier than the hopscotch pinwheel and works best as a border or focal area rather than wall to wall. Expect 15 percent waste. Dry lay a full repeat on the floor to confirm the module fits.
Best for: foyers, accent panels, and patio pavers.
9. Random (Modular or Versailles Style)
A random tile pattern combines three or four square and rectangular sizes in a repeating module that looks unplanned. The style often mimics old stone floors. It hides imperfect walls well and suits natural stone and stone-look porcelain. Waste runs 15 percent, and you must order sizes in the module’s proportions. Follow the module diagram exactly, or the pattern collapses into true chaos that never closes at the edges.
Best for: great rooms, patios, and rustic or Old World designs.
Tools and Layout Tips
- Wet tile saw for straight and diagonal cuts, with a diamond blade suited to porcelain
- Manual tile cutter for quick straight scores on ceramic
- Chalk line, framing square, laser level and tape measure
- Notched trowel sized to the tile, plus leveling clips for large formats
- Spacers matched to your chosen grout joint
- Safety glasses, hearing protection, gloves and an N95 or P100 respirator
Cut porcelain and stone wet. Cutting tile dry releases crystalline silica dust, which damages lungs over time. A wet tile saw keeps dust down, but still wear a respirator when grinding or cutting indoors, and clean up with a HEPA vacuum rather than sweeping. Dry lay at least one row in each direction before mixing thinset, and photograph the final dry layout for reference.
Troubleshooting Common Pattern Problems
- Thin slivers at one wall: Your starting line was not centered. Shift the layout half a tile.
- Pattern drifts across the room: Snap new reference lines every few feet and check with a framing square.
- Lippage on large tiles: Use a one-third offset and leveling clips, and back-butter every tile.
- Pinwheel will not close: The tiles were not true modules. Measure actual tile sizes, which often differ from the nominal label.
- Grout lines look wavy: Calibrated or rectified tile helps; handmade tile needs wider joints.
Cost Considerations
Material cost depends on the tile, but the pattern changes the labor bill. Many installers charge a base rate for a straight lay and add a premium for diagonal, pinwheel, basketweave or random layouts, often 15 to 30 percent more because of layout time and cuts. Patterns with two or more tile sizes can also raise material costs if the accent tiles are pricier. Budget overage at 10 percent for grids and offsets and 15 percent for angled or mixed-size patterns.
When to Call a Pro
A straight or offset layout is approachable for a careful DIYer. Hire a tile setter for large-format tile, natural stone, intricate mixed-size patterns, or floors with significant height variation. A pro will also check that the subfloor is stiff enough for tile, since deflection cracks grout regardless of pattern. In older homes, test existing flooring and adhesive for asbestos before tearing it out.
Frequently Asked Questions
What is the most popular square tile pattern?
The straight lay grid is the most popular because it is fast, affordable and suits nearly any room and tile size.
How much extra tile do I need for a diagonal pattern?
Plan on about 15 percent overage for a diagonal layout, compared with about 10 percent for a straight grid.
What sizes work for a pinwheel tile pattern?
Pair a large square with a small square about one-third or one-quarter its size, such as 12 by 12 with 4 by 4. Confirm actual dimensions so the module closes.
Do square tile patterns make a small room look bigger?
Diagonal layouts and large tiles in a simple grid both help a small room feel more open. Busy multi-size patterns can make it feel smaller.
Can I use 12×12 tile in a random pattern?
Yes, if you combine it with the other sizes the module calls for, usually 6 by 6, 6 by 12 and 12 by 12 or larger.
Prefer to explore on your own?
See how new flooring looks in your actual room in seconds — free, no signup.
Try the free Floor Studio →