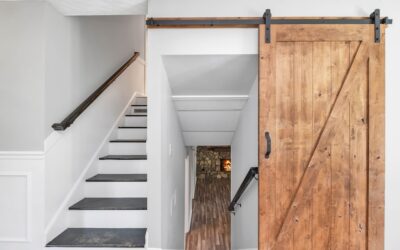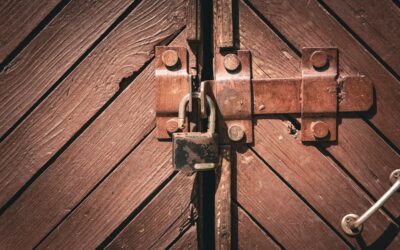
The hardware you bolt onto a sliding barn door does more heavy lifting than most people expect. The right barn door pulls finish the look, determine how easily the door glides open, and even affect whether the door clears its trim without pinching your fingers. Because a barn door slides flat against the wall instead of swinging on hinges, it needs specialized pulls rather than a conventional knob. This guide breaks down the handle styles, the sizing rules that keep your door functional, and the straightforward installation that any homeowner can handle in an afternoon.
Part of our Windows & Doors guide — explore the full guide →
- Why Barn Doors Need Special Hardware
- Common Pull Styles
- Getting the Sizing Right
- Surface Mount Versus Flush Mount
- Tools and Materials for Installation
- Step-by-Step Installation
- Matching Pulls to Your Door Material
- Matching Finish to the Rest of the Room
- Grip Comfort and Everyday Use
- Final Buying Tips
Why Barn Doors Need Special Hardware
A traditional doorknob projects several inches from the surface, which would collide with the wall or door casing every time a barn door slid past. Sliding doors instead use low-profile pulls that keep the hand grip close to the door face. Many installations pair a surface-mounted pull on the room side with a flush recessed pull on the wall side, so the door can tuck fully against the wall without the hardware catching.
This dual-pull approach is the detail separating a smooth installation from a frustrating one. Skip the flush pull and you may find the door refuses to slide the last few inches, leaving an awkward gap or a handle that scrapes the trim.
Common Pull Styles
Barn door pulls come in a range of shapes, each suited to a different aesthetic and grip preference. Your choice should complement both the door and the surrounding fixtures, from cabinet hardware to light fixtures.
- Bar and ladder pulls — vertical or horizontal bars, the most common and easiest to grab, sized from 8 to 24 inches
- Handle pulls — compact D-shaped or square handles for a minimal footprint
- Flush recessed pulls — round or rectangular cups that sit inside the door, essential for the wall side
- Rustic and rope pulls — heavy iron rings or twisted rope for farmhouse and industrial rooms
- Edge pulls — mounted on the door’s leading edge, useful for tight closets and pantry doors
Match the metal finish to your existing hardware: matte black remains the runaway favorite for modern and farmhouse styles, while oil-rubbed bronze, brushed nickel, and brass round out the choices. Consistency across a room reads as intentional design.
Getting the Sizing Right
Size affects both looks and function. A pull that is too small looks lost on a broad door, while an oversized handle can feel clunky. As a rule of thumb, a standard 36-inch-wide interior barn door pairs well with a 12- to 18-inch pull. Taller or wider doors carry larger hardware gracefully, and a pantry-height door may want a full 24-inch bar.
Mounting height matters just as much. Set the center of the pull at roughly 36 to 42 inches from the floor, matching the comfortable grip height of a standard doorknob. If the same person uses both a barn door and adjacent hinged doors, aligning the heights keeps the space feeling coordinated rather than haphazard.
Surface Mount Versus Flush Mount
Understanding the difference between these two mounting types is the key to a door that operates cleanly. A surface-mounted pull attaches to the face of the door with bolts that pass through and thread into the handle, projecting an inch or two outward. This is what you grab from the room side.
A flush pull is recessed into a pocket routed or drilled into the door, sitting nearly level with the surface. It belongs on the side that faces the wall, and sometimes on the leading edge, so nothing protrudes to block the door’s travel. On closet or pantry doors where two doors bypass each other, flush pulls on the inner faces prevent the doors from jamming.
Tools and Materials for Installation
Installing barn door pulls is a light-duty project requiring only basic tools. Gather your supplies before you start so the door is off the wall for the shortest possible time, or work with it in place if the hardware allows.
- Cordless drill and a set of standard bits
- The through-bolts supplied with your pull, sized to your door thickness
- Tape measure, pencil, and a level
- Painter’s tape to mark the surface without denting it
- A spade or Forstner bit if you are recessing a flush pull
Most surface pulls ship with bolts sized for a standard 1-3/8-inch door. If your door is thicker or you added a backer panel, confirm the bolts are long enough before you begin, since a too-short bolt will not bite securely.
Step-by-Step Installation
With the door hung on its track and the tools staged, the actual mounting goes quickly. Precision at the marking stage is what makes the difference between a solid handle and a wobbly one.
- Mark your desired height, then use a level to draw a vertical or horizontal guide line for the pull
- Measure the bolt-hole spacing on the pull and transfer those exact points onto the door with tape and pencil
- Drill pilot holes straight through the door, backing the exit side with scrap wood to prevent tear-out
- For a flush pull, bore the recess pocket first, test-fit, then drill the mounting holes
- Insert the through-bolts, seat the pull, and tighten until snug but not stripped
Test the door’s full range of motion once everything is bolted down. It should glide the entire length of the track without the hardware touching the wall or casing at any point.
Matching Pulls to Your Door Material
The door itself influences your hardware choice. A reclaimed-wood or knotty-pine door carries chunky iron pulls and rope handles convincingly, while a smooth painted MDF or glass-panel door looks best with clean modern bars. On glass or acrylic barn doors, use through-bolt pulls specifically rated for that material, with rubber gaskets that protect the panel from cracking under torque.
Weight is a practical factor too. A heavy solid-core door benefits from a substantial pull you can grip firmly, since you are moving real mass every time you open it. Lightweight hollow-core doors accept almost any handle without strain.
Matching Finish to the Rest of the Room
Hardware finish is where a barn door either blends into a coordinated space or sticks out awkwardly. The goal is to echo the metals already present in the room rather than introducing a fourth or fifth tone. If your cabinet knobs, faucet, and light fixtures are matte black, a matte black pull continues the story. In a room leaning warm, oil-rubbed bronze or brass ties into existing fixtures and hinges.
You do not have to match every metal in the house perfectly, but within a single room consistency reads as intentional. A common approach is picking one dominant hardware finish per room and repeating it on the barn door pull, the light switch plates, and any visible hinges. That repetition is subtle, but it is exactly what makes a space feel professionally pulled together rather than assembled piece by piece from different sales.
Grip Comfort and Everyday Use
Because you touch a barn door pull every single day, ergonomics matter more than the catalog photo suggests. A pull that looks striking but forces your knuckles against the door face gets frustrating fast. Look for a handle with enough clearance behind the grip, generally at least an inch and a half, so your fingers wrap comfortably without scraping the surface.
Diameter affects feel too. A chunky bar fills the hand and gives leverage to move a heavy solid-core door, while a slim handle suits a light hollow-core slab and a minimal aesthetic. If anyone in the household has limited grip strength, a longer bar pull that can be grabbed anywhere along its length is far easier to operate than a small knob-style handle. Test the grip in the store if you can, since a pull that feels good in your hand is one you will appreciate for years.
Final Buying Tips
When you shop, buy the surface pull and its matching flush pull as a coordinated set whenever possible, so the finishes match exactly. Read the included hardware list to confirm bolts fit your door thickness, and check the projection depth against your wall clearance. A quality set of barn door pulls costs $20 to $70 and, installed correctly, delivers years of smooth, silent operation while tying the whole sliding-door look together. Spend a little extra on solid metal over hollow castings; the heft you feel in your hand every day is worth it.