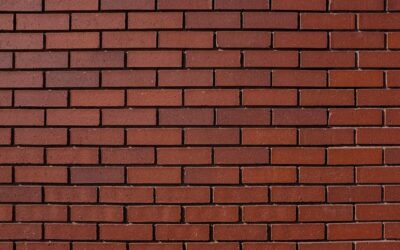
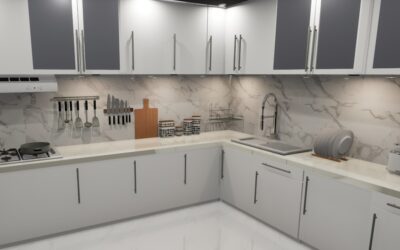
A brick tile wall gives you the rugged, characterful look of exposed masonry without the weight, mess, or structural demands of laying real full-depth brick. Whether you are dreaming of an exposed-brick accent wall in the living room, a warm backsplash behind the range, or a fireplace surround with old-world texture, brick-look tile and thin brick veneer make that finish achievable on almost any flat surface. Because the material is a fraction of the thickness of conventional brick, you can apply it directly to drywall, cement board, or existing tile with the right preparation.
Part of our Tile & Grout guide — explore the full guide →
This guide walks you through the two main product types, the rooms where each one shines, a realistic installation overview, design choices, cost estimates, and the maintenance habits that keep your wall looking sharp for years.
Brick-Look Tile vs. Thin Brick Veneer
The phrase “brick tile” covers two distinct products, and knowing the difference helps you shop with confidence.
- Brick-look porcelain or ceramic tile: These are standard wall or floor tiles manufactured to mimic the color, grain, and worn edges of brick. They are flat, uniform in thickness (often around 3/8 inch), easy to cut, and highly water-resistant, which makes them a favorite for kitchen backsplashes and bathrooms.
- Thin brick veneer: This is genuine fired clay or concrete sliced into thin pieces roughly 1/2 to 3/4 inch deep. It delivers the most authentic texture and dimension because it is, in fact, real brick. It weighs more than tile and usually needs grouting with a mortar joint.
If you want crisp authenticity and depth, lean toward thin brick veneer. If you prioritize easy cleaning, water resistance, and a lighter, more forgiving installation, brick-look porcelain is the practical choice.
Where a Brick Tile Wall Works Best
This finish is remarkably versatile, but a few locations stand out. An accent wall in a living room or bedroom adds instant warmth and a focal point without committing the whole room to heavy texture. Kitchen backsplashes benefit from the casual farmhouse or industrial vibe, and a sealed porcelain version wipes clean of grease and splatter. Fireplace surrounds are a natural fit, lending a hearth the cozy masonry character people associate with brick.
Entryways, mudrooms, home bars, and basement feature walls round out the list. In bathrooms and wet areas, stick with porcelain or properly sealed veneer and confirm the product is rated for moisture exposure before you install.
Preparing the Wall Surface
Good preparation is the difference between a wall that lasts decades and one that fails in a season. Start by confirming the substrate can carry the weight, especially for thin brick veneer. Drywall handles lightweight porcelain tile fine, but heavier veneer over a large area may call for cement backer board fastened to the studs. Always follow the manufacturer’s substrate recommendations.
- Clean the surface so it is free of dust, grease, and loose paint.
- Repair cracks and fill holes, then make sure the wall is flat and plumb.
- In moisture-prone zones, add a waterproofing membrane per the product instructions.
- Plan your layout with a level line and a vertical reference so courses stay straight as you climb.
Dry-lay a row or two on the floor first to check color blend and joint spacing before any adhesive touches the wall.
How to Install a Brick Tile Wall
The basic sequence is similar for both product types, though veneer typically uses more mortar. Read the manufacturer’s instructions in full before you begin, and wear safety glasses, gloves, and a dust mask when cutting, since clay and porcelain dust is hazardous to breathe.
- Mark your layout. Snap a level baseline; you may temporarily fasten a ledger board to support the first course while it sets.
- Apply adhesive. Use a notched trowel to spread the recommended thinset or mastic, working in small sections so it does not skin over.
- Set the pieces. Press each tile or brick firmly with a slight twist, using spacers to keep grout joints consistent. Stagger the joints in a running bond for the classic brick pattern.
- Cut as needed. Use a wet saw for clean cuts around outlets, edges, and corners. Plan cut pieces for the least visible spots.
- Let it cure. Allow the adhesive to set for the time stated on the bag, usually 24 hours, before grouting.
- Grout the joints. Pack mortar or grout into the joints, tool them smooth, and clean haze off the faces before it hardens.
This is a doable weekend project for a confident DIYer on a small accent wall. For large walls, heavy veneer, fireplace surrounds, or anything involving structural questions or gas lines, hire a licensed professional. The cost of redoing a failed wall almost always exceeds the price of doing it right the first time.
Design Ideas and Style Choices
Color and finish set the entire mood. Classic red brick reads traditional and warm, white or whitewashed brick feels bright and modern-farmhouse, and gray or charcoal brick leans industrial and contemporary. Reclaimed-look tiles with uneven tones and chipped edges suggest age and history, while clean, uniform tiles deliver a tidier, more modern result.
- Running bond: The standard offset pattern that looks like a real brick wall.
- Stack bond: Aligned vertical joints for a crisp, modern grid.
- Herringbone: Angled pieces for a striking, high-effort feature.
Grout color matters more than people expect. A matching grout makes the wall read as one continuous surface, while a contrasting grout emphasizes every individual brick. German smear and mortar-washed techniques, where mortar is dragged across the brick faces, add an old-world, rustic softness.
Cost Expectations
Pricing varies widely by material, region, and whether you hire out the labor, so treat these as rough estimates rather than quotes. Brick-look porcelain tile commonly runs from about $3 to $10 per square foot for the material. Thin brick veneer typically falls in the $5 to $15 per square foot range, with reclaimed or specialty products costing more. Add adhesive, grout, backer board, and tools to the budget.
If you bring in a professional installer, labor often adds roughly $5 to $15 per square foot depending on complexity, wall prep, and local rates. A modest accent wall is one of the more affordable high-impact upgrades you can make, while a full fireplace or multi-wall project naturally scales up.
Maintenance and Longevity
One of the biggest advantages of a brick tile wall is how little it asks of you. Porcelain tile needs only occasional wiping with a damp cloth and a mild cleaner. For real thin brick veneer and any porous grout, applying a penetrating sealer after installation, and resealing every few years, helps repel grease, moisture, and dust, particularly in kitchens and bathrooms. Always follow the sealer manufacturer’s directions and ensure good ventilation while you apply it.
Dust the textured surface periodically with a soft brush or vacuum attachment, since the nooks of brick collect more debris than smooth tile. Address any cracked grout joints promptly to keep moisture from getting behind the wall. With basic care, a properly installed brick tile wall holds its character for decades, making it one of the most durable and rewarding accent finishes available to homeowners.
Prefer to explore on your own?
See how new flooring looks in your actual room in seconds — free, no signup.
Try the free Floor Studio →