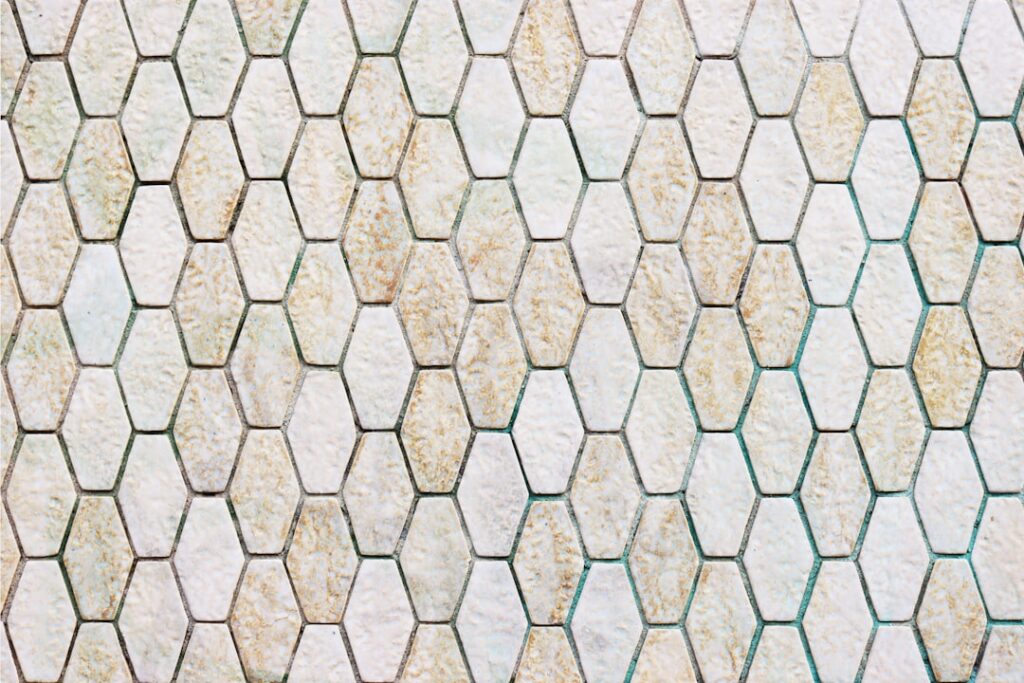
An elongated hexagon tile backsplash takes the trendy honeycomb shape and stretches it into a longer, six-sided form that reads as both modern and timeless. Where a standard hexagon looks playful and geometric, the elongated version feels sleeker and more architectural, which is why designers reach for it when they want a backsplash that stands out without shouting. This guide covers the shapes, sizes, materials, layouts, costs, and installation details you need to plan the project with confidence.
Part of our Kitchen Remodeling guide — explore the full guide →
- What Makes the Elongated Hexagon Different
- Popular Layout Orientations
- Material Choices
- Choosing Color and Finish
- Grout Strategy
- How Much It Costs
- Installing an Elongated Hexagon Backsplash
- Pairing With Cabinets and Countertops
- Where to Use It Beyond the Kitchen
- Common Mistakes to Avoid
- Bringing It All Together
What Makes the Elongated Hexagon Different
A traditional hexagon has six equal sides. An elongated hexagon, sometimes called a picket, stretched hex, or long hex, has two pairs of longer parallel sides and pointed ends, so each tile looks like a slightly flattened, drawn-out honeycomb cell. Common individual tile sizes run around 2 by 5 inches, 3 by 8 inches, and 4 by 12 inches. The longer proportions give walls a subtle directional pull, either widening a space horizontally or drawing the eye upward when set vertically.
Popular Layout Orientations
The same tile produces very different effects depending on how you orient it.
- Horizontal: the long axis runs side to side, visually widening a narrow galley kitchen and creating a calm, restful feel.
- Vertical: the long axis points up, adding height to a room with low ceilings and giving a more dynamic, energetic look.
- Angled or herringbone-style: a more complex install that produces a striking, custom result but wastes more tile at the edges.
Because the tile is directional, decide your orientation before you buy so you can order the right quantity with adequate overage for cuts.
Material Choices
Elongated hexagon tiles come in nearly every backsplash material, and each brings a different character and price:
- Ceramic and porcelain: the most affordable and practical, running roughly $8 to $20 per square foot. Porcelain is denser and better for heavy-use areas.
- Glass: luminous and reflective, ideal for brightening a dark kitchen, typically $15 to $30 per square foot.
- Natural stone (marble, travertine): luxurious and unique but porous, requiring sealing; often $18 to $40 per square foot.
- Zellige and handmade ceramic: irregular, artisanal surfaces with color variation that carry a premium look and price.
Choosing Color and Finish
White and soft neutrals keep the focus on the geometry itself and pair with almost any cabinet color. Matte finishes read contemporary and hide fingerprints and water spots, while glossy finishes bounce light and make small kitchens feel larger. For a bolder statement, deep green, navy, and terracotta elongated hex tiles have become popular accent choices behind ranges and on feature walls. Consider ordering physical samples, because screen colors rarely match the fired glaze in person.
Grout Strategy
Grout choice dramatically changes the final look of a hexagon backsplash. A matching grout, such as white grout with white tile, blurs the individual tiles into a soft, continuous field. A contrasting grout, such as charcoal grout with white tile, outlines every hexagon and makes the geometry pop. Most installers use a grout joint of 1/16 to 1/8 inch. Choose a stain-resistant, pre-mixed urethane or epoxy grout for kitchen backsplashes so grease and splatter wipe away without permanent staining.
How Much It Costs
For a standard kitchen backsplash of about 30 square feet, materials in ceramic or porcelain run roughly $250 to $600, glass or stone can push materials to $600 to $1,200, and professional installation adds $10 to $25 per square foot, or $300 to $750 for that same area. A complete professionally installed elongated hexagon backsplash therefore typically lands between $600 and $2,000 depending on material. Doing the labor yourself can cut the total nearly in half if you are comfortable with a wet saw and tile work.
Installing an Elongated Hexagon Backsplash
Whether the tile comes on mesh-backed sheets or as individual pieces affects difficulty. Sheet-mounted hex is far faster because the spacing is pre-set; loose tiles demand careful, tile-by-tile alignment. The general process is:
- Clean and lightly sand the wall, then find and mark a level horizontal reference line.
- Spread thin-set mortar with a 3/16-inch V-notch trowel over a small working area.
- Press sheets or tiles into place, keeping the pointed ends aligned and using spacers or the sheet mesh to maintain even joints.
- Cut edge and outlet pieces with a wet saw fitted with a diamond blade; the angled hex points make these cuts the trickiest part.
- Let the mortar cure, then grout, wipe diagonally across the joints, and seal natural stone once cured.
Pairing With Cabinets and Countertops
An elongated hexagon backsplash rarely lives in isolation, so think about how it interacts with your cabinets and counters. Against white or light gray shaker cabinets, a white elongated hex reads clean and timeless, while a contrasting grout adds just enough definition to keep it from looking flat. With dark navy or forest green lower cabinets, a white or cream hex backsplash provides bright relief and keeps the kitchen from feeling heavy. If your countertop is a busy granite or a heavily veined quartz, lean toward a quiet, solid-color hex so the two surfaces do not compete. If the counter is a calm solid such as a plain white or gray quartz, you have room to let the backsplash carry more color or a bolder grout contrast.
The scale of the tile matters relative to the room, too. In a small kitchen, a smaller 2-by-5-inch hex keeps the geometry proportional and can make the space feel larger, while an oversized 4-by-12-inch hex can overwhelm a tight galley. In a large kitchen with a long backsplash run, the bigger format reads as intentional and reduces the number of grout lines, giving a cleaner, more contemporary field.
Where to Use It Beyond the Kitchen
While the kitchen backsplash is the classic application, elongated hexagon tile has migrated all over the home. It makes a striking bathroom vanity backsplash, a full shower-wall accent, a powder-room feature wall, and even a fireplace surround. In a bathroom, the same rules about material and grout apply, though natural stone hex demands diligent sealing in a wet shower environment. A vertical elongated hex behind a floating vanity adds height and drama to a small powder room, while a horizontal run behind a long double vanity visually stretches the counter. Because the tile is so recognizable and current, using it in more than one room can tie a home’s design together without feeling repetitive if you vary the color or orientation.
Common Mistakes to Avoid
- Under-ordering: the angled cuts create more waste, so buy 15 to 20 percent extra, not the usual 10 percent.
- Ignoring outlet placement: map where receptacles land so a hex point does not fall awkwardly across a cover plate.
- Skipping the layout dry run: lay a few rows out on the counter first to confirm orientation and spacing before mixing mortar.
- Wrong grout for the kitchen: sanded cement grout in a food-splatter zone stains; use epoxy or urethane.
Bringing It All Together
An elongated hexagon tile backsplash is one of the smartest ways to give a kitchen a current, custom feel without a full remodel. The stretched geometry flatters both traditional and modern cabinetry, the orientation lets you tune the sense of width or height in the room, and the material range spans budget ceramic to luxury marble. Nail down your orientation, order generous overage for the angled cuts, and pick a grout that either softens or sharpens the pattern to taste, and you will end up with a focal wall that feels intentional and enduring.
Prefer to explore on your own?
See how new flooring looks in your actual room in seconds — free, no signup.
Try the free Floor Studio →