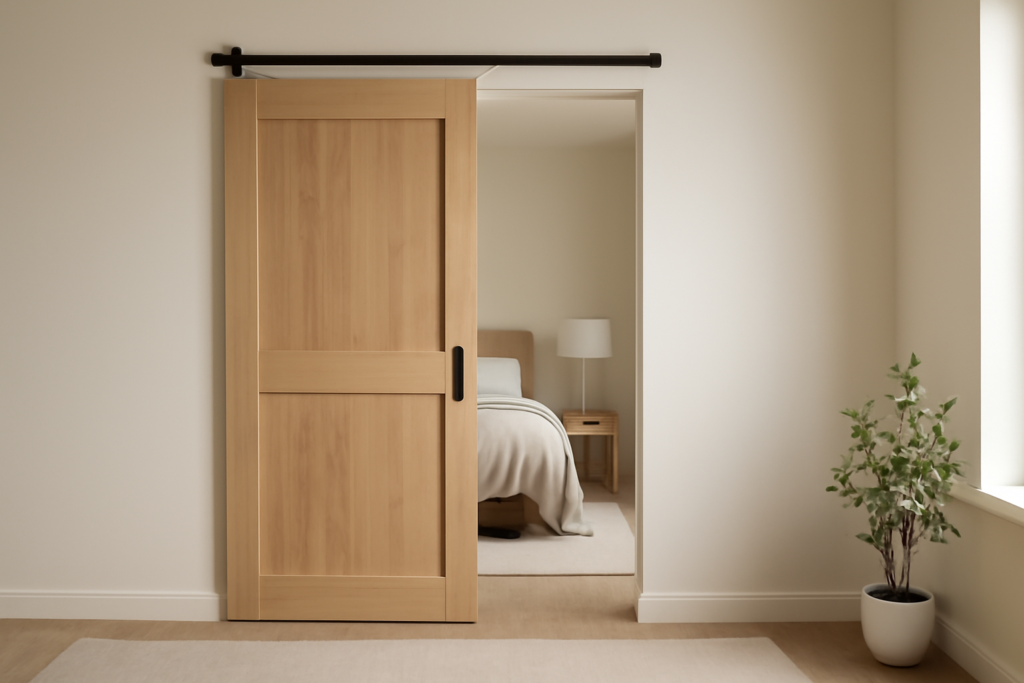
A standard barn door announces itself with an exposed steel rail and a row of visible rollers. Hidden barn door hardware does the opposite: the track disappears into a header, a soffit, or a slot in the wall, so the panel seems to float and slide with no visible mechanism. If you like the space-saving swing-free operation of a barn door but not the industrial look, this is the upgrade worth planning for.
Part of our Windows & Doors guide — explore the full guide →
I have hung dozens of sliding doors, and the concealed systems are the ones that make a hallway or a primary suite look custom. They also cost more and demand more framing work up front. Here is exactly how they work, what they cost, and how to install one without the door binding or sagging six months later.
- What “Hidden” Actually Means
- Typical Costs
- Weight, Studs, and the Header
- Tools and Materials Checklist
- Step-by-Step Installation
- Getting the Reveals Right
- Privacy and Sound
- Concealed vs. Exposed: Weighing the Trade-Offs
- Sound, Wind, and Real-World Annoyances
- Maintenance and Adjustment
- When to Call a Pro
What “Hidden” Actually Means
There are three broad approaches, and people lump them together under the same search term:
- Concealed face-mount track: A standard top-hung track is bolted to the wall, then wrapped by a fascia board or valance that hides the rail and rollers. The door still runs on the wall’s face. Cheapest to retrofit.
- Ceiling/soffit-recessed track: The track sits inside a built-out header or a dropped soffit. You see the door and a clean reveal above it, nothing else. This is the most common “hidden” look for new construction.
- In-wall pocket-style with exposed panel: The carriage rides in a slot framed into the wall while the door stays flush to the surface. Closest to a true pocket door but the panel remains visible and removable.
The right choice depends on whether you are building new, gutting a wall, or working with finished drywall you would rather not open up.
Typical Costs
Concealed kits run more than the open steel rails you see at big-box stores. Budget roughly:
- Concealed track kit (hardware only): $180–$450 for a quality 6–8 ft system rated for a 200 lb door.
- Soft-close dampers: add $40–$120; strongly recommended so the door does not slam.
- The door slab: $150–$700 depending on solid-core vs. hollow, wood species, and glass.
- Framing and drywall work: $300–$1,200 if a carpenter builds out a header or soffit.
An all-in DIY concealed install typically lands around $500–$900. Have a pro frame and finish the header and you are closer to $1,500–$3,000.
Weight, Studs, and the Header
This is where most hidden installs go wrong. The entire door hangs from the track, and the track must transfer that load into framing, not drywall. A solid-core 36-inch door weighs 70–90 lbs; add glass and you can pass 100 lbs.
You need continuous solid backing behind the track for its full travel — roughly double the door width. Options:
- Mount a 2×8 or 2×10 backer board lag-screwed into every stud, then hide it inside the built-out header.
- In new framing, run a doubled 2x header above the opening and lag the track directly to it.
Use 5/16-inch lag screws at least 2 inches into solid wood, spaced per the kit’s instructions (usually every 16 inches to hit studs). Never rely on drywall anchors for a top-hung door.
Tools and Materials Checklist
- Concealed barn door kit with carriages, stops, and floor guide
- 4-ft level and a laser level if you have one
- Stud finder, and a nail to confirm framing
- Impact driver plus a drill for pilot holes
- Lag screws, structural backer lumber
- Floor guide (bottom guide keeps the door from swinging into the wall)
- Shims, painter’s tape, and a helper — the slab is awkward solo
Step-by-Step Installation
Working from finished framing with your backer or header already in place:
- Find dead level. Snap or laser a level line for the top of the track. A track that is 1/8 inch off over 6 feet will let the door creep open or closed on its own.
- Mount the track. Bolt the rail to the backer with the supplied lag screws. Check level again after every few fasteners — the act of driving screws can pull it off line.
- Attach the carriages/rollers to the door. Follow the kit’s edge distances; roller plates that are too close to the top edge can blow out the door’s stile.
- Hang the door. Lift the rollers onto the track. This is a two-person job for anything solid-core.
- Set the floor guide. A bottom guide in a slot or a wall-mounted guide keeps the panel from swinging. Cut a shallow kerf in the door’s bottom edge for a channel guide.
- Add end stops and soft-close. Position stops so the door cannot roll off the track, and install the soft-close dampers at both ends if included.
- Build out and finish. Wrap the track in your fascia, header return, or soffit, then caulk and paint. Leave a service gap so you can access the rollers later.
Getting the Reveals Right
The whole point of hidden hardware is a clean gap. Aim for:
- Top reveal: 3/8–1/2 inch between door and header trim, consistent end to end.
- Floor gap: 3/8–3/4 inch so the door clears flooring and any transition.
- Wall overlap: the door should overlap the opening by at least 1 inch on each side for privacy and to block light gaps.
Uneven reveals are the giveaway that a job was rushed. Dial the rollers’ height-adjustment nuts to fine-tune before you close up the header.
Privacy and Sound
Sliding doors do not seal like a hinged door. If this is a bathroom or bedroom, add:
- A privacy latch designed for sliding doors (surface hook or a flush edge pull with a bolt).
- Felt or brush strips along the jamb and floor to cut the light gap and dampen sound.
- A solid-core slab — it blocks far more noise than a hollow-core panel.
Concealed vs. Exposed: Weighing the Trade-Offs
Before you commit, be honest about what you are buying. Exposed steel track is cheaper, faster, and easier to service — a roller problem is right there in the open. Concealed hardware costs two to three times as much once you count the framing and finish work, and any future repair means opening the header back up. What you get for that premium is a genuinely custom look: no visible rail, no industrial rollers, just a panel that appears to float. For a designer-driven space, a primary suite, or a room where the exposed-rail trend feels dated, it is worth it. For a laundry room or a pantry nobody photographs, exposed track does the same job for less.
Sound, Wind, and Real-World Annoyances
A few things bite people after the install. Nylon or steel rollers on aluminum track can hum or click as the door moves; better kits use sealed precision bearings and delrin wheels that run near-silent, so pay up for quality rollers on a bedroom door. If the door leads to a garage or an exterior wall, air pressure can push a lightly hung slider open on its own — dial in dead-level track and add soft-close dampers at both ends so the door settles rather than drifts. Because the whole panel hangs from the top, any grit that gets into the track telegraphs into rougher operation over time; keep the track wrapped enough to shed dust but leave a service gap so you can vacuum it and re-lube the wheels once a year.
Maintenance and Adjustment
Concealed hardware is low-maintenance but not no-maintenance. Once a year, slide the door open, check the roller height-adjustment nuts, and re-true any reveal that has drifted as the house settles. A shot of dry silicone lubricant on the track — not oil, which grabs dust — keeps it gliding. If the door starts to sag on the latch side, one carriage bolt has usually loosened; snug it and re-level. Keep the two or three spare fasteners and the kit’s adjustment wrench taped inside the header return so the next service call is a five-minute job instead of a demolition.
When to Call a Pro
You can handle a concealed face-mount retrofit yourself if you are comfortable finding studs and driving lag screws into a level line. Call a carpenter when the design calls for a built-out soffit, an in-wall slotted track, or when you are cutting into a load-bearing wall to recess the framing — that last one may need a permit and an engineered header. Electrical rarely enters into it unless you are relocating a switch the door will cover; if so, kill the breaker and verify the box is dead before moving anything.
Done right, hidden barn door hardware gives you the practical wins of a slider — no swing arc, easy operation, big openings — with none of the visible industrial rail. Plan the framing first, hang from solid wood, and keep those reveals dead even, and the door will read as a built-in rather than a bolt-on.