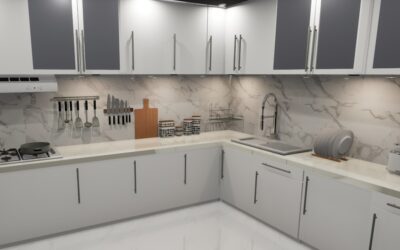
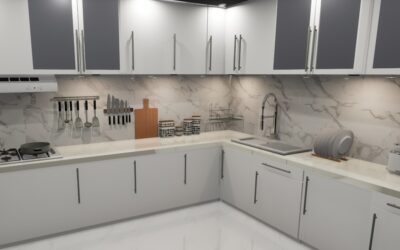
Most kitchen regrets are not about the countertop color or the cabinet finish. They come from a layout that fights you every time you cook. Thoughtful kitchen layout planning decides whether you bump elbows at the sink, walk a marathon between fridge and stove, or move through meals with ease. Get the bones right before you spend a dollar on materials, because reworking plumbing or moving a gas line after the fact can add $2,000 to $5,000 to a remodel.
Part of our Kitchen Remodeling guide — explore the full guide →
Start With the Work Triangle
The work triangle connects your three busiest stations: the sink, the refrigerator, and the cooktop. For an efficient kitchen, each leg of the triangle should measure between 4 and 9 feet, with the three sides totaling 13 to 26 feet. Too tight and the space feels cramped; too sprawling and you waste steps on every meal.
Keep traffic from cutting through the triangle. If a doorway or island walkway slices across the path between stove and sink, you will collide with anyone passing through while you carry a hot pan. In larger kitchens, designers now layer in distinct work zones, but the triangle remains the proven starting point.
The Five Core Layout Types
Your room’s shape and dimensions usually point to one or two workable configurations.
- Galley: two parallel runs of cabinets, extremely efficient for narrow spaces, needs 42 to 48 inches of aisle
- L-shaped: two adjoining walls, opens to dining or living areas, great for corners
- U-shaped: three walls of cabinets, maximum storage and counter space, ideal for serious cooks
- Single-wall: everything on one run, common in apartments and studios
- Island or peninsula: adds a fourth surface for prep, seating, or a second sink
Clearances That Prevent Daily Headaches
Numbers matter here more than instinct. Leave at least 42 inches of walkway in a one-cook kitchen and 48 inches if two people work at once. An island needs 36 to 42 inches of clear space on all sides so dishwasher doors and oven doors can open without blocking the path.
Allow 15 inches of counter on the handle side of the refrigerator for a landing zone, 18 to 24 inches beside the cooktop, and a full 24 inches next to the sink for dish staging. Counters should sit at 36 inches high, with toe-kick clearance of 3.5 inches so you can stand close without stubbing your toes.
Plan Storage Around How You Cook
Group items where you use them. Store pots and pans near the cooktop, everyday dishes by the dishwasher to shorten the unloading loop, and knives and cutting boards beside the prep counter. Deep drawers hold cookware far better than low cabinets where you have to crouch and dig.
Map out a pantry early. A 24-inch pull-out pantry cabinet or a dedicated closet keeps dry goods organized and frees up wall cabinets for dishware. Corner cabinets are notorious dead zones; a lazy Susan or a magic-corner pull-out reclaims that space for around $150 to $400 per unit.
Lighting and Outlets in the Plan
Lighting belongs on the plan from the start, not as an afterthought. Layer three types: ambient ceiling fixtures, task lighting under the upper cabinets for the counters, and accent lighting for atmosphere. Under-cabinet LED strips run about $20 to $50 per cabinet run and eliminate the shadow you cast when working with your back to the ceiling light.
Sketch outlet locations now. Code requires receptacles every 48 inches along counters, plus dedicated circuits for the microwave, dishwasher, and disposal. Adding a couple of outlets in the island during construction is cheap; chiseling them in later is not.
Use Software Before You Commit
Draw your kitchen to scale before ordering anything. Free tools like IKEA’s kitchen planner or paid options such as SketchUp let you test layouts virtually and catch clashes, like a drawer that cannot open because it hits the oven handle. Print the plan, tape the island footprint on the floor with painter’s tape, and walk the space for a few days.
Match the Layout to Your Room Size
Square footage narrows your realistic options fast. A kitchen under 100 square feet works best as a single-wall or galley layout, since an island would choke the walkways. Between 100 and 200 square feet, an L-shape opens up and a small peninsula becomes possible. Above 200 square feet, a U-shape or a true island layout starts to make sense, giving you the counter space and storage that larger families need.
Ceiling height factors in too. Tall ceilings invite full-height cabinets that add storage and draw the eye up, while standard 8-foot ceilings usually stop cabinets at 42 inches with a soffit or open space above. Be honest about your room before you fall in love with an island; forcing a 4-by-6-foot island into a kitchen that cannot spare 36 inches of clearance on every side creates a daily traffic jam rather than the dream feature you pictured.
Common Layout Mistakes
The most expensive errors are usually invisible until you live with them. Placing the dishwasher across the room from the sink means dripping water across the floor on every unload. Hanging a cabinet door or appliance door where it collides with another when both are open is a daily annoyance you cannot undo without a remodel. Forgetting a landing zone beside the oven leaves you juggling hot pans with nowhere to set them.
Skimping on counter space is the regret homeowners voice most often. Aim for at least 158 inches of total usable counter frontage in a working kitchen, and never sacrifice prep surface to squeeze in a feature you saw online. Function first, then form.
Budget and Sequence
Lock the layout first, then build the budget around it. Cabinets typically eat 35 to 40 percent of a kitchen remodel, with the national average renovation landing between $25,000 and $40,000. The smartest move in kitchen layout planning is to keep plumbing and gas lines where they are when the existing positions still serve the work triangle. Moving the sink across the room sounds minor on paper but quietly becomes one of the most expensive decisions you can make.