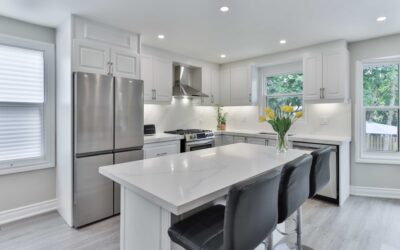
For two decades the raised bar top was the default upgrade in any kitchen remodel, and now the pendulum has swung the other way. A two tier kitchen island features a lower work surface — usually 36 inches high — paired with a raised secondary counter, typically 42 inches, that serves as a seating bar or a visual screen to hide dirty dishes from the dining room. The design hasn’t disappeared; it has become a deliberate choice for specific needs rather than an automatic default. Understanding when the two-level layout genuinely helps and when a flat single-level island serves you better will save you thousands and years of second-guessing.
Part of our Kitchen Remodeling guide — explore the full guide →
How the Two Heights Work Together
The lower tier matches standard counter height at 36 inches, giving you a continuous prep and cooking surface that lines up with the rest of your kitchen counters. The raised tier steps up to 42 inches, the traditional bar height, and sits along one edge — usually the side facing the living or dining area.
That 6-inch step does two jobs. It creates a comfortable perch for bar stools without diners staring directly at your cutting board, and it hides the working mess. When guests sit at a raised bar, they don’t see the pile of prep bowls, the sink, or the crumbs on the lower counter. For open-concept homes where the kitchen is always on display, that screening effect is the whole point.
The Case Against a Raised Bar
Designers have cooled on the two-tier island for practical reasons worth weighing. A single-level island — one flat surface at 36 inches — offers more usable space because the raised ledge steals counter real estate you can’t set a mixing bowl or serving platter on comfortably at 42 inches.
Single-level islands also photograph cleaner and read as more modern, which matters for resale in the current market. And they’re more versatile: a flat expanse handles a buffet spread, a homework station, and a rolled-out pie crust equally well, while a raised bar mostly just holds stools. If your kitchen is small or you entertain by laying out food, the flat island usually wins.
Seating Dimensions That Actually Work
Whichever tier you seat at, the clearances make or break daily comfort. For a raised 42-inch bar, use 30-inch bar stools and plan 24 inches of width per seat so shoulders don’t collide. For a lower 36-inch counter-height seating edge, use 24 to 26-inch stools.
- Allow 15 inches of knee depth under any overhang so legs tuck comfortably.
- Support a raised overhang over 12 inches with steel corbels or brackets; stone can crack under weight.
- Leave 42 to 48 inches of walkway between the island and surrounding cabinets — 48 if two cooks work at once.
- Budget 24 inches of linear counter per stool; a 6-foot bar seats three, not four.
Skimping on any of these turns a beautiful island into a cramped one, so measure your floor plan before committing to seat count.
Costs by Material and Size
A two tier kitchen island costs more than a single-level version because it requires additional framing, a second countertop cut, and sometimes support brackets. Expect to add 15 to 30 percent over a flat island of the same footprint.
Countertop material drives the budget. Laminate runs $20 to $50 per square foot installed, butcher block $40 to $70, quartz $60 to $120, and natural granite or marble $60 to $150. A typical 4-by-7-foot two-tier island with a quartz lower counter and a raised bar totals roughly $3,500 to $7,000 including the cabinet base, plumbing if you add a sink, and electrical for outlets. Custom cabinetry and waterfall edges push that higher.
Utilities: Sink, Cooktop, and Outlets
Many homeowners add a prep sink or a cooktop to the island’s lower tier, and the raised back tier conveniently hides the plumbing and any range hood ductwork. If you install a cooktop, code requires proper ventilation and clearances, and most jurisdictions mandate outlets on the island itself.
National Electrical Code requires at least one receptacle for islands with a countertop of 12 square feet or larger, and the raised tier’s vertical face is a tidy spot to mount them out of splash range. Plan these rough-ins early — running water and 20-amp circuits to an island after the slab is poured or the floor is finished is far more expensive than doing it during the remodel.
Styling the Two Levels
You can treat the two tiers as one material for a seamless look or contrast them for visual interest. A popular approach pairs a durable quartz on the working lower counter with a warm butcher-block raised bar, adding texture and defining the eating zone. Another uses the same stone throughout with a waterfall edge on the exposed end for a high-end finish.
Pendant lighting anchors the island visually — hang two or three fixtures 30 to 36 inches above the raised bar, spaced evenly. Paint or stain the island base a different color than your perimeter cabinets to make it a focal point; navy, forest green, and charcoal bases under a light stone remain popular and hide scuffs from stool traffic.
Storage and Function Below the Counter
The tiers you see on top are only half the island — what happens in the base cabinet determines how hard the island works every day. A two tier island’s larger footprint gives you room to build in real storage, and planning it thoughtfully turns the island into the kitchen’s command center rather than just a place to sit.
Consider deep drawers on the working side for pots and mixing bowls, since drawers beat shelves for reaching heavy items without crouching. Add a trash-and-recycling pull-out near the prep zone and the sink. The end caps make ideal spots for open shelving to display cookbooks or a wine rack, and the seating side often has room for a shallow bank of cubbies or a bookshelf that faces the dining area. If you install a microwave drawer or a beverage fridge in the base, the raised back tier conveniently hides any venting or the electrical whip. Map these functions to how you actually cook — a baker wants a landing spot near the oven, while an entertainer prioritizes the beverage station on the guest side.
Countertop Care and Longevity
Because the two surfaces often use different materials, each needs its own care routine to stay looking sharp. Quartz on the working lower tier is the easiest — it’s nonporous, needs no sealing, and wipes clean with soap and water, though you should still use a trivet since extreme heat can scorch the resin binder.
A butcher-block raised bar demands more attention but rewards it with warmth and character. Oil it with food-safe mineral oil every few weeks when new, then a few times a year once it’s seasoned, and sand out any deep scratches or water rings as they appear. Natural granite and marble need periodic sealing — test by dripping water and watching whether it beads or soaks in; when it stops beading, it’s time to reseal, usually every one to three years. Wipe up acidic spills like lemon juice, wine, and vinegar quickly on stone, since they can etch a dull mark on marble in minutes. Matching your maintenance habits to the materials you choose keeps a two-tier island looking new for decades.
Is a Two Tier Island Right for You
Choose a two tier kitchen island if you have an open floor plan and want to hide kitchen clutter from guests, if you like a defined bar area separate from the prep zone, or if your family gravitates to a raised perch for casual meals. The step also helps when the island doubles as a room divider between kitchen and living space.
Stick with a single flat level if your kitchen is compact, if you prep and entertain on the island surface itself, or if you want the cleanest modern look for resale. Whichever you pick, nail the clearances and seating math first — a well-proportioned island of either style beats a cramped one every time. Walk the layout with painter’s tape on the floor before you order a single cabinet, and sit an actual stool in the marked footprint to test knee room.