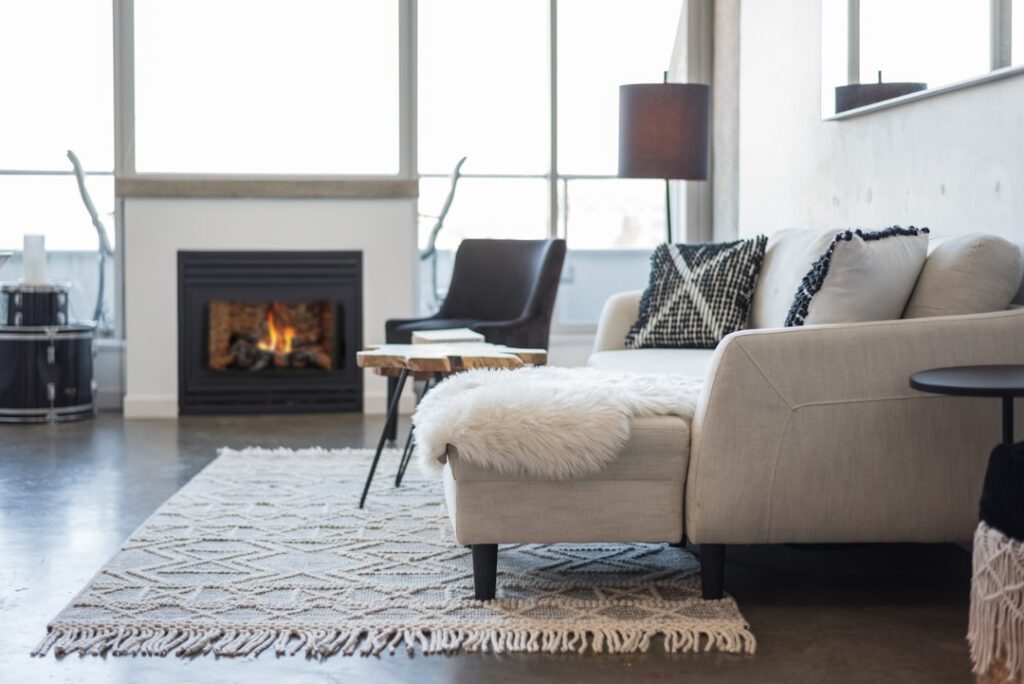
A free standing gas fireplace gives you real, thermostat-controlled heat in a room that never had a chimney and never needed one. Unlike a built-in unit buried in a framed wall, a free standing gas fireplace sits out on the floor like a cast-iron stove, radiating heat from all four sides and venting through a small pipe out the wall or roof.
- What a Free-Standing Unit Actually Is
- Venting: The Decision That Drives Everything
- Sizing: Match BTU to the Room
- Clearances to Combustibles and Hearth Pads
- Natural Gas vs. Propane
- What Installation Looks Like
- What It Costs
- Operating and Maintaining It Safely
- Freestanding Stove vs. Insert vs. Built-In
- Efficiency, Fuel Cost, and Running It All Winter
- Is It Right for Your Room?
I have set dozens of these in corners, sunrooms, cabin lofts, and finished basements. They are one of the most flexible heating appliances you can buy, but only if you match the unit, the venting, and the fuel to the room. Here is what actually matters before you spend a dime.
What a Free-Standing Unit Actually Is
A free-standing gas stove is a fully enclosed, self-contained appliance. The firebox, burner, glass front, and heat exchanger all live inside a finished steel or cast-iron cabinet that stands on legs or a pedestal. You do not frame it into a wall. You place it on a hearth pad, run a gas line to it, connect the vent, and it is done.
That freestanding design is the whole point. Because heat comes off the sides, back, and top rather than just the front, these units heat a room faster than a comparable insert. Most models throw between 20,000 and 40,000 BTU, enough to warm 800 to 1,500 square feet depending on insulation and ceiling height.
Venting: The Decision That Drives Everything
You have three venting paths, and this choice determines where the stove can go and how much the install costs.
- Direct-vent: The most common and the one I recommend for most homes. A concentric pipe pulls combustion air from outside and pushes exhaust back out, usually straight through the wall behind or beside the unit. Sealed combustion means no indoor air is burned and the glass stays fixed. Clearances are tight and efficiency runs 70 to 80 percent.
- B-vent (natural vent): Uses a vertical pipe up through the roof and draws combustion air from inside the room. Cheaper hardware, but lower efficiency, roughly 50 to 60 percent, and it needs a straight vertical run. Fading from the market for good reason.
- Vent-free: No pipe at all. It burns clean enough to exhaust into the room. Efficiency approaches 99 percent, but vent-free units add moisture to the air, are banned in bedrooms and bathrooms in many jurisdictions, and are illegal outright in California and parts of the Northeast. Check your local code before you even consider one.
If you can run direct-vent, run direct-vent. It is the safest, cleanest, and most code-friendly option in the widest range of locations.
Sizing: Match BTU to the Room
Oversizing is the mistake I see most. A 40,000 BTU stove in a well-insulated 400 square foot den will cook you out and short-cycle. Use a rough baseline of 20 to 30 BTU per square foot for a moderately insulated home in a cold climate, less in the South.
- Measure the room’s square footage and ceiling height.
- Note insulation quality and window count.
- Match to a unit whose rated BTU output covers, but does not massively exceed, the load.
A 25,000 BTU model handles most 900 to 1,100 square foot spaces. Step up to 35,000 to 40,000 BTU only for large, open, or poorly insulated rooms. When in doubt, size slightly under and let the stove run steady rather than blast and cycle.
Clearances to Combustibles and Hearth Pads
Every free-standing gas fireplace ships with a listed clearance table, and you must follow it exactly. Typical direct-vent stoves need 3 to 8 inches to a side wall, 2 to 6 inches to a back wall, and specific pipe clearances. Never guess and never assume it matches your old wood stove.
You also need a non-combustible base. Direct-vent gas stoves often permit installation directly on a combustible floor, but many still call for a hearth pad or ember-strip in front. Confirm the manual’s floor-protection spec before you set anything. Curtains, furniture, and firewood stacks stay outside the listed clearances, period.
Natural Gas vs. Propane
Both fuels work well, and most models convert between them with a manufacturer’s orifice kit installed by your pro.
- Natural gas (NG): Piped in, never runs out, cheaper per BTU in most regions. Best if you already have a gas meter.
- Propane (LP): Stored in an outdoor tank, burns hotter per cubic foot, and is the go-to for rural cabins and off-grid spots with no gas main. You pay for delivery and monitor the tank.
Never burn propane through an appliance orificed for natural gas or vice versa. The flame characteristics differ enough to cause sooting or dangerous over-firing.
What Installation Looks Like
This is not a DIY job. Gas fireplace installation requires a licensed gas fitter or HVAC pro, a permit, and a final inspection. Do not run or tap the gas line yourself, no matter how handy you are.
A typical single-day install runs like this: the pro sets the stove on its final spot, cuts and flashes the vent penetration, runs and pressure-tests the gas line, connects the appliance, checks for leaks with a manometer, and fires it for the inspector. Plan on 4 to 8 hours for a straightforward direct-vent job, more if a new gas line has to be trenched or fished across the house.
What It Costs
Budget realistically. Here is what these projects run in most US markets:
- The unit: $1,500 to $4,500 for a quality direct-vent freestanding stove; premium cast-iron European models reach $5,000-plus.
- Venting components: $300 to $900 depending on run length and roof vs. wall termination.
- Labor and gas line: $700 to $2,500. A long new line or a difficult routing pushes this higher.
- Permit and inspection: $100 to $400.
All in, most homeowners land between $3,000 and $7,000 for a fully installed, inspected free-standing gas stove.
Operating and Maintaining It Safely
Gas is forgiving until it is not. Build these habits from day one:
- Install a working carbon monoxide detector in the room and test it monthly. This is non-negotiable with any gas appliance.
- Book annual professional service. A tech cleans the burner, checks the venting, inspects the glass gasket, and verifies the safety controls.
- Keep the listed clearances clear at all times.
- If you ever smell gas, that rotten-egg odor, do not flip the switch, do not touch a light, do not use the igniter. Stop, ventilate the space, get everyone out, and call your gas company or 911 from outside.
To light a modern unit you typically flip a wall switch or press a remote, and the electronic igniter sparks the burner. Older stoves use a standing pilot: hold the control knob to “pilot,” press and hold to light it, keep holding about 30 seconds so the thermocouple heats, then release and turn to “on.” If the pilot will not stay lit and you smell no gas, wait five minutes and retry. If you smell gas at any point, stop and follow the leak steps above.
Freestanding Stove vs. Insert vs. Built-In
Homeowners often lump these together, but they solve different problems. Knowing the distinction saves you money and regret.
- Free-standing stove: Sits in the open, radiates from all sides, and needs no existing fireplace. Best heat-per-dollar and the most placement freedom.
- Insert: Slides into an existing masonry firebox to convert a wood fireplace to gas. Great retrofit, but you must already have a fireplace and chimney chase.
- Built-in (zero-clearance): Framed into a new wall for a flush look. Most design flexibility, most labor.
If you have no fireplace and want maximum warmth with minimal construction, the freestanding stove wins nearly every time.
Efficiency, Fuel Cost, and Running It All Winter
A direct-vent freestanding stove at 75 percent efficiency turns most of your fuel into usable heat rather than sending it up a chimney. On natural gas, expect to spend roughly $0.50 to $1.20 an hour on a mid-size 30,000 BTU unit at typical US rates, less if you run the flame low. Propane costs more per BTU and swings with delivery prices, so budget accordingly for a cabin.
Zone heating is where these stoves earn their keep. Rather than running a central furnace to warm the whole house, you fire the stove in the room you actually occupy and drop the thermostat elsewhere. Over a cold season that can trim a meaningful chunk off a heating bill. A model with a built-in fan or blower kit, usually a $150 to $300 add-on, pushes that warm air farther into the room and speeds up recovery on a frigid morning.
Is It Right for Your Room?
A free-standing gas fireplace shines where you want serious, controllable heat without tearing open a wall for a chimney. Corner installs, additions, cabins, and basements are ideal candidates. If you want a flush, built-in look, a direct-vent insert may suit you better. But for radiant warmth, flexible placement, and a real fire feel with a wall switch, a quality freestanding stove is hard to beat, as long as you size it right, vent it properly, and let a licensed pro handle the gas.