Ask any kitchen designer what finish survives a decade of trend cycles, and a gray and white backsplash lands near the top of the list. The combination reads clean without feeling cold, and it flatters everything from white shaker cabinets to walnut and matte black hardware. Homeowners often assume a two-tone tile wall costs a fortune, yet a well-planned gray and white backsplash can be one of the most affordable upgrades in the room. This guide walks through tile styles, grout choices, real costs, and the installation details that separate a builder-grade job from a showroom result.
Part of our Kitchen Remodeling guide — explore the full guide →
- Why Gray and White Works in Almost Any Kitchen
- Popular Tile Styles and Layouts
- Choosing the Right Grout Color
- Materials Compared
- What a Gray and White Backsplash Costs
- Installation Tips for a Professional Finish
- Design Combinations That Sell
- Cleaning and Maintaining the Finish
- Common Mistakes to Avoid
- Final Takeaway
Why Gray and White Works in Almost Any Kitchen
Gray is a neutral that behaves like a chameleon. Warm grays with beige undertones (sometimes called “greige”) pull toward cream cabinets and butcher-block counters. Cool grays with blue or violet undertones sharpen white cabinets and stainless appliances. Because both tones are muted, they let a statement countertop or bold light fixture take the spotlight instead of competing with it.
The pairing also solves a practical problem. Pure white grout stains and yellows over a stovetop; solid gray tile hides grease and hard-water spots far better. Mixing the two lets you keep the bright, airy look of white while burying the maintenance headaches in the darker field.
Popular Tile Styles and Layouts
The material you pick sets the tone as much as the color. Here are the layouts homeowners request most often:
- Marble-look subway tile — white with soft gray veining, usually 3×6 or 4×12 inches. It delivers the marble aesthetic for a fraction of natural stone’s price.
- Two-tone stacked pattern — alternating solid gray and solid white rows in a horizontal stack for a modern, gridded look.
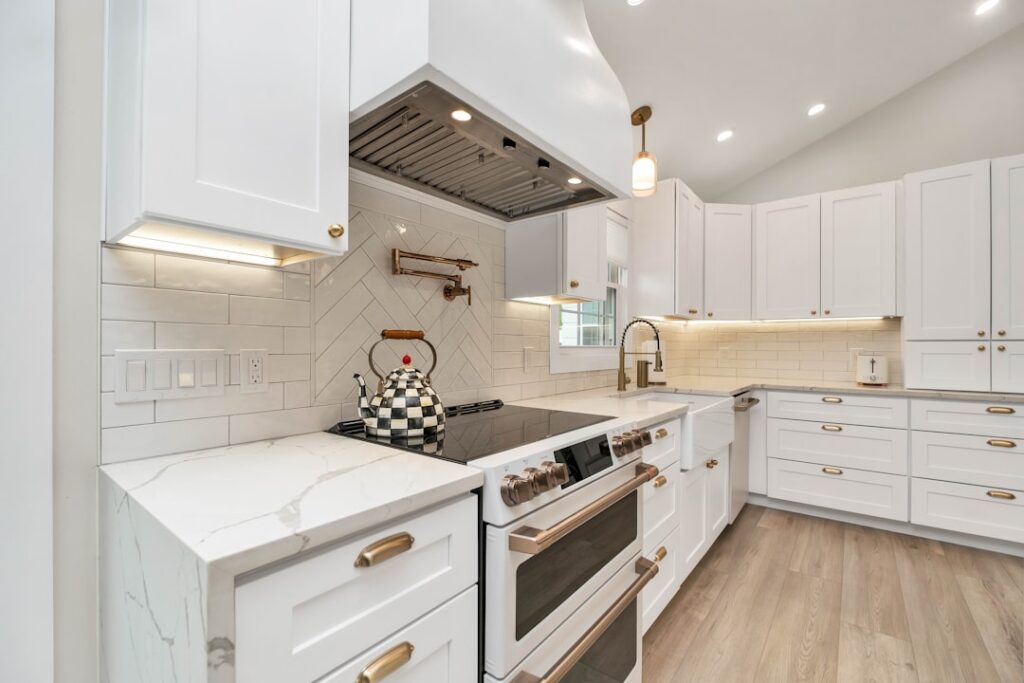
- Gray herringbone with white grout — a 2×8 gray tile set in herringbone reads tailored and adds movement without color noise.
- Hexagon mosaic — mixed gray-and-white hex sheets create a hand-crafted, textured field that works well on a full wall.
- Picket or arabesque — elongated hexagons and lantern shapes bring a soft, transitional feel that suits farmhouse and cottage kitchens.
If your cabinets and counters are busy, keep the tile calm with a simple subway layout. If the rest of the kitchen is quiet, a patterned mosaic gives the eye somewhere to land.
Choosing the Right Grout Color
Grout is the detail people underestimate, and it changes the entire look. With white tile, a light gray grout like Mapei Warm Gray or a “Frost” tone outlines each piece just enough to show the pattern without the harsh contrast that dark grout creates. For a seamless, monolithic wall, match the grout to the tile as closely as possible.
On solid gray tile, a slightly lighter grout brightens the field, while a matching gray disappears for a spa-like effect. Avoid bright white grout behind a range unless you enjoy scrubbing; a dove or silver gray hides splatter and ages more gracefully. Always request an epoxy or a high-quality cement grout with a stain-blocking additive in a kitchen.
Materials Compared
Not every gray and white tile is created equal. The three most common materials each trade cost for durability:
- Ceramic — the budget champion at roughly $2 to $8 per square foot. Easy to cut, plenty of gray-and-white options, but glazes can chip on the edges.
- Porcelain — denser and harder, usually $4 to $15 per square foot. The best choice for marble-look tile because the pattern runs through the body.
- Natural stone (marble, quartzite) — the real thing at $15 to $50 per square foot. Stunning veining but it needs sealing every 12 to 18 months and etches from lemon juice and vinegar.
For most homeowners, a porcelain marble-look tile hits the sweet spot: the authentic gray veining of stone with none of the sealing chores.
What a Gray and White Backsplash Costs
A standard kitchen backsplash covers 30 to 40 square feet. Budget tile installed by a pro typically runs $10 to $20 per square foot all-in, which puts a basic job around $400 to $800. Step up to a patterned mosaic or natural stone and full installation can reach $1,200 to $2,000. The labor share is significant — intricate patterns like herringbone or a busy hex mosaic add 20 to 40 percent to install time because of the extra cutting and layout precision.
DIYers can cut material-only costs to $150 to $400 for the same wall, plus roughly $80 in thinset, grout, spacers, and a tile-cutting blade. Renting a wet saw for a day runs about $50 to $70 and pays for itself the first time you need a clean edge around an outlet.
Installation Tips for a Professional Finish
Start with a clean, flat wall. Skim any texture, and prime bare drywall so the thinset bonds. Find the center of your main wall and work outward so cut tiles land symmetrically at the ends rather than leaving a sliver in a corner.
Dry-lay a section on the counter first to preview how the gray and white tiles distribute, especially with mixed mosaic sheets where you want to avoid two dark pieces clustering. Use 1/16-inch spacers for a tight modern look or 1/8-inch for a more traditional grout line. Let thinset cure 24 hours before grouting, and seal cement grout after another 48 to 72 hours. A silicone bead — color-matched to your grout — belongs where the tile meets the countertop, never rigid grout, so the joint can flex without cracking.
Design Combinations That Sell
A gray and white backsplash is versatile, but a few pairings look intentional every time. White cabinets with a gray veined tile and brushed brass hardware read timeless and bright. Gray cabinets with a white subway tile and black grout give a crisp, industrial edge. Two-tone kitchens — white uppers, gray lowers — tie together beautifully when the backsplash borrows both shades. If you want warmth, add wood open shelving and a greige-toned tile to keep the space from feeling clinical.
Cleaning and Maintaining the Finish
One reason this palette stays popular is how forgiving it is day to day. Wipe glazed ceramic or porcelain with warm water and a drop of dish soap, then buff dry with a microfiber cloth to prevent hard-water spots on the white tile. Skip abrasive powders and scouring pads, which can scratch a glossy glaze and leave the surface looking cloudy over time.
Grout is where maintenance really lives. Reseal cement grout once a year with a penetrating sealer so grease and moisture bead off instead of soaking in. For the occasional stain behind the range, a paste of baking soda and water scrubbed with a soft toothbrush lifts most grease without bleaching the grout color. If you chose natural stone, use only a pH-neutral stone cleaner — vinegar and citrus cleaners etch marble and travertine within seconds.
Common Mistakes to Avoid
A few missteps turn a promising project into a costly redo. Steer clear of these:
- Bright white grout behind the stove — it yellows and stains fast; step to a soft gray in the cooking zone.
- Skipping the dry layout — mixed mosaics need previewing so dark tiles don’t cluster in one spot.
- Rigid grout at the counter joint — always use color-matched silicone there so the seam can flex.
- Matching cool tile to warm cabinets — an undertone mismatch reads “off” even when you can’t name why.
- Under-ordering tile — buy 10 to 15 percent extra for cuts, breakage, and future repairs from the same dye lot.
Final Takeaway
The reason this look endures is simple: gray and white is neutral enough to outlast trends yet flexible enough to feel current with the right tile shape and grout. Choose porcelain for durability, pick a grout that hides kitchen mess, and lay it out symmetrically. Done well, a gray and white backsplash is the upgrade that quietly makes the whole kitchen look finished — and it does it without demanding a remodel-sized budget.