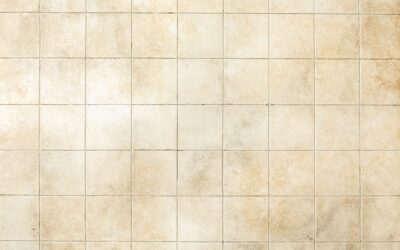
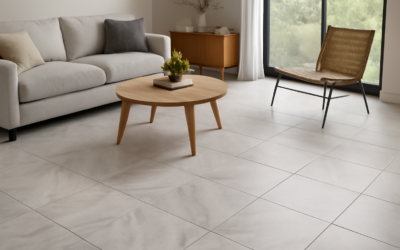
Shoppers comparing the two names often expect two different products. In practice, the MSI ivory brick look tile sold as Capella Ivory Brick and the one listed today as Brickstone Ivory share the same product code, NCAPIVOBRI2X10, and the same core specs: glazed porcelain, a matte finish, a 2-1/3 by 10 inch face and a PEI 4 rating. MSI introduced the brick tiles as an addition to its Capella porcelain collection, and the manufacturer now markets them under the Brickstone collection name.
Part of our Tile & Grout guide — explore the full guide →
So the real choice is not Capella versus Brickstone. It is which size and layout you want (the ivory colour now comes in 2 by 10, 2 by 18 and 5 by 10 inch formats), what grout joint gives the look you are after, and where the tile is going: a backsplash, an accent wall or a floor. The spec comparison sorts out the details, and the sections on size, grout and installation cover practical advice for each use.
- MSI Ivory Brick Look Tile: Capella vs Brickstone Specs
- What the Specs Mean for Your Project
- Backsplash vs Floor: Which Size Works Where
- Capella or Brickstone Label: Does It Matter When You Buy?
- Grout Pairing Ideas
- Tools and Materials
- Installation Steps
- Troubleshooting
- Silica Dust Safety
- General Cost Ranges
- When to Call a Pro
- Planning Layout and Box Count for MSI Capella Ivory Brick
- Frequently Asked Questions
MSI Ivory Brick Look Tile: Capella vs Brickstone Specs
The Capella column reflects MSI’s original brick flyer. The Brickstone column reflects the current manufacturer product page and Brickstone collection flyer.
| Spec | Capella Ivory Brick (original listing) | Brickstone Ivory (current listing) |
|---|---|---|
| Product code | NCAPIVOBRI2X10 | NCAPIVOBRI2X10 (same) |
| Material | Glazed porcelain | Glazed porcelain |
| Size | 2-1/3 x 10 in | 2-1/3 x 10 in; also 2 x 18 and 5 x 10 in in ivory |
| Thickness | 3/8 in | 3/8 in (collection flyer) |
| Finish | Matte | Matte |
| PEI rating | IV (4) | 4 |
| Slip rating | DCOF above 0.42 wet | DCOF above 0.42 |
| Shade variation | V4 | V4 |
| Recommended grout joint | 1/8 in (3/8 to 1/2 in for a real-brick look) | 1/8 in |
| Uses listed | Floors, walls, counters | Residential and light commercial floors, walls, residential countertops, shower surrounds |
A couple of details appear only in one source. The original Capella flyer notes more than 90 different face punches, so the bricks do not visibly repeat. The Brickstone flyer adds that the collection is freeze-thaw resistant and has pressed (not rectified) edges. Neither change suggests a different tile, just updated literature.
What the Specs Mean for Your Project
PEI 4 and floor use
PEI measures glaze wear resistance on a 0 to 5 scale. A rating of 4 suits all residential floors, including kitchens and entries, and the manufacturer lists light commercial flooring as acceptable. That makes this tile far tougher than ceramic wall-only brick tile, so it can run from a backsplash down onto a mudroom floor without a durability worry.
V4 shade variation
V4 is the highest variation class: expect noticeable differences from piece to piece in tone and texture, from creamy off-white to warmer ivory with darker speckles. That randomness is what makes it look like reclaimed brick, but it also means you must blend tiles from several boxes as you go. Pull from three or four open boxes at once.
Matte finish and slip resistance
A DCOF above 0.42 meets the common benchmark for level interior floors that may get wet. The matte surface also hides water spots on a backsplash better than gloss. For shower floors, use smaller mosaic tile instead, since a 10 inch brick has few grout lines for grip.
Pressed edges and grout width
Pressed edges are slightly cushioned and less uniform than rectified edges, which suits the rustic look. The manufacturer recommends a 1/8 inch grout joint for installation. The older Capella literature also noted that a 3/8 or 1/2 inch joint mimics real mortared brick. Wider joints change the look substantially, so mock up both on a board before committing.
Backsplash vs Floor: Which Size Works Where
- 2 x 10 inch: The classic brick proportion. Ideal for kitchen backsplashes, fireplace surrounds and accent walls. Works on small floors in a herringbone or running bond.
- 2 x 18 inch: A longer, slimmer brick that reads more modern. Good on long walls and in hallways, and needs a flat substrate since longer tiles show lippage.
- 5 x 10 inch: Closer to a paver look. Faster to install on floors and larger walls, with fewer grout lines to clean.
Whichever format you pick, the MSI ivory brick look tile has the same glaze and colour range, so sizes can be mixed in one room. For a backsplash, plan around outlets and the countertop line so the bottom course is a full or near-full brick. For floors, a running bond with an offset of less than 33 percent is what the manufacturer strongly recommends for rectangular tiles, because a 50 percent offset exaggerates any slight bow in the tile.
Capella or Brickstone Label: Does It Matter When You Buy?
Because older stock, online listings and showroom samples may carry either name, it helps to shop by product code rather than collection name. Match NCAPIVOBRI2X10 for the 2 by 10 size, NCAPIVOBRI2X18 for the long brick and NCAPIVOBRI5X10 for the larger format. If you are adding to an existing installation, also match the shade or lot number printed on the box, since V4 variation means two production runs can look noticeably different side by side.
Keep at least one spare box after the job. Discontinued colours and shifted lots are common across brick-look lines, and a few extra tiles make future repairs around a new outlet or a cracked piece far easier.
Grout Pairing Ideas
Grout colour drives the final look more than the tile itself.
- White or bright grout: Blends the joints for a soft painted-brick effect.
- Light gray grout: Defines each brick gently and hides kitchen grime better than white.
- Warm beige or sand grout: Leans into the ivory tones for a cottage feel.
- Charcoal grout: Strong contrast, more industrial. Shows every brick outline, so layout must be precise.
A sanded grout is typical for joints of 1/8 inch and wider. Seal cement grout on backsplashes and floors, or use a stain-resistant urethane or epoxy-type grout in high-splash areas.
Tools and Materials
- Wet tile saw (porcelain is hard; a manual snap cutter works for straight cuts on thin brick)
- Tile spacers in your chosen joint width, 1/8 inch or larger
- 1/4 by 1/4 inch square notch trowel for walls; 1/4 by 3/8 inch for floors
- Polymer-modified thin-set rated for porcelain
- Laser level or 4 foot level and chalk line
- Grout float, sponges and buckets
- Tile leveling clips for the 2 by 18 inch size on floors
- N95 or P100 respirator, safety glasses and gloves
Installation Steps
- Prep the surface. Walls need to be flat and clean; floors need a stiff, flat subfloor with cement backer board or an uncoupling membrane.
- Blend the boxes. Open several boxes and mix tiles before setting so the V4 variation spreads evenly.
- Snap a level start line. Begin a backsplash from a level line, not the countertop, and shim the first row.
- Set with spacers. Comb thin-set, set each brick, and use tile spacers to keep joints consistent. Offset each row by less than one-third of the tile length.
- Cut neatly. Make cuts on the wet saw and place cut ends at corners or under trim.
- Grout and seal. Wait for the mortar to cure, grout, clean the haze, then seal cement grout.
Troubleshooting
- Tile looks patchy. Tiles were set from one box at a time. Blend more aggressively.
- Uneven edges on the floor. Offset too close to 50 percent or substrate not flat. Reduce the offset and use leveling clips.
- Grout haze on matte surface. Grout was left too long before cleaning. Use a haze remover safe for porcelain.
- Brick rows drift. No layout lines. Snap lines every few courses.
Silica Dust Safety
Porcelain contains crystalline silica, and cutting or grinding it creates hazardous dust. Cut with a wet saw, avoid dry grinding, wear an N95 or P100 respirator when making any dry cuts or mixing mortar, and clean up with a HEPA vacuum or damp wiping.
General Cost Ranges
Porcelain brick-look tile in this class generally falls in a budget to mid range per square foot, often somewhere around $4 to $8, depending on size and region. Retail listings for the 2 by 10 size typically show cases of about 32 pieces covering a little over 5 square feet. Installation on a backsplash usually costs more per square foot than on a floor because of small pieces and many cuts.
When to Call a Pro
A backsplash is a common DIY project. Hire an experienced tile setter for floors over wood subfloors that flex, shower surrounds where waterproofing must be done correctly, and herringbone layouts where small errors compound quickly. Any work that involves moving outlets on a backsplash wall should go to a licensed electrician.
Planning Layout and Box Count for MSI Capella Ivory Brick
MSI Capella Ivory Brick and Brickstone Ivory are the same tile, so the planning math is identical under either label. The 2-1/3 by 10 inch size typically ships in cases of about 32 pieces covering a little over 5 square feet. Measure the area, add a waste allowance that suits the pattern, and round up to whole boxes plus one spare.
Waste allowance by pattern
| Pattern | Look | Typical extra to order | Skill level |
|---|---|---|---|
| Running bond (offset under one-third) | Classic brick wall | About 10 percent | Beginner friendly |
| Stacked bond (straight joints) | Modern and graphic | About 10 percent | Needs very straight lines |
| Vertical stack | Makes low walls feel taller | About 10 to 15 percent | Moderate |
| Herringbone | Traditional, busy | About 15 to 20 percent | Experienced |
| Basket weave pairs | Vintage, patterned | About 15 percent | Moderate |
Working out a backsplash
Multiply the width by the height of each wall section in inches, divide by 144 for square feet, and subtract large openings such as a window, but not small ones like outlets. A typical 18 inch backsplash running 12 feet comes to about 18 square feet. With a 10 percent allowance that is roughly 20 square feet, or four boxes of the 2 by 10 format. Herringbone on the same wall would push the order to five boxes.
Mixing in the other MSI Brickstone Ivory sizes
Because the 2 by 18 and 5 by 10 formats share the same glaze, some designers run the larger size on a floor and the classic brick on the adjoining wall. Calculate each area separately, since the formats come in different box sizes, and check the coverage printed on the carton or the maker’s current spec sheet for the 2 by 18 and 5 by 10 versions.
Layout tips that save tile
- Dry-lay one full course along the counter to see where cut pieces fall, then shift the start point so both ends get pieces wider than half a brick.
- Center the pattern on the range or sink, the spots people look at first.
- Use cut offcuts from one row to start the next row where the offset allows.
- Order every box at the same time so they come from one shade lot, which matters with V4 variation.
Keep the spare box with the lot number visible. Matching a later repair is far easier with tile from the original run than with a fresh lot.
Frequently Asked Questions
Is MSI Brickstone Ivory the same as Capella Ivory Brick?
Both names share the product code NCAPIVOBRI2X10 and the same size, finish and PEI rating. The tile originated in the Capella collection and is now listed under the Brickstone name.
Can MSI ivory brick look tile go on floors?
Yes. It carries a PEI 4 rating and is listed for residential and light commercial floors, as well as walls and residential countertops.
What size is MSI Brickstone Ivory?
The 2 by 10 tile actually measures 2-1/3 by 10 inches and is 3/8 inch thick. Ivory also comes in 2 by 18 and 5 by 10 inch sizes.
What grout joint should I use?
The manufacturer recommends 1/8 inch. A 3/8 to 1/2 inch joint gives a more realistic mortared-brick look.
Does this tile need sealing?
The glazed porcelain face does not need sealing, but cement-based grout should be sealed, especially on backsplashes and floors.
Prefer to explore on your own?
See how new flooring looks in your actual room in seconds — free, no signup.
Try the free Floor Studio →